

Introduction to Velvet Banana Dream Lush
Let’s talk about the ultimate crowd-pleaser: Velvet Banana Dream Lush! This dessert is not just creamy; it’s a comforting hug in a dish. After a long day, nothing beats indulging in a layered delight that whispers sweet nothings with every spoonful. I can almost hear the cheerful laughter of my family as they dive into this blissful treat. Whether it’s a special occasion or just a Tuesday night, this dreamy dessert makes memories sweeter. You’ll love how easy it is to whip up, and I promise, it’ll be gone before you know it!
Why You’ll Love This Velvet Banana Dream Lush
Who doesn’t appreciate a dessert that’s both quick and incredibly satisfying? Velvet Banana Dream Lush comes together in no time! It requires no baking, making it perfect for those busy evenings when you want something sweet without the fuss. The combination of fluffy whipped topping and rich banana pudding creates layers of delightful flavors. Plus, it’s a hit with kids and adults alike. Your family will be asking for seconds, trust me!
Ingredients for Velvet Banana Dream Lush
Let’s gather our stars for this creamy masterpiece! You’ll need a delightful mix of ingredients to create your Velvet Banana Dream Lush:
- Vanilla wafers: These cookies bring a sweet crunch to the dessert. Crush them to create a silky base.
- Butter: Melted butter binds the crust together and adds richness. Feel free to substitute with coconut oil for a unique twist.
- Cream cheese: This is the secret to the lusciousness! Make sure it’s softened for easy mixing.
- Powdered sugar: It effortlessly sweetens the cream cheese layer. You can swap with granular sugar if needed, but it won’t mix as smoothly.
- Whipped topping (Cool Whip): This fluffy delight adds volume and airiness. You can use homemade whipped cream for a fresher taste.
- Banana pudding mix: It’s where the banana flavor shines through! Instant pudding makes this dessert easy and quick.
- Cold milk: Perfect for whisking with the pudding mix. Use almond or oat milk if you’re looking for a dairy-free option.
- Fresh bananas: Ripe bananas lend a delightful sweetness and texture. Choose ones with a few brown spots for the best flavor.
- Additional crushed vanilla wafers: Sprinkle these on top for added crunch and a presentation that pops!
For exact quantities, please check the bottom of the article where the measurements are available for printing. Happy cooking!
How to Make Velvet Banana Dream Lush
Now that we’ve gathered our delightful ingredients, let’s dive into making this Velvet Banana Dream Lush! Follow these easy steps, and soon, you’ll be savoring this creamy deliciousness.
Prepare the Crust
Start with the crust. In a mixing bowl, combine the crushed vanilla wafers with the melted butter. I like to dig in with my hands to ensure everything is evenly coated. Once well mixed, press the mixture firmly into the bottom of a 9×13-inch glass dish. This layer serves as the strong yet delicate foundation of our dessert. Pop the dish into the fridge for about 15 minutes to firm it up.
Make the Cream Cheese Layer
Next up, the irresistible cream cheese layer! Grab your softened cream cheese and beat it together with the powdered sugar. It should be smooth and creamy—no lumps allowed! Gently fold in half of the whipped topping until everything is blended beautifully. This step adds a wonderful fluffy texture that balances the richness of the cream cheese.
Add the Whipped Topping
Spread the cream cheese mixture evenly over the chilled crust. I find a spatula works wonders here for smoothing everything out. Then, it’s time for the fun part—scoop out the remaining whipped topping and layer it generously over the cream cheese. Don’t be shy; you want each bite to be heavenly!
Prepare the Banana Pudding
Now, let’s whip up the banana pudding! In a separate bowl, whisk together the instant banana pudding mix with cold milk. It takes about two minutes for it to thicken up. Then, it’s time to layer this luscious pudding over the whipped topping. Try to spread it evenly, so every bite has that delightful banana flavor.
Assemble the Layers
Once the pudding layer is on, sprinkle a layer of crushed vanilla wafers over the top. This adds a satisfying crunch, making each bite a delightful experience. Now, finish it off with the remaining whipped topping, smoothing it gently with a spatula. I love making sure it looks pretty because we eat with our eyes first!
Chill and Garnish
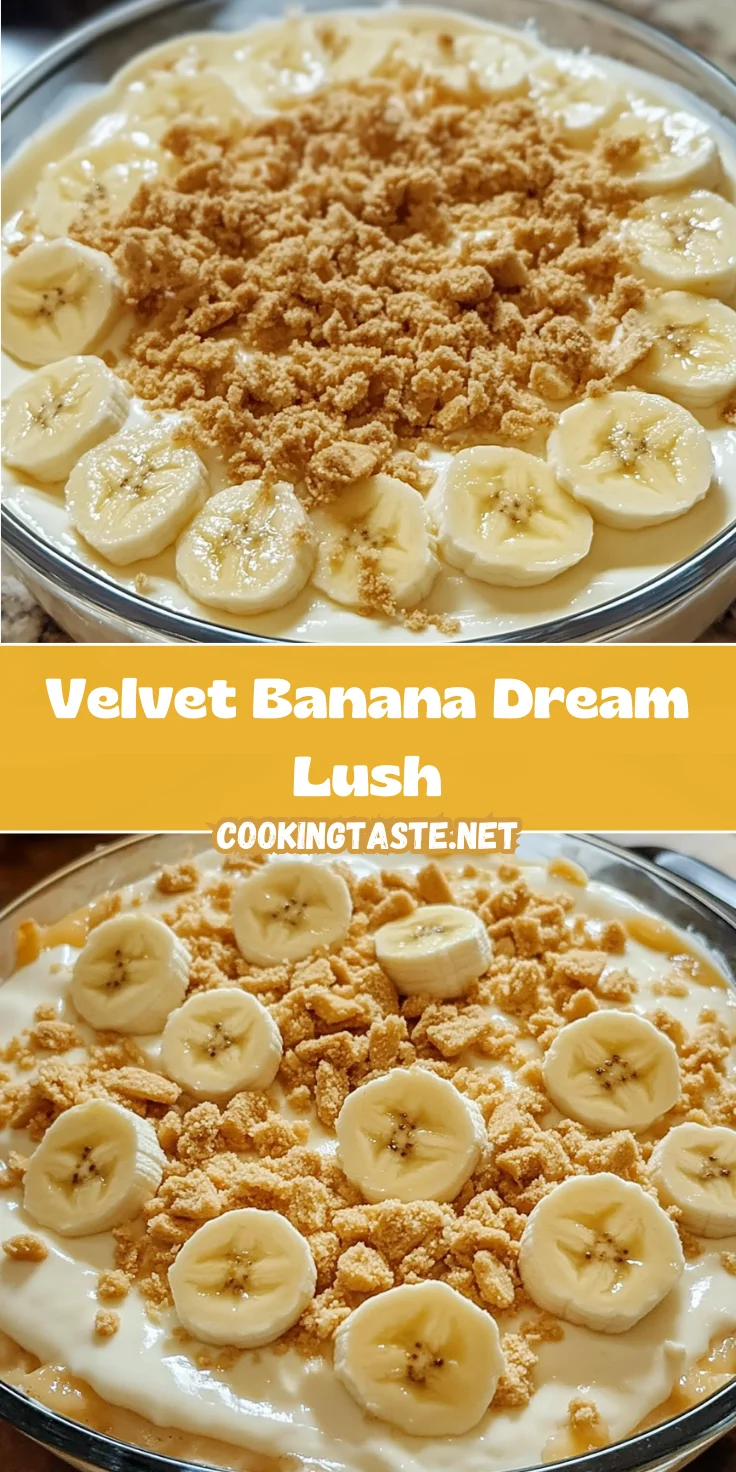
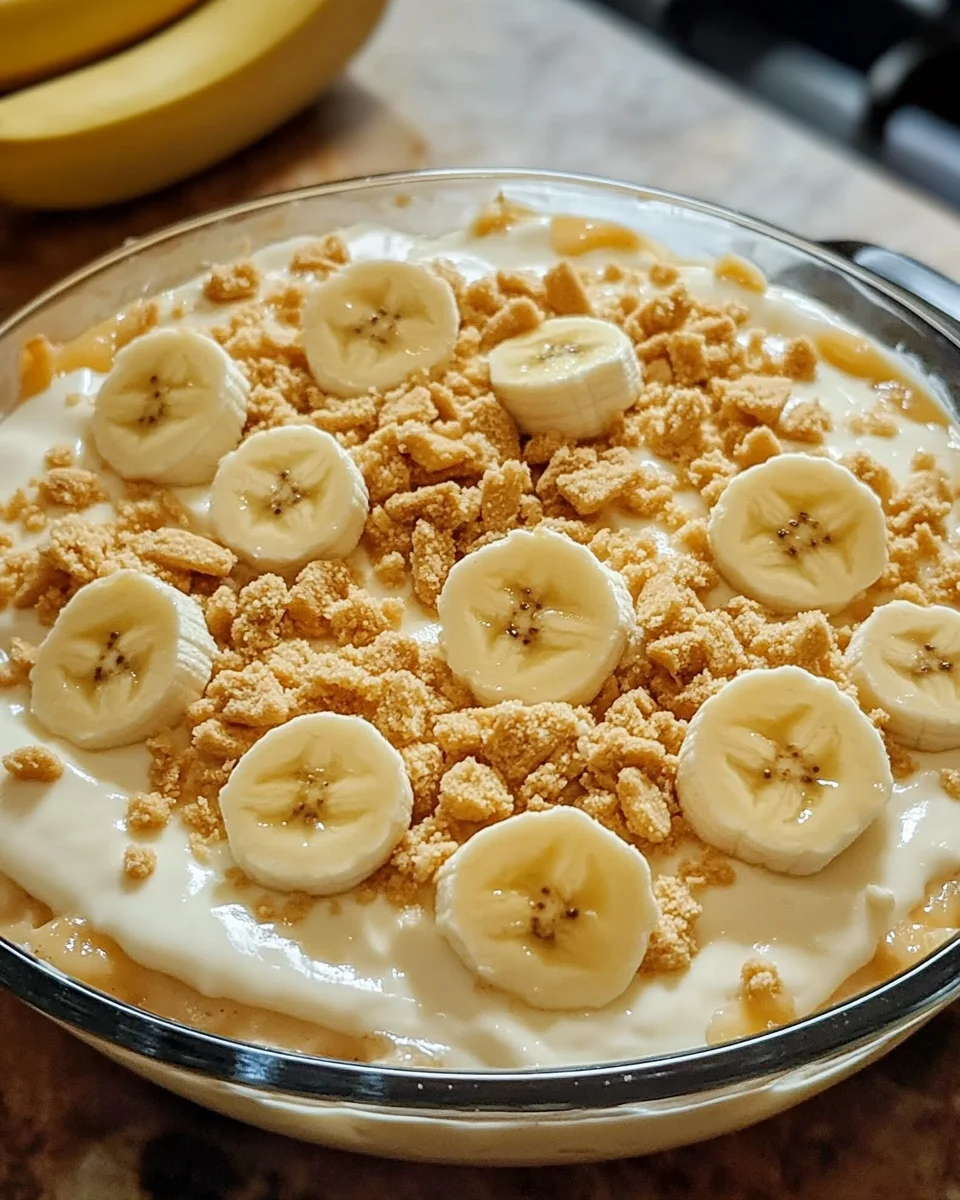
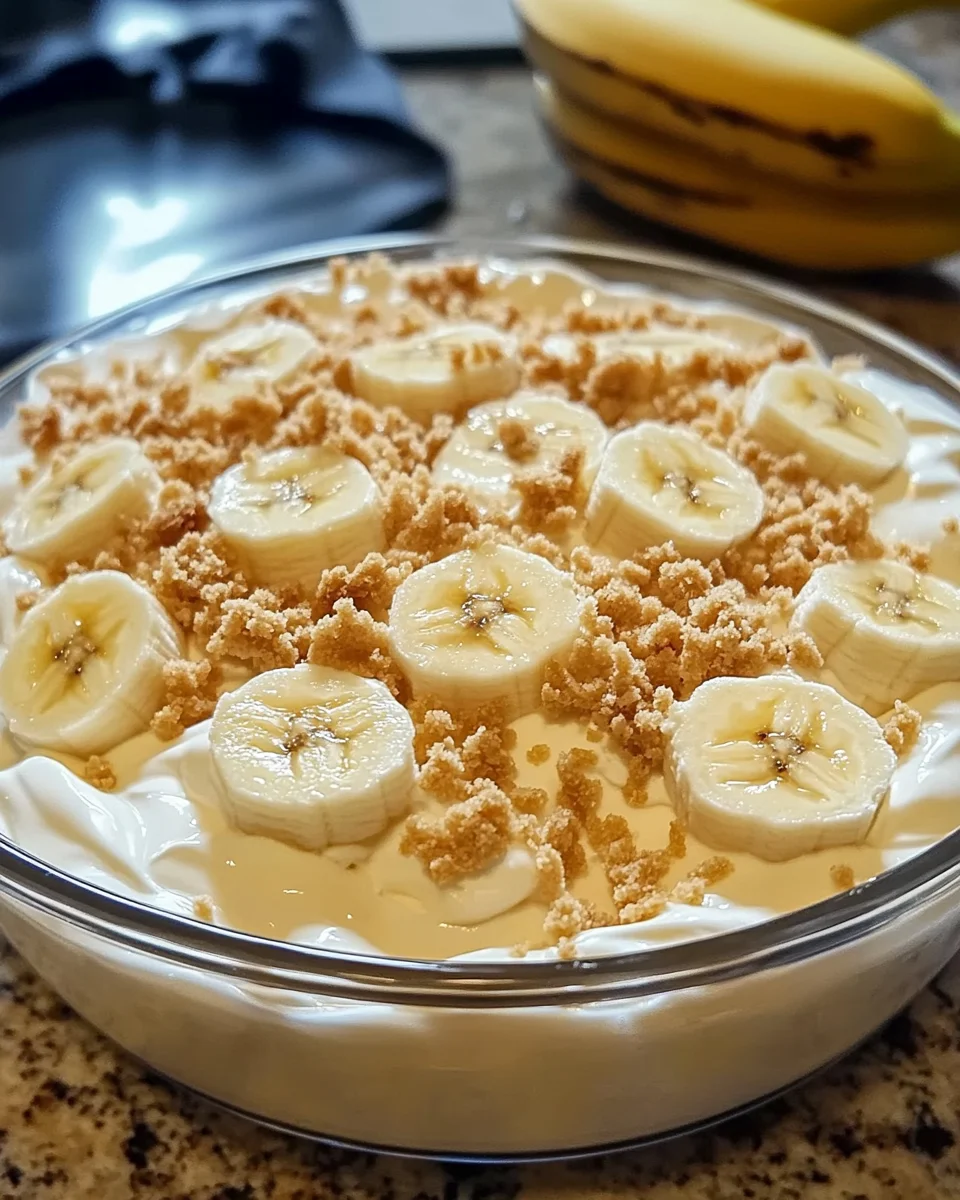
Now, it’s time for the dessert to chill. Cover your luscious creation and let it sit in the refrigerator for at least four hours, or overnight if you can wait. This resting time allows all the flavors to meld together, creating a taste sensation. Before serving, garnish with fresh banana slices around the edge and a sprinkle of additional crushed wafers in the center. Prepare to enjoy praise from everyone who tries it!
Tips for Success
- Always use ripe bananas for the best flavor and creaminess.
- Chill the dessert overnight if possible for the ultimate texture!
- Feel free to adjust the sweetness by adding more or less powdered sugar.
- Use a serrated knife to slice through the layers cleanly.
- Keep an eye on the pudding to avoid lumps while whisking.
Equipment Needed
- 9×13-inch glass dish: Perfect for layering, but you can also use a metal or ceramic dish if needed.
- Mixing bowls: Small and large bowls for mixing ingredients. A whisk can serve as an alternative for beating.
- Spatula: A must for spreading layers evenly; a large spoon works as a good substitute.
- Electric mixer: Ideal for smooth cream cheese; however, a whisk can do the trick with some elbow grease!
Variations
- Chocolate Velvet Banana Dream Lush: Add a layer of chocolate pudding for a decadent twist. The rich chocolate complements the banana perfectly!
- Nut-free version: Simply omit any nuts you might consider adding, or use sunflower seed butter in place of peanut or almond butter for flavor.
- Gluten-free alternative: Swap out vanilla wafers for gluten-free cookies or a gluten-free graham cracker for the crust.
- Healthier option: Use Greek yogurt in place of cream cheese for added protein and a tangy flavor while still being creamy.
- Vegan adaptation: Substitute the cream cheese with a vegan cream cheese alternative and use coconut whipped cream instead of Cool Whip.
Serving Suggestions
- Serve Velvet Banana Dream Lush chilled for the best experience.
- Pair it with a hot cup of coffee or a refreshing iced tea.
- Add a dollop of whipped cream or a sprinkle of cinnamon on top for extra flair.
- For a festive touch, serve in individual dessert cups.
FAQs about Velvet Banana Dream Lush
Can I make Velvet Banana Dream Lush in advance?
Absolutely! In fact, making it the day before serves the flavors well. Just ensure you keep it covered in the fridge.
What if I don’t have banana pudding mix?
No worries! You can create a creamy banana flavor with homemade pudding. Just make it with ripe bananas and cornstarch instead.
Can I use fresh whipped cream instead of Cool Whip?
Definitely! Fresh whipped cream adds a lovely taste and texture. Just ensure it’s stiff enough to hold its shape as a layer.
How do I store leftovers of Velvet Banana Dream Lush?
Store any leftovers in an airtight container in the fridge. They should be good for about three days, but trust me—everyone will want seconds!
Can I freeze Velvet Banana Dream Lush?
While it’s best enjoyed fresh, you can freeze it. Just make sure to cover it well. Thaw it in the fridge overnight before serving, though the texture may differ slightly.
Final Thoughts
As I reflect on the joy of making Velvet Banana Dream Lush, I can’t help but smile. This creamy delight brings a little magic to any gathering, sparking laughter and delight with every bite. Whether it’s the rich layers or the inviting banana flavor, this dessert quickly becomes a family favorite. It’s a reminder of simpler times and sweet memories shared around the table. So, grab your ingredients, gather your loved ones, and dive into this delightful experience. I promise it will leave you with a smile, a full belly, and memories that last a lifetime!
Print
Velvet Banana Dream Lush
- Total Time: 4 hours 20 minutes
- Yield: 12 servings 1x
- Diet: Vegetarian
Description
Let’s talk about the ultimate crowd-pleaser: Velvet Banana Dream Lush! This dessert is not just creamy; it’s a comforting hug in a dish. After a long day, nothing beats indulging in a layered delight that whispers sweet nothings with every spoonful. I can almost hear the cheerful laughter of my family as they dive into this blissful treat. Whether it’s a special occasion or just a Tuesday night, this dreamy dessert makes memories sweeter. You’ll love how easy it is to whip up, and I promise, it’ll be gone before you know it!
Ingredients
- 1 box vanilla wafers, crushed (about 2½ cups crumbs)
- 1/2 cup melted butter
- 8 oz cream cheese, softened
- 1 cup powdered sugar
- 1 (8 oz) tub whipped topping (Cool Whip), divided
- 2 (3.4 oz) boxes instant banana pudding mix
- 3 cups cold milk
- 2 ripe bananas, sliced (for garnish)
- Crushed vanilla wafers (for garnish)
Instructions
- In a bowl, mix the crushed vanilla wafers with melted butter until fully combined. Press the mixture into the bottom of a 9×13-inch glass dish to form an even crust. Chill for 15 minutes.
- Beat the softened cream cheese with powdered sugar until smooth and creamy. Gently fold in half of the whipped topping.
- Spread the cream cheese layer evenly over the chilled crust, smoothing the top.
- Spoon and spread a generous layer of whipped topping over the cream cheese mixture.
- In a separate bowl, whisk the instant banana pudding mix with cold milk until it thickens (about 2 minutes). Spread the pudding evenly over the whipped topping layer.
- Sprinkle a layer of crushed vanilla wafers over the banana pudding for added texture and flavor.
- Top the dessert with the remaining whipped topping, smoothing it gently with a spatula.
- Arrange fresh banana slices around the edges and sprinkle additional crushed wafers in the center for garnish.
- Cover and chill the dessert in the refrigerator for at least 4 hours, preferably overnight, before slicing and serving.
Notes
- For best results, prepare the dessert a day in advance to allow flavors to meld.
- Ensure bananas are ripe for the best flavor and texture.
- For a nuttier flavor, consider adding chopped nuts between layers.
- Prep Time: 20 minutes
- Cook Time: 0 minutes
- Category: Dessert
- Method: Chilling
- Cuisine: American
Nutrition
- Serving Size: 1 slice
- Calories: 290
- Sugar: 24g
- Sodium: 150mg
- Fat: 18g
- Saturated Fat: 10g
- Unsaturated Fat: 6g
- Trans Fat: 0g
- Carbohydrates: 32g
- Fiber: 1g
- Protein: 3g
- Cholesterol: 30mg


