
Introduction to Pink Velvet Roll Cake
Welcome to the delightful world of baking! Today, I’m excited to share my recipe for Pink Velvet Roll Cake. This stunning dessert is not just a feast for the eyes; it’s a quick solution for busy days when you want to impress your loved ones. Imagine serving a slice of this vibrant cake at your next gathering, and watch as everyone’s faces light up with joy. With its soft texture and creamy filling, this Pink Velvet Roll Cake is sure to become a favorite in your home. Let’s dive into this delicious adventure together!
Why You’ll Love This Pink Velvet Roll Cake
This Pink Velvet Roll Cake is a true gem in the dessert world. It’s not only visually stunning but also incredibly easy to make, even on your busiest days. The soft, velvety texture paired with the creamy filling creates a delightful taste experience that will have everyone asking for seconds. Plus, it’s a fantastic way to celebrate special occasions or simply brighten up an ordinary day. Trust me, you’ll fall in love with every bite!
Ingredients for Pink Velvet Roll Cake
Gathering the right ingredients is the first step to creating your Pink Velvet Roll Cake. Here’s what you’ll need:
- All-purpose flour: This is the foundation of your cake, providing structure and a soft crumb.
- Baking powder: A leavening agent that helps the cake rise, giving it that light, airy texture.
- Salt: Just a pinch enhances the flavors and balances the sweetness.
- Granulated sugar: Sweetness is key! It adds flavor and moisture to the cake.
- Eggs: These bind the ingredients together and contribute to the cake’s richness.
- Vanilla extract: A splash of this adds a warm, inviting flavor that complements the cake beautifully.
- Milk: This keeps the batter moist and helps create a tender cake.
- Unsweetened cocoa powder: Just a touch gives the cake a subtle chocolate flavor without overpowering the pink hue.
- Red food coloring: This is what makes your cake pop! Use gel for a more vibrant color.
- Unsalted butter: Melted butter adds richness and moisture to the cake.
- Cream cheese: The star of the filling! It provides a creamy, tangy contrast to the sweet cake.
- Powdered sugar: This sweetens the cream cheese filling and gives it a smooth texture.
- Heavy cream: Whipped into soft peaks, it lightens the filling and adds a luscious mouthfeel.
For exact measurements, check the bottom of the article where you can find everything listed for easy printing. Happy baking!

How to Make Pink Velvet Roll Cake
Step 1: Preheat and Prepare
First things first, let’s get that oven preheating to 350°F (175°C). While it warms up, grab a 15×10-inch jelly roll pan. Grease it lightly and line it with parchment paper. This step is crucial! The parchment will help the cake release easily after baking. Trust me, you don’t want to wrestle with a stuck cake. Once your pan is ready, you’re all set to start mixing those delightful ingredients!
Step 2: Mix Dry Ingredients
In a medium bowl, whisk together the all-purpose flour, baking powder, and salt. This is where the magic begins! Mixing these dry ingredients ensures that the baking powder is evenly distributed, which helps the cake rise beautifully. Take a moment to enjoy the aroma of the flour and baking powder. It’s like a warm hug for your kitchen! Set this bowl aside while you tackle the next step.
Step 3: Beat Eggs and Sugar
Now, let’s move on to the eggs and sugar. In a large bowl, beat the eggs and granulated sugar with an electric mixer on high speed. You want this mixture to become pale and fluffy, which usually takes about 3-4 minutes. It’s like watching a transformation! Once it’s light and airy, stir in the vanilla extract, cocoa powder, and red food coloring. This is where the cake gets its signature pink hue. Don’t be shy with that food coloring; it’s what makes this cake pop!
Step 4: Combine Ingredients
Next, it’s time to combine everything. Gradually add the dry ingredients to the egg mixture, alternating with the milk. Mix until everything is smooth and well combined. This batter should be silky and inviting! Finally, fold in the melted butter gently. This adds richness and moisture to your Pink Velvet Roll Cake. Remember, folding is key here; you want to keep that airy texture intact!
Step 5: Bake the Cake
Pour the luscious batter into your prepared pan, spreading it evenly. It should look like a beautiful canvas waiting to be baked! Slide it into the preheated oven and bake for 12-15 minutes. Keep an eye on it! You’ll know it’s done when a toothpick inserted into the center comes out clean. The aroma wafting through your kitchen will be heavenly, and you’ll be tempted to sneak a taste!
Step 6: Roll the Cake
Once baked, remove the cake from the oven and flip it onto a clean kitchen towel dusted with powdered sugar. This is a delicate moment, so take your time! Gently peel off the parchment paper. While the cake is still warm, roll it up with the towel from one short side. This helps prevent cracking later. Allow the rolled-up cake to cool completely on a wire rack. Patience is key here, my friend!
Step 7: Prepare the Filling
While the cake cools, let’s whip up that dreamy cream cheese filling. In a medium bowl, beat together the softened cream cheese, powdered sugar, and vanilla extract until smooth. It should be creamy and luscious! In a separate bowl, whip the heavy cream until soft peaks form. Gently fold the whipped cream into the cream cheese mixture. This adds a lightness that makes the filling irresistible. You might want to taste it—just a little, of course!
Step 8: Assemble the Cake
Now that your cake is cool, carefully unroll it. Spread the cream cheese filling evenly over the cake, making sure to cover every inch. Then, roll the cake back up without the towel, ensuring the seam is on the bottom. This is where the magic happens! You’re creating a beautiful swirl of pink and cream that will wow your guests. It’s like wrapping a present, but way more delicious!
Step 9: Chill and Serve
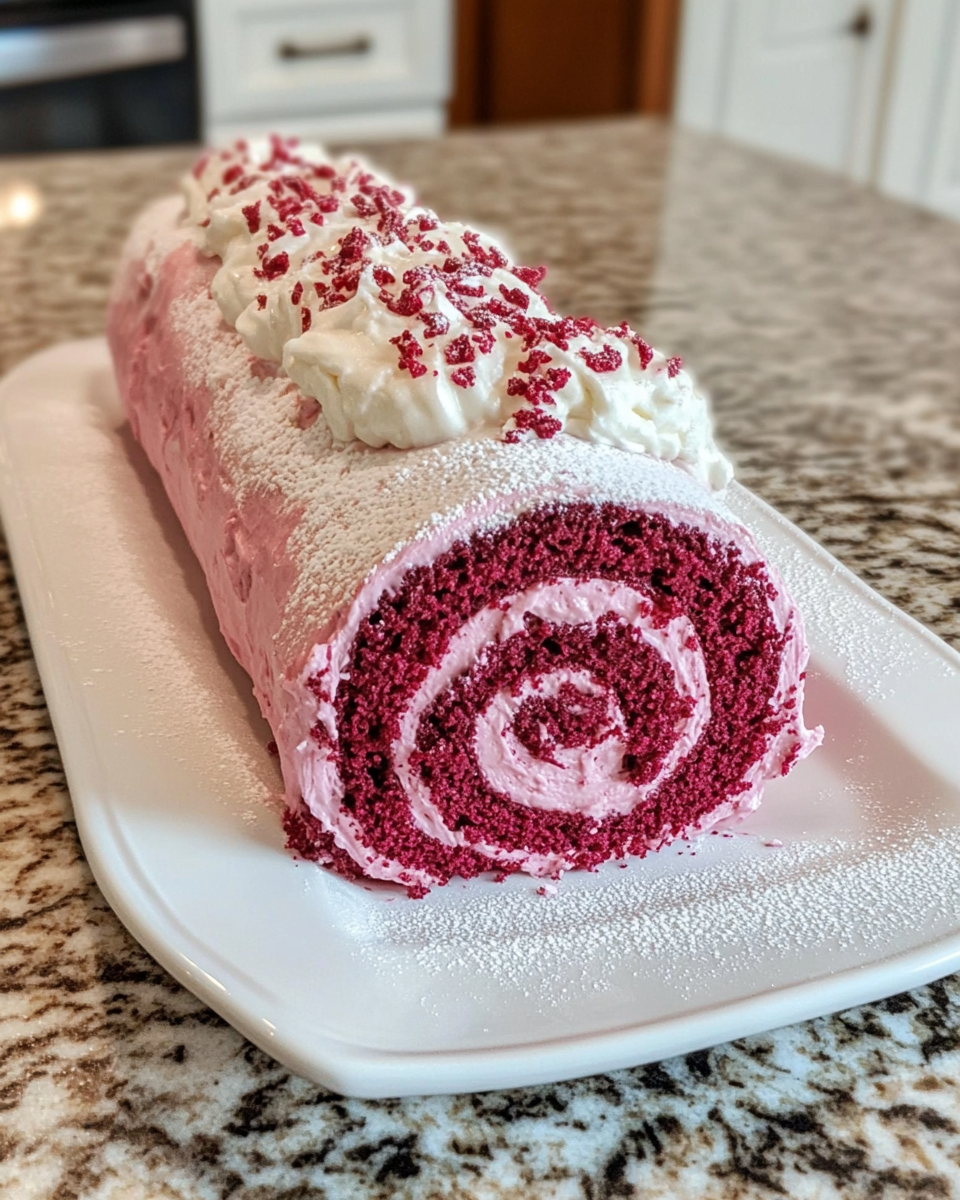
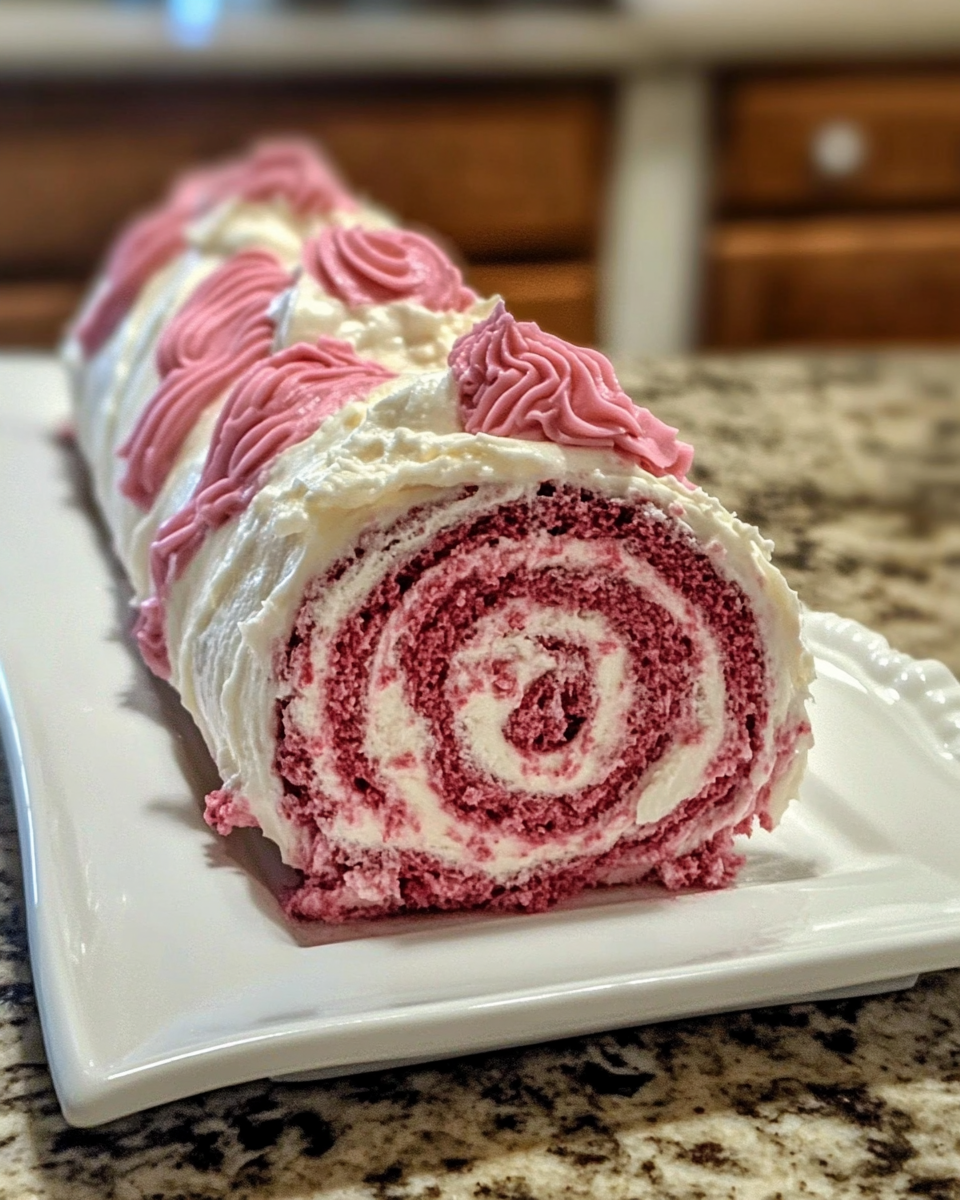
Finally, refrigerate the cake for at least 1 hour to set. This chilling time allows the flavors to meld beautifully. When you’re ready to serve, slice the cake into generous pieces. You can garnish with a dusting of powdered sugar or fresh berries for that extra touch. Each slice reveals a stunning swirl of pink and cream, making it a showstopper at any gathering!
Tips for Success
- Make sure your eggs are at room temperature for better mixing.
- Use gel food coloring for a more vibrant pink hue.
- Don’t skip the parchment paper; it’s your best friend for easy removal.
- Allow the cake to cool completely before adding the filling to avoid melting.
- For a fun twist, try adding a splash of almond extract to the filling!
Equipment Needed
- Jelly roll pan: A 15×10-inch pan is ideal, but a larger baking sheet can work too.
- Electric mixer: A hand mixer is perfect, but a stand mixer can save time.
- Whisk: Essential for mixing dry ingredients; a fork can work in a pinch.
- Kitchen towel: Use a clean dish towel for rolling the cake; parchment paper can also help.
- Wire rack: Great for cooling; a plate can substitute if needed.
Variations of Pink Velvet Roll Cake
- Chocolate Pink Velvet: Add a bit more cocoa powder to the batter for a richer chocolate flavor.
- Fruit-Infused Filling: Mix in some fresh strawberries or raspberries into the cream cheese filling for a fruity twist.
- Gluten-Free Option: Substitute all-purpose flour with a gluten-free blend to make this cake suitable for gluten-sensitive friends.
- Vegan Version: Use flax eggs and a dairy-free cream cheese alternative to create a vegan-friendly Pink Velvet Roll Cake.
- Nutty Delight: Fold in some finely chopped nuts, like pecans or walnuts, into the filling for added texture and flavor.
Serving Suggestions for Pink Velvet Roll Cake
- Pair with a scoop of vanilla ice cream for a delightful contrast.
- Serve alongside fresh berries for a pop of color and flavor.
- Drizzle with chocolate or raspberry sauce for an elegant touch.
- Garnish with mint leaves for a refreshing finish.
- Enjoy with a cup of tea or coffee for a cozy treat.
FAQs about Pink Velvet Roll Cake
Can I make Pink Velvet Roll Cake ahead of time?
Absolutely! You can bake the cake a day in advance. Just roll it up and store it in the refrigerator. When you’re ready to serve, prepare the filling and assemble it. This makes it a great option for busy days!
What can I use instead of cream cheese in the filling?
If you’re looking for a lighter option, you can use mascarpone cheese or a dairy-free cream cheese alternative. Both will give you a deliciously creamy filling without compromising on flavor.
How do I store leftovers of Pink Velvet Roll Cake?
Store any leftover cake in an airtight container in the refrigerator. It will stay fresh for up to three days. Just be sure to keep it chilled to maintain its delightful texture!
Can I freeze Pink Velvet Roll Cake?
Yes, you can freeze the cake! Wrap it tightly in plastic wrap and then in aluminum foil. It can be frozen for up to a month. Just thaw it in the refrigerator before serving.
What occasions are perfect for serving Pink Velvet Roll Cake?
This cake is perfect for birthdays, anniversaries, or even a simple family gathering. Its vibrant color and delicious flavor make it a showstopper for any celebration!
Final Thoughts
Creating this Pink Velvet Roll Cake is more than just baking; it’s about sharing joy and love with those around you. Each slice reveals a beautiful swirl of pink and cream, making it a delightful centerpiece for any occasion. The process is simple, yet the results are stunning, allowing you to impress your family and friends without spending hours in the kitchen. Whether it’s a birthday celebration or a cozy family dinner, this cake brings smiles and sweet memories. So, roll up your sleeves and dive into this delicious adventure—you won’t regret it!
Print
Pink Velvet Roll Cake
- Total Time: 1 hour 45 minutes
- Yield: 8 servings 1x
- Diet: Vegetarian
Description
Welcome to the delightful world of baking! Today, I’m excited to share my recipe for Pink Velvet Roll Cake. This stunning dessert is not just a feast for the eyes; it’s a quick solution for busy days when you want to impress your loved ones. Imagine serving a slice of this vibrant cake at your next gathering, and watch as everyone’s faces light up with joy. With its soft texture and creamy filling, this Pink Velvet Roll Cake is sure to become a favorite in your home. Let’s dive into this delicious adventure together!
Ingredients
- 1 cup all-purpose flour
- 1 teaspoon baking powder
- 1/4 teaspoon salt
- 1/2 cup granulated sugar
- 3 large eggs
- 1 teaspoon vanilla extract
- 1/2 cup milk
- 1 tablespoon unsweetened cocoa powder
- 2 tablespoons red food coloring (gel or liquid)
- 1/4 cup unsalted butter, melted
- 8 oz cream cheese, softened
- 1/2 cup powdered sugar
- 1 teaspoon vanilla extract
- 1 cup heavy cream
Instructions
- Preheat your oven to 350°F (175°C). Grease and line a 15×10-inch jelly roll pan with parchment paper.
- In a medium bowl, whisk together the flour, baking powder, and salt. In a separate large bowl, beat the eggs and granulated sugar with an electric mixer on high speed until the mixture becomes pale and fluffy (about 3-4 minutes). Stir in the vanilla extract, cocoa powder, and red food coloring.
- Gradually add the dry ingredients to the egg mixture, alternating with the milk. Mix until smooth. Finally, fold in the melted butter until combined.
- Pour the batter into the prepared pan and spread it evenly. Bake for 12-15 minutes, or until a toothpick inserted into the center comes out clean.
- Immediately after baking, remove the cake from the oven and carefully flip it onto a clean kitchen towel dusted with powdered sugar. Gently peel off the parchment paper. While the cake is still warm, roll it up with the towel (from one short side) to prevent cracking. Allow the rolled-up cake to cool completely on a wire rack.
- In a medium bowl, beat together the softened cream cheese, powdered sugar, and vanilla extract until smooth. In a separate bowl, whip the heavy cream until soft peaks form. Gently fold the whipped cream into the cream cheese mixture until smooth and fluffy.
- Once the cake has cooled, carefully unroll it. Spread the cream cheese filling evenly over the cake. Roll the cake back up without the towel, making sure the seam is on the bottom.
- Refrigerate the cake for at least 1 hour to set. Slice and serve chilled, garnished with powdered sugar or fresh berries if desired.
Notes
- Ensure the cake is completely cool before adding the filling to prevent melting.
- Use gel food coloring for a more vibrant color.
- Store leftovers in the refrigerator for up to 3 days.
- Prep Time: 30 minutes
- Cook Time: 15 minutes
- Category: Dessert
- Method: Baking
- Cuisine: American
Nutrition
- Serving Size: 1 slice
- Calories: 320
- Sugar: 20g
- Sodium: 150mg
- Fat: 22g
- Saturated Fat: 12g
- Unsaturated Fat: 8g
- Trans Fat: 0g
- Carbohydrates: 30g
- Fiber: 1g
- Protein: 4g
- Cholesterol: 80mg


