
Introduction to Olive Garden Breadsticks Recipe
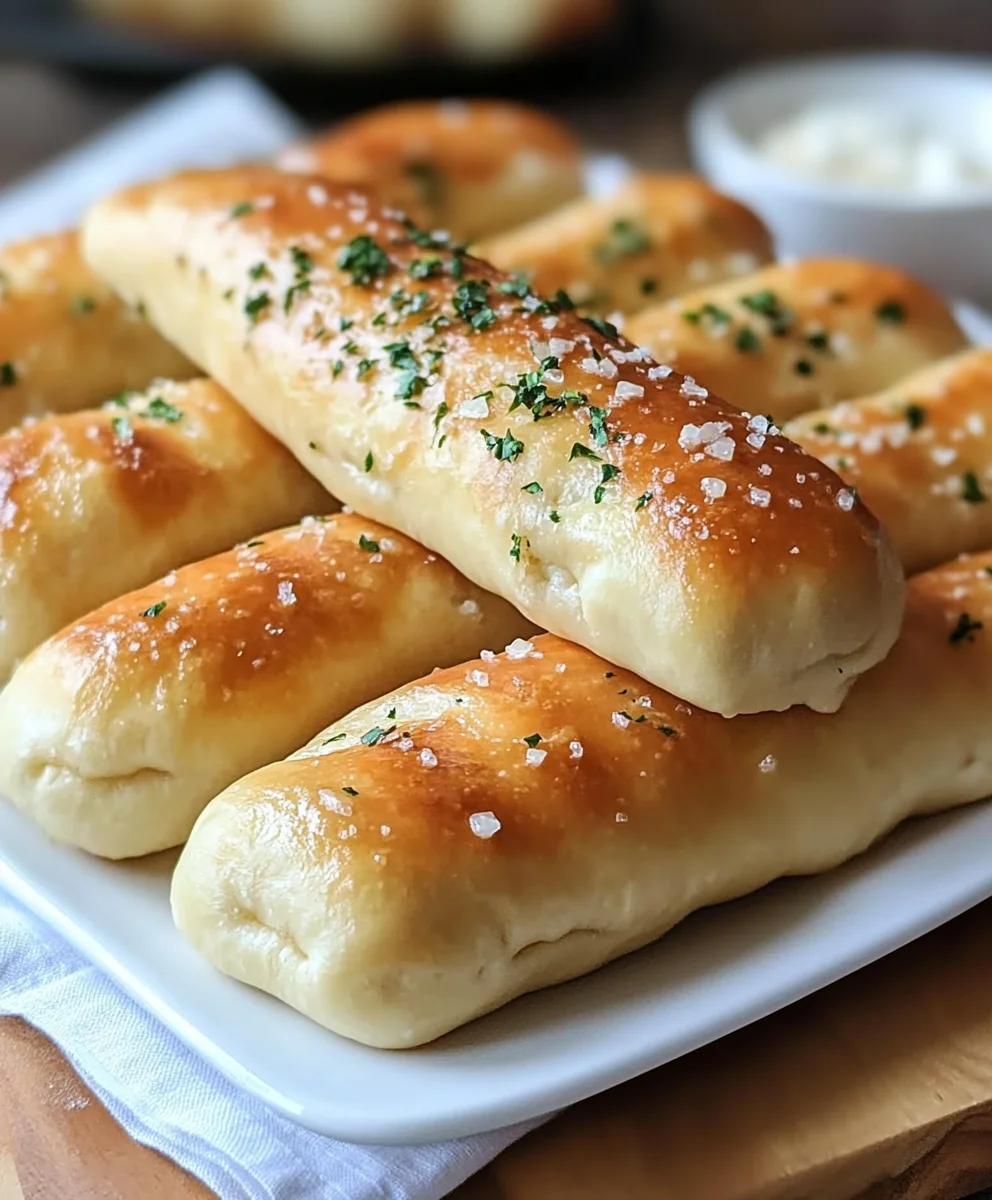
Have you ever craved those warm, buttery breadsticks from Olive Garden? You’re not alone! These delightful treats have a special place in many hearts (and stomachs). The good news is that you can recreate this beloved recipe right in your own kitchen. Making Olive Garden breadsticks at home is not just fun; it’s also a great way to impress family and friends.
The Allure of Olive Garden Breadsticks
What makes Olive Garden breadsticks so irresistible? For starters, they’re soft, fluffy, and have a hint of garlic flavor. Each bite melts in your mouth, making them the perfect accompaniment to any meal. Plus, they’re served warm and fresh, straight from the oven. It’s no wonder people often ask for extra servings!
But it’s not just the taste that draws people in. The experience of enjoying these breadsticks, perhaps while sipping on a delicious soup or salad, adds to their charm. They evoke feelings of comfort and satisfaction, making them a staple for many diners. So, why not bring that experience home?
Why Make Them at Home?
Making Olive Garden breadsticks at home has several perks. First, you can enjoy them anytime you want! Imagine a cozy night in with a big bowl of pasta and a basket of warm breadsticks. Sounds perfect, right?
Another reason to try this recipe is the chance to customize. You can add your favorite herbs or spices to the dough. Have you ever thought about tossing in some cheese or even a sprinkle of red pepper flakes? The possibilities are endless!
Plus, making breadsticks at home can be a fun activity for the whole family. Kids love to help in the kitchen, and rolling out dough can be a great bonding experience. Just be prepared for some flour on the floor—it’s all part of the fun!
So, are you ready to roll up your sleeves and make some delicious breadsticks? Let’s dive into the recipe!

Ingredients for Olive Garden Breadsticks Recipe
If you’ve ever dined at Olive Garden, you know their breadsticks are a highlight. They’re warm, buttery, and oh-so-delicious! Making them at home is easier than you might think. Let’s dive into the ingredients you’ll need to whip up this delightful treat.
Essential Ingredients
To create those iconic Olive Garden breadsticks, you’ll need a few key ingredients. Each one plays a vital role in achieving that perfect texture and flavor.
Flour and Yeast
First up, flour and yeast. All-purpose flour is your best bet here. It gives the breadsticks structure. As for yeast, active dry yeast works wonderfully. It’s what makes the dough rise and gives those breadsticks their fluffy texture. Have you ever wondered how much yeast to use? Typically, one packet (about 2 ¼ teaspoons) is perfect for this recipe.
Sugar and Salt
Next, let’s talk about sugar and salt. Sugar isn’t just for sweetness; it helps the yeast activate and rise. A tablespoon should do the trick. On the other hand, salt is crucial for flavor. It balances the sweetness and enhances the overall taste. Just a teaspoon will suffice. Remember, too much salt can overpower the breadsticks, so stick to the recommended amount!
Butter and Garlic
Now, who can resist butter and garlic? These two ingredients are what make the breadsticks truly irresistible. You’ll need melted butter to brush on top after baking. It adds richness and a lovely sheen. As for garlic, using garlic powder or fresh minced garlic can elevate the flavor. A teaspoon of garlic powder or one clove of minced garlic will give you that classic taste. Trust me, your kitchen will smell amazing!
Optional Ingredients for Variations
While the essential ingredients are fantastic on their own, you might want to get a little creative. Here are some optional ingredients to consider for variations.
Cheese Toppings
Cheese lovers, rejoice! Adding cheese can take your breadsticks to the next level. Parmesan or mozzarella are great choices. Just sprinkle some on top before baking, and you’ll have cheesy, gooey goodness. Imagine biting into a warm breadstick with melted cheese—heavenly, right?
Herbs and Spices
If you’re feeling adventurous, why not toss in some herbs and spices? Dried oregano, basil, or even a pinch of red pepper flakes can add a delightful twist. It’s worth noting that fresh herbs can also work wonders. Just chop them finely and mix them into the dough for an aromatic experience. Have you ever tried rosemary with bread? It’s a game-changer!
In conclusion, making Olive Garden breadsticks at home is all about the right ingredients. With flour, yeast, sugar, salt, butter, and garlic as your base, you can create a delicious treat. And don’t forget the optional ingredients for a personal touch. Happy baking!
Step-by-Step Instructions for Olive Garden Breadsticks Recipe
If you’ve ever dined at Olive Garden, you know their breadsticks are a highlight of the meal. Soft, warm, and buttery, they’re hard to resist! Luckily, you can recreate this deliciousness at home with a simple recipe. Let’s dive into the step-by-step instructions to make your very own Olive Garden breadsticks.
Preparing the Dough
The first step in making these delightful breadsticks is preparing the dough. It’s easier than you might think, and the smell of fresh bread will fill your kitchen in no time!
Mixing Dry Ingredients
Start by gathering your dry ingredients. You’ll need flour, sugar, salt, and instant yeast. In a large mixing bowl, combine 4 cups of all-purpose flour, 2 tablespoons of sugar, 1 tablespoon of salt, and 1 tablespoon of instant yeast. Mixing these together ensures that the yeast activates properly later on. Have you ever noticed how important it is to mix dry ingredients well? It really makes a difference!
Activating Yeast
Next, it’s time to activate the yeast. In a separate bowl, heat 1 and ½ cups of water until it’s warm but not boiling—about 110°F (43°C) is perfect. Add the warm water to your dry mixture. If you have a thermometer, great! If not, just test it with your finger; it should feel warm, not hot. This step is crucial because yeast loves warmth!
Combining Ingredients
Now, mix everything together until a dough forms. You can use a wooden spoon or your hands. If the dough feels too sticky, sprinkle in a bit more flour. Knead the dough on a floured surface for about 5 to 7 minutes. It should become smooth and elastic. Trust me, the kneading is a great workout!
Shaping the Breadsticks
Once your dough is ready, it’s time to shape those breadsticks. This is where the fun begins!
Rolling and Cutting the Dough
First, let the dough rest for about 10 minutes. This helps it relax, making it easier to roll out. After resting, divide the dough into 12 equal pieces. Roll each piece into a long, thin stick—about 8 inches long. Don’t worry if they’re not perfect; they’ll still taste amazing!
Proofing the Breadsticks
Place the shaped breadsticks on a baking sheet lined with parchment paper. Cover them with a clean kitchen towel and let them rise in a warm place for about 30 minutes. This step is essential for achieving that fluffy texture. Have you ever wondered why bread rises? It’s all about the yeast working its magic!
Baking the Breadsticks
Now that your breadsticks have risen, it’s time to bake them to golden perfection.
Preheating the Oven
Preheat your oven to 400°F (200°C). This temperature is just right for baking breadsticks. While the oven heats up, you can prepare the garlic butter topping. It’s going to make these breadsticks even more irresistible!
Baking Time and Temperature
Once the oven is ready, bake the breadsticks for about 12 to 15 minutes. Keep an eye on them; you want them to be golden brown. The aroma will be heavenly, and you might find it hard to wait!
Adding the Garlic Butter Topping
The final touch is the garlic butter topping. This is what makes these breadsticks truly special.
Preparing the Garlic Butter
In a small saucepan, melt ½ cup of unsalted butter over low heat. Once melted, add 2 cloves of minced garlic and a pinch of salt. Stir it well and let it simmer for a minute. The smell will be fantastic! If you love garlic, feel free to add more. It’s all about your taste!
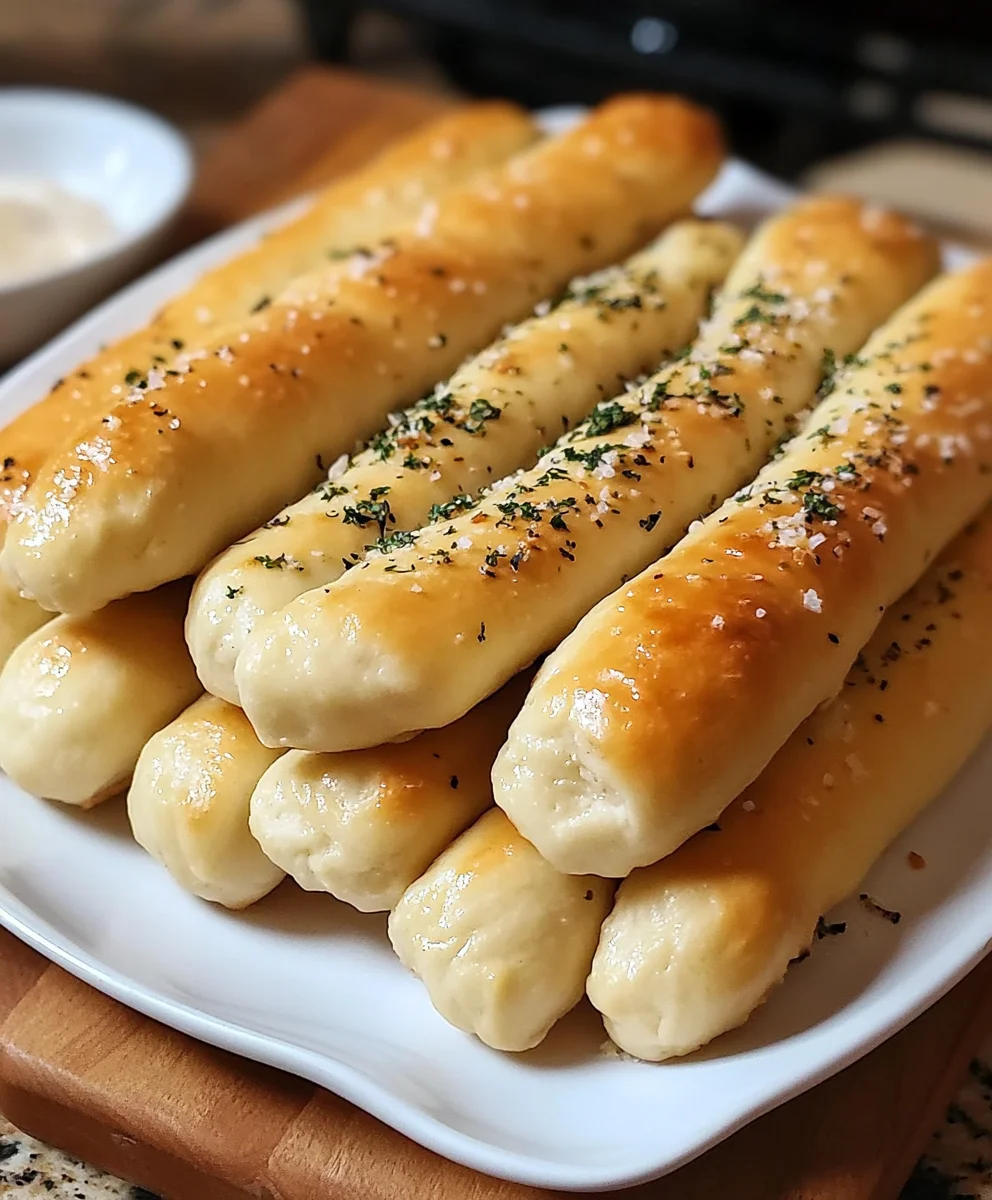
Brushing on the Breadsticks
As soon as the breadsticks come out of the oven, brush them generously with the garlic butter. Don’t be shy—get every nook and cranny! You can also sprinkle a little bit of parsley on top for a pop of color. And there you have it—your homemade Olive Garden breadsticks are ready to enjoy!
Serve them warm with marinara sauce or alongside your favorite pasta dish. They’re perfect for sharing, but you might just want to keep them all to yourself. Happy baking!
Tips for Perfect Olive Garden Breadsticks
If you’ve ever dined at Olive Garden, you know their breadsticks are a highlight. Soft, buttery, and oh-so-delicious, they’re hard to resist. Luckily, you can recreate this beloved treat at home! Here are some tips to help you make the perfect Olive Garden breadsticks that will impress your family and friends.
Common Mistakes to Avoid
Making breadsticks might seem simple, but there are a few common pitfalls to watch out for. First, let’s talk about the dough. If you over-knead it, your breadsticks can turn out tough instead of soft. Aim for a smooth, elastic texture without going overboard.
Another mistake is not letting the dough rise enough. Patience is key here! Allow the dough to double in size. This step is crucial for achieving that fluffy texture we all love. Also, don’t skip the baking soda in the water. It gives the breadsticks that signature flavor.
Lastly, be careful with the baking time. Every oven is different, so keep an eye on your breadsticks. You want them golden brown, not burnt. Trust me, I’ve had my share of crispy disasters!
Storage and Reheating Tips
So, you’ve made a batch of delicious breadsticks, but what do you do with leftovers? First, let them cool completely before storing. Place them in an airtight container or wrap them in plastic wrap. They can last for about 2-3 days at room temperature. If you want to keep them longer, consider freezing them. Just make sure to wrap them tightly to prevent freezer burn.
When it’s time to enjoy your breadsticks again, reheating is simple. You can pop them in the oven at 350°F for about 5-10 minutes. This will help restore their softness. Alternatively, you can microwave them for about 15-20 seconds. Just be careful not to overdo it, or they might turn chewy!
Have you ever wondered how to make them even better? Try brushing them with a little garlic butter before serving. It adds an extra layer of flavor that’s simply irresistible!
Nutritional Information for Olive Garden Breadsticks Recipe
If you’ve ever enjoyed the warm, buttery breadsticks at Olive Garden, you know they’re a delightful treat. But have you ever wondered what’s in them? Understanding the nutritional information can help you enjoy these breadsticks while keeping your diet in check. Let’s break down the nutritional content of this beloved recipe.
Nutritional Breakdown (per 100g)
Here’s a quick look at the nutritional values for Olive Garden breadsticks. This table provides a clear overview of what you’re consuming with each serving.
| Nutrient | Amount |
|---|---|
| Calories | 250 |
| Total Fat | 10g |
| Sodium | 400mg |
| Carbohydrates | 35g |
| Protein | 6g |
As you can see, these breadsticks pack a decent amount of calories and sodium. It’s always a good idea to enjoy them in moderation, especially if you’re watching your sodium intake. But hey, who can resist that warm, garlicky goodness?
Next time you whip up a batch of these breadsticks, consider pairing them with a fresh salad or a light soup to balance out the meal. And remember, cooking is all about having fun, so don’t hesitate to experiment with flavors! Maybe add a sprinkle of herbs or a dash of cheese for an extra kick. Happy baking!
Frequently Asked Questions about Olive Garden Breadsticks Recipe
Olive Garden breadsticks are a beloved treat for many. They’re soft, buttery, and perfect for dipping. If you’re thinking about making them at home, you might have some questions. Let’s dive into the most common queries about this delicious recipe!
Can I make Olive Garden breadsticks gluten-free?
Absolutely! You can make gluten-free Olive Garden breadsticks by using a gluten-free flour blend. Many brands offer all-purpose gluten-free flour that works well in bread recipes. Just keep in mind that the texture might differ slightly from the original. You might want to add a bit of xanthan gum to help with the dough’s elasticity. Have you ever tried baking with gluten-free flour? It can be a fun experiment!
How long do Olive Garden breadsticks last?
Once baked, Olive Garden breadsticks are best enjoyed fresh. However, if you have leftovers, they can last for about 2 to 3 days when stored in an airtight container at room temperature. If you notice them getting a bit stale, you can always pop them in the microwave for a few seconds to warm them up. It’s worth noting that they might not be as soft as when they were first baked, but they’ll still taste great!
Can I freeze Olive Garden breadsticks?
Yes, you can freeze Olive Garden breadsticks! Just let them cool completely after baking. Then, wrap them tightly in plastic wrap or aluminum foil and place them in a freezer-safe bag. They can last in the freezer for up to 3 months. When you’re ready to enjoy them, simply thaw them in the fridge overnight and reheat them in the oven. Have you ever frozen bread before? It’s a great way to save some for later!
What can I serve with Olive Garden breadsticks?
Olive Garden breadsticks are versatile and pair well with many dishes. You can serve them with marinara sauce for dipping, which is a classic choice. They also go wonderfully with soups, salads, or pasta dishes. If you’re feeling adventurous, why not try them with a creamy Alfredo sauce? It’s a delightful combination! What’s your favorite dish to enjoy with breadsticks?
How do I make the breadsticks softer?
If you want your Olive Garden breadsticks to be extra soft, there are a few tricks you can try. First, make sure not to overbake them. They should be golden brown but not too dark. Another tip is to brush them with melted butter right after they come out of the oven. This adds flavor and keeps them moist. Lastly, consider adding a bit of milk or yogurt to the dough for added softness. Have you ever had a kitchen mishap while trying to make bread? It can be quite the adventure!


