
Introduction
A strong and active sourdough starter is the key to baking beautiful, airy, and flavorful bread. However, many bakers struggle with starters that become too acidic, weak, or fail to give a good rise to their loaves. If you’ve been feeding your starter a traditional 1:1:1 ratio but are still facing issues, it’s time to try a different approach!
Many home bakers get frustrated when their bread doesn’t rise as expected, often blaming their recipe or baking technique. However, the real issue frequently lies with the starter itself. A well-fed, active starter is essential for successful sourdough baking. By learning how to properly feed and maintain your starter, you can achieve consistently great results without unnecessary effort or waste.
Understanding Your Sourdough Starter
A sourdough starter is a living culture of wild yeast and lactic acid bacteria. It requires regular feeding with flour and water to stay active. However, an improper feeding ratio can lead to an overly acidic and weak starter, which in turn affects the final bread quality.
Signs of a Weak Starter:
- Small bubbles instead of a strong, airy texture, indicating poor yeast activity.
- A sour or overly acidic smell, which may suggest that the bacteria are dominating over the yeast.
- Inconsistent or poor rise in baked bread, leading to dense or gummy loaves.
- Needing frequent feeding to stay active, which can be time-consuming and inefficient.
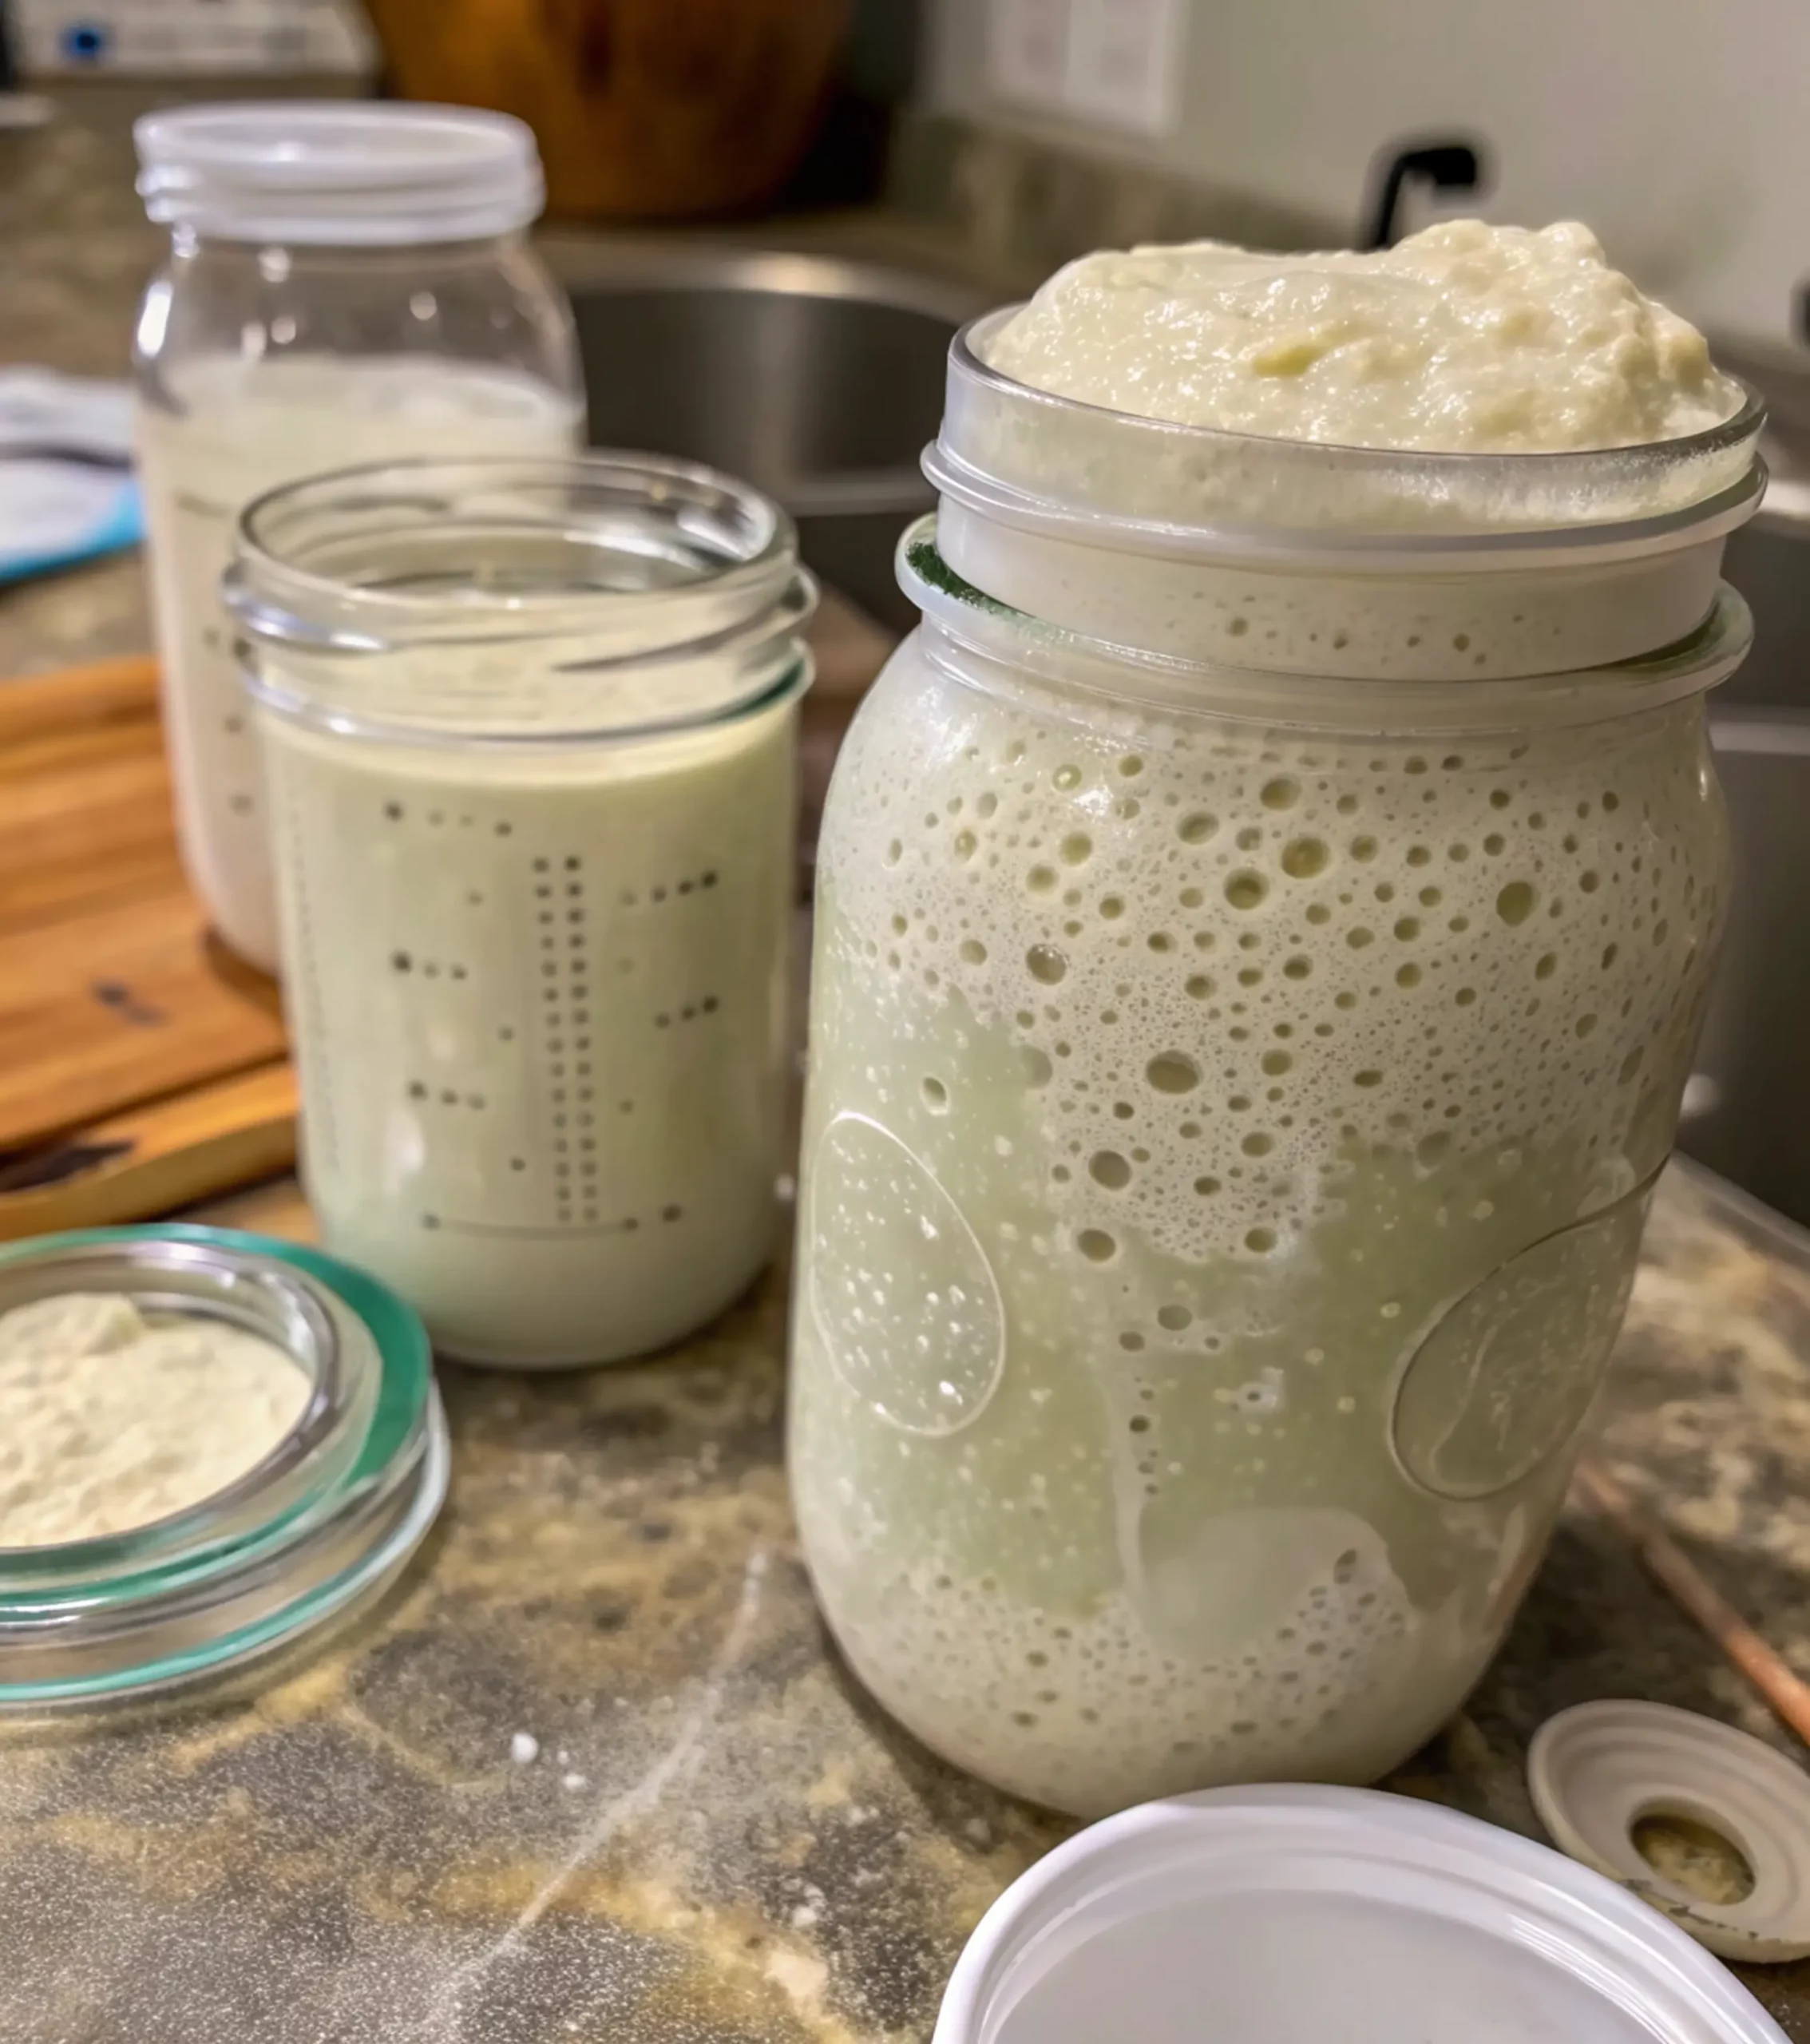
Signs of a Strong Starter:
- Large, airy bubbles that indicate active yeast fermentation.
- Thick and stretchy consistency, making it easy to work with.
- Less frequent feeding required, making maintenance more manageable.
- Strong oven spring in baked loaves, resulting in taller, better-textured bread.
By understanding these signs, you can adjust your feeding and storage practices to maintain a consistently healthy starter.

The Impact of Different Feeding Ratios
Many bakers traditionally use a 1:1:1 feeding ratio (equal parts starter, flour, and water). While this works for very active starters that are fed daily, it can lead to excessive acidity, requiring constant attention and frequent feeding. Switching to a 1:3:2 ratio (1 part starter, 3 parts flour, and 2 parts water) can make a big difference!
Comparison of Feeding Ratios:
| Ratio | Strength | Maintenance Frequency | Best For |
|---|---|---|---|
| 1:1:1 | Weaker | Daily Feeding | High Activity, Quick Ferment |
| 1:3:2 | Stronger | Every 4-5 Days | Better Rise, Less Maintenance |
By feeding your starter using the 1:3:2 ratio (e.g., 40g starter, 120g flour, 80g water), you allow the yeast to thrive without becoming too acidic. This method results in a more robust starter that can be stored in the fridge for days without needing to be fed.
The reason this ratio works so well is that it provides more food (flour) for the yeast while maintaining a hydration level that keeps it from becoming too acidic. A thicker consistency helps slow fermentation, allowing the starter to stay active longer between feedings.
Best Practices for Feeding Your Starter
- Use a Super Thick Paste: The consistency should be very thick, like a stiff dough, rather than a liquid. A wetter starter tends to become acidic more quickly.
- Feed Less Often: With a stronger starter, you only need to feed it once every 4-5 days, instead of daily, making it easier to maintain.
- Store in the Fridge: This slows down fermentation and prevents spoilage or mold, reducing waste and effort.
- No Need for Discarding Often: Since the feed sustains the starter longer, you reduce waste. A well-fed starter should have minimal discard if maintained properly.
Storage and Maintenance Tips
- Refrigeration: Keeping your starter in the fridge reduces the need for daily feedings while maintaining activity.
- Feeding Frequency: Once every 4-5 days is enough, but if you bake less often, you can extend this to a week.
- Signs Your Starter Needs Feeding: If it starts to smell overly acidic, becomes runny, or stops rising well, it’s time for a feed.
- Avoid Mold: Always use clean utensils and avoid contamination. If you see mold, it’s best to start a new starter.
Baking Benefits: Taller Loaves & Less Waste
Using a strong starter leads to better bread rise, producing taller loaves with improved texture. The improved yeast activity creates more gas, leading to an open crumb structure. Additionally, feeding less often reduces waste, making the process more efficient for frequent bakers.
Ingredients
To maintain and strengthen your sourdough starter, you’ll need a few simple yet crucial ingredients. The quality of these ingredients can significantly impact the health of your starter and, ultimately, the quality of your bread.
1. Mature Sourdough Starter (40g)
- This is the portion of your existing starter that will be used to seed the new feed.
- It should be bubbly, slightly tangy in smell, and free from mold or an off-putting odor.
- If your starter has been in the fridge for a long time, give it one or two extra feedings before using it for baking.
2. All-Purpose or Bread Flour (120g)
- Bread flour contains higher protein, which strengthens gluten development, but all-purpose flour also works well.
- You can use whole wheat or rye flour for extra nutrition and fermentation strength, but white flour maintains a more neutral taste.
- Always use unbleached flour, as bleaching agents can weaken the natural yeast and bacteria in the starter.
3. Water (80g, Adjust for Consistency)
- Use filtered or dechlorinated water because chlorine in tap water can kill or weaken the wild yeast.
- The water should be room temperature to slightly warm (not hot, as high temperatures can damage the microorganisms).
- The amount of water affects the hydration of the starter—less water creates a thicker consistency, while more water results in a runnier starter.
4. A Clean, Wide-Mouthed Jar
- Choose a glass jar or a food-safe plastic container with enough space for the starter to expand.
- Avoid sealing the jar airtight, as fermentation produces gases that need to escape. A loose-fitting lid or a breathable cover (such as a coffee filter or cloth) is ideal.
5. A Stirring Tool
- A silicone spatula, wooden spoon, or chopstick is best for mixing, as metal tools can react with acidity over time.
By using these high-quality ingredients, you ensure that your sourdough starter remains active, balanced, and ready for baking.
Step-by-Step Instructions
Maintaining a strong sourdough starter involves a precise yet simple feeding routine. Follow these steps carefully to create a reliable, long-lasting starter that consistently produces excellent bread.
Step 1: Take Out Your Starter from the Fridge
- If your starter has been refrigerated, remove it and let it come to room temperature for about 30 minutes.
- If you notice any liquid (hooch) on top, stir it back in for a more sour flavor or pour it off for a milder taste.
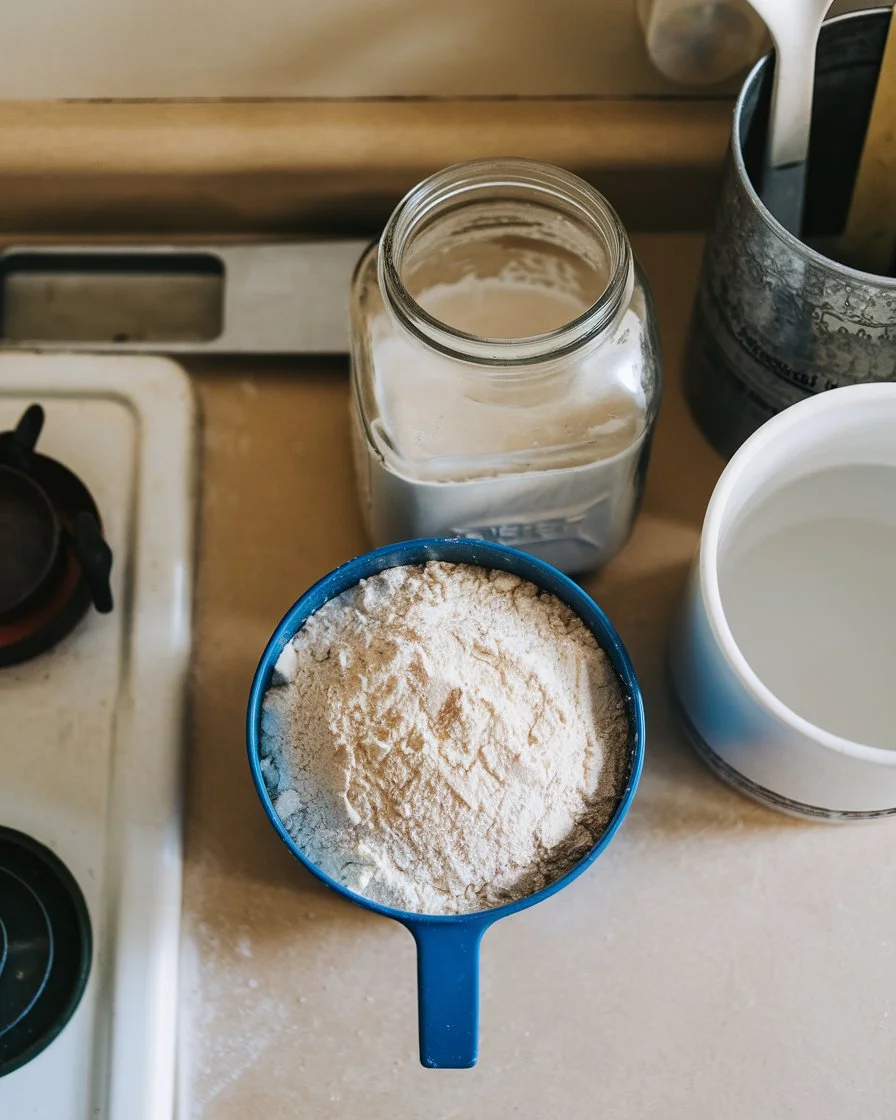
Step 2: Measure Your Ingredients
- Use a kitchen scale to weigh 40g of starter, 120g of flour, and 80g of water for the 1:3:2 feeding ratio.
- If you don’t have a scale, use approximately 2 tablespoons of starter, ¾ cup of flour, and ⅓ cup of water as an estimate.
Step 3: Mix Everything Together
- In a clean jar, add the starter first, followed by the flour and water.
- Stir thoroughly until all the flour is fully incorporated, and no dry bits remain.
- The consistency should be a thick paste—if it’s too dry, add a teaspoon of water; if it’s too runny, add a little more flour.
Step 4: Store Your Starter Properly
- Cover the jar loosely with a lid or breathable cloth.
- Leave it at room temperature for 4-6 hours if you plan to bake soon, or refrigerate immediately if storing for later use.
Step 5: Let It Ferment
- If left at room temperature, your starter should double or triple in size within 4-6 hours, depending on the warmth of your kitchen.
- In the fridge, the starter will ferment more slowly and can be left unfed for up to 5 days before the next feeding.
Step 6: Monitor and Maintain Your Starter
- If baking frequently, feed the starter every 4-5 days following the same 1:3:2 ratio.
- If the starter smells too sour or becomes sluggish, try a refresh feed at room temperature before refrigeration.
- If you notice mold or an off smell, discard the starter and begin a new one.
Frequently Asked Questions (FAQ)
1. How often should I feed my starter?
With the 1:3:2 ratio, you only need to feed it every 4-5 days if kept in the fridge. If baking frequently, you may need to feed more often.
2. What if my starter smells too sour?
This is a sign of too much acidity. Adjust feeding to a lower hydration and increase the flour ratio.
3. Can I revive a weak starter?
Yes! Start feeding with the 1:3:2 method, and within a few feedings, it should regain strength.
4. How do I know when my starter is ready to bake with?
A strong starter will double or triple in size within 4-6 hours after feeding and have a pleasant, slightly tangy aroma.
Conclusion
Strengthening your sourdough starter doesn’t have to be complicated. By switching to a 1:3:2 feeding ratio, you can create a robust, less acidic starter that requires less maintenance and produces better bread with taller loaves. Try this method, and you’ll never look back!
Ready to take your sourdough baking to the next level? Try this technique and enjoy the results!
Print
How to Strengthen Your Sourdough Starter for Better Bread
- Total Time: 4-6 hours (active fermentation)
- Yield: Makes enough for multiple feedings before use in baking
- Diet: Vegan
Description
A strong and active sourdough starter is the key to baking beautiful, airy, and flavorful bread. However, many bakers struggle with starters that become too acidic, weak, or fail to give a good rise to their loaves. If you’ve been feeding your starter a traditional 1:1:1 ratio but are still facing issues, it’s time to try a different approach!
Ingredients
- 40g mature sourdough starter
- 120g all-purpose or bread flour
- 80g water (adjust slightly for consistency)
Instructions
- Take Out Starter: Remove your starter from the fridge and let it come to room temperature.
- Measure Ingredients: Use the 1:3:2 ratio (e.g., 40g starter, 120g flour, 80g water) for best results.
- Mix: Stir well until you get a super thick paste-like consistency. It should not be runny.
- Store: Place in a clean jar and cover loosely to allow gas to escape.
- Ferment: Let it sit at room temperature for a few hours before refrigerating.
- Feed Every 4-5 Days: Refresh using the same ratio when needed.
Notes
- This feeding method reduces acidity and enhances yeast activity, leading to better bread rise.
- The starter can be stored in the fridge and fed every 4-5 days, reducing the need for daily maintenance.
- Use unbleached flour and filtered water for the best results.
- If your starter smells too sour, it may need more frequent feeding at room temperature for a couple of days before returning to the fridge.
- Prep Time: 5 minutes
- Cook Time: Not applicable
- Category: Sourdough Starter Maintenance
- Method: Fermentation
- Cuisine: Baking / Bread
Nutrition
- Serving Size: 50g of starter
- Calories: 90 kcal
- Sugar: 0g
- Sodium: 1mg
- Fat: 0.3g
- Saturated Fat: 0.1g
- Unsaturated Fat: 0.2g
- Trans Fat: 0g
- Carbohydrates: 18g
- Fiber: 1g
- Protein: 3g
- Cholesterol: 0mg


Hello,
I used the 1:3:2 ratio and it’s looking great. When can I use it for baking? Once it’s come to room temp and it’s peaked?
Hello! 👋 I’m so glad to hear your starter is looking great — it sounds like you’re on the right track! Yes, once your starter has come to room temperature, peaked (meaning it’s risen and just starts to dome or flatten slightly at the top), that’s the perfect time to use it for baking. Timing it right like that really gives your dough the best rise and flavor!
Are you planning to bake a classic sourdough loaf first, or are you experimenting with something like sandwich bread or flavored boules? I’d love to hear what you’re preparing — and if you want, I can suggest a few ideas for your first bake! 🌾🍞
Keep up the great work — your sourdough journey is off to an amazing start!