
A simple and efficient method for a perfect loaf every time
Introduction
When I first began baking sourdough bread, I followed the traditional route using a Dutch oven. It gave me that rustic round shape and a hearty crust—but there was one thing I couldn’t quite get over: the size limitations. One loaf at a time just didn’t work for my needs, especially when I wanted to share or freeze extras.

That’s when I made the switch to loaf pans, and it completely changed the game. Not only does it allow me to bake three or even four loaves in one go, but it also gives my bread a more uniform, easy-to-slice shape that’s perfect for everyday use.
The best part? You can cold-proof directly in the loaf pan, which makes the whole process simpler and more flexible. Whether you’re making bread for your family, neighbors, or just your freezer, this method brings the joy of sourdough baking to a whole new level.
Ingredients
What You’ll Need
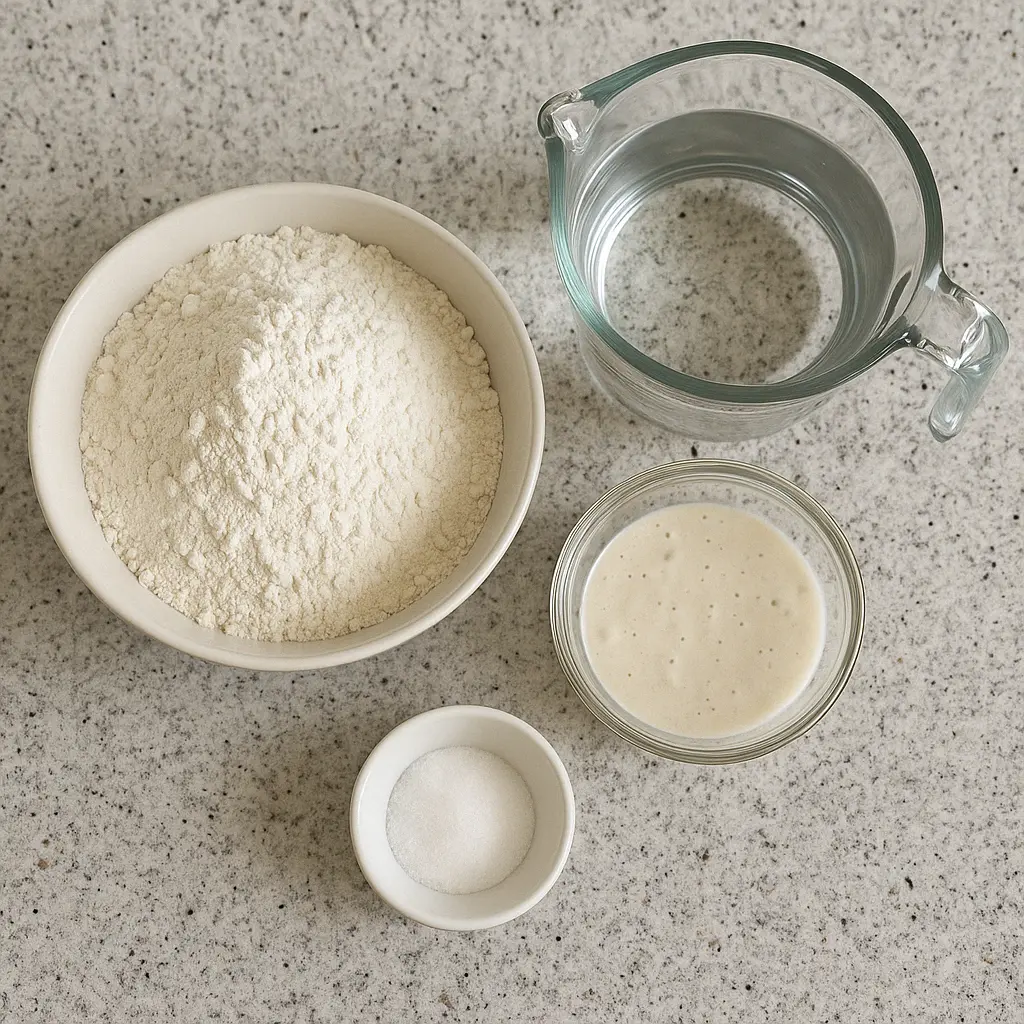
Here are the basic ingredients you’ll need to get started with this sourdough loaf recipe. They’re simple, but each plays an important role:
- 120g active sourdough starter
Your starter should be bubbly and recently fed—ideally within the last 4 to 12 hours. This ensures it’s strong enough to rise your dough. - 350ml lukewarm water
The water should feel slightly warm to the touch—not hot. Aim for around 80°F (27°C) to encourage fermentation. - 500g bread flour or all-purpose flour
Bread flour gives a chewier texture and better rise, but all-purpose flour also works well if that’s what you have on hand. - 2 tablespoons fine sea salt
Don’t skip this—it adds flavor and helps control fermentation. Fine salt blends into the dough more evenly than coarse varieties.
This short and sweet list is all you need to create a flavorful, crusty, and beautifully shaped sourdough loaf.
Step-by-Step Instructions
1. Mix the Dough
In a large bowl, stir the starter and water together until well combined. Add the flour and salt, then mix with a wooden spoon or your hands until it forms a shaggy, slightly sticky dough. Don’t worry if it’s not perfectly smooth yet—this stage is just about combining everything.
2. Bulk Fermentation
Cover the bowl with a clean towel or plastic wrap and let it sit at room temperature for 1 hour. This rest gives the flour time to absorb the water and starts the gluten development process.
3. Stretch and Folds
Over the next 2 hours, you’ll perform 4 sets of stretch and folds, spaced 30 minutes apart. To do this, wet your hands, grab one edge of the dough, gently pull it upward without tearing, and fold it back over the rest of the dough. Repeat on all four sides. This technique strengthens the gluten structure without kneading.
4. Rest and Rise
Once all folds are complete, let the dough sit for another 4 to 8 hours, depending on room temperature. It should rise noticeably, appear puffier, and show some bubbles under the surface. A well-risen dough will jiggle slightly when you nudge the bowl.
5. Shape and Transfer
Turn your dough out onto a lightly floured surface. Shape it gently into loaves, trying not to deflate it too much. Place each one into a parchment-lined loaf pan. Loaf pans should be about 8.5″ x 4.5″ in size.
6. Cold Proofing
Cover the pans with plastic wrap or a damp towel and place them in the fridge for 12 to 48 hours. This long, cold rest helps develop flavor and gives the dough strength for baking.
7. Preheat and Bake
Take the loaves out and let them sit at room temperature for 1 hour. Meanwhile, preheat your oven to 500°F with the loaf pans inside. When ready, score the tops of the loaves using a sharp knife or bread lame, then reduce the oven temperature to 450°F, cover the pans (with foil or another loaf pan), and bake for 30 minutes.
After that, remove the cover and bake for another 15 minutes to develop a rich golden crust.
8. Cooling
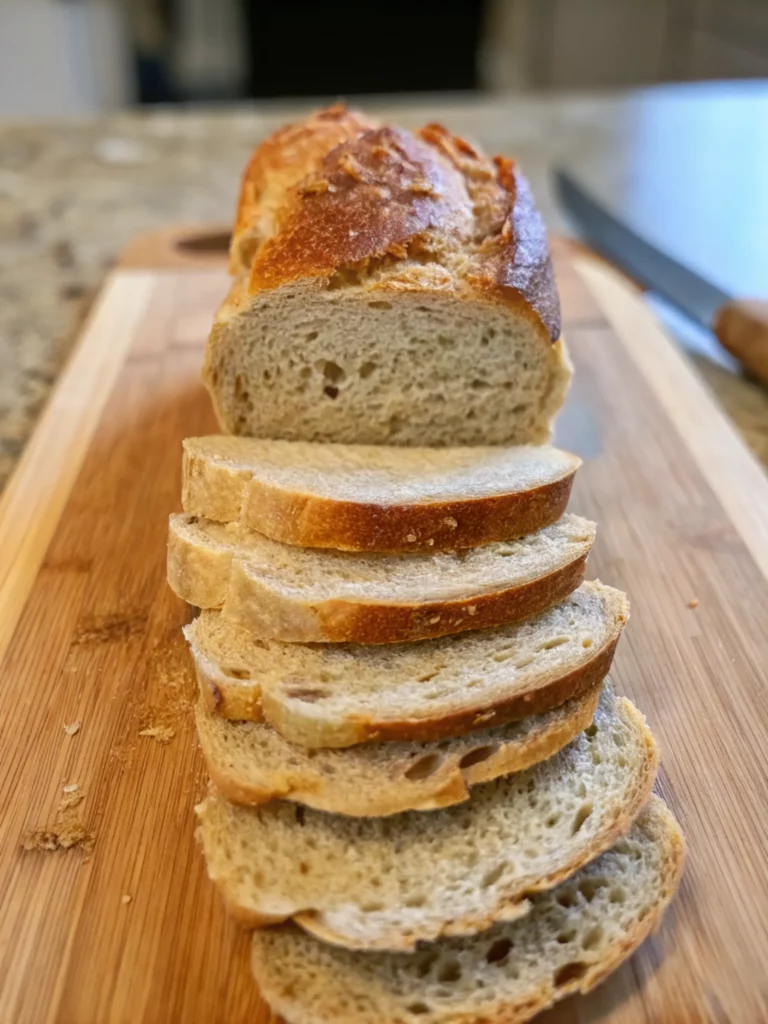
Once baked, carefully remove the loaves from the pans and let them cool on a wire rack for at least an hour. This step is crucial—the cooling period allows the crumb inside to finish setting.
Why I Prefer Loaf Pans Over Dutch Ovens
Loaf pans bring a level of practicality that I never quite got with Dutch ovens. While a round boule looks lovely, the loaf pan produces a shape that’s more usable day-to-day—it slices cleaner, fits in sandwich bags, and toasts beautifully.
There’s also the space advantage: I can proof directly in the loaf pan in the fridge, freeing up counter space and making cleanup easier. And baking three loaves at once? That’s efficiency you can taste.
Cold Proofing: What It Is and Why It Works
Cold proofing is when you let your dough rise slowly in the fridge after shaping. This technique doesn’t just make your schedule more flexible—it actually enhances the flavor.
The colder environment slows down yeast activity, allowing the natural bacteria in your starter to develop more complex notes. The result is bread with a deeper taste, better texture, and more consistent oven spring.
You can cold-proof your dough for as little as 12 hours or as long as 48 hours. It’s forgiving and flexible—just the way home baking should be.
Scoring and Baking Tips
Scoring is an essential part of baking. It gives your loaf room to expand and creates that signature “ear” or crust pattern. When scoring, use a very sharp blade and make one confident, swift motion. A straight line or slight curve down the center works well.
To get that professional-style crust, always preheat the pans in the oven. This gives the dough a boost of heat (oven spring) that helps it rise higher and create a crisp crust.
Covering the pan for the first half of baking traps steam, which also contributes to a shiny, crackly finish.
Storage and Freshness
Once your bread has cooled completely, it can be stored in several ways depending on how quickly you plan to use it:
- Short term (1–2 days): Store cut-side down on a cutting board or wrapped in a tea towel.
- Medium term (3–5 days): Place in a paper bag or wrap in parchment and store in an airtight container.
- Long term: Slice and freeze in a zip-top bag. Toast slices directly from frozen—no thawing needed.
Avoid storing bread in the fridge, as it dries it out quickly.
Serving Ideas and Pairings
This sourdough loaf is incredibly versatile. It’s soft inside, with a tender crust and subtle tang—making it the perfect base for sweet or savory toppings. Here are some favorites:
- Toasted with butter and local honey
- A base for grilled cheese or tuna melts
- Spread with avocado, salt, and cracked pepper
- Served alongside soups, chili, or creamy stews
- Layered into a classic turkey sandwich
It’s also great for French toast or homemade croutons if it gets a little stale.
Common Mistakes and How to Avoid Them
Sticky Dough
A little stickiness is okay, but if it’s hard to handle, add a touch more flour or let the dough rest longer after mixing.
Dense Loaves
Usually caused by an underfed starter. Make sure your starter is bubbly, doubled in size, and smells slightly sweet or yeasty before using.
Overproofed Dough
Dough that’s collapsed or super flat likely sat too long at room temp. Reduce bulk fermentation time slightly or bake sooner after cold proofing.
Crust Too Hard
Try wrapping the cooled loaf in a towel for an hour to soften the crust a bit—especially helpful if your crust came out thicker than desired.
Frequently Asked Questions (FAQ)
Can I use commercial yeast instead of starter?
This recipe is designed for sourdough starter, but you can adapt it by replacing the starter with 1 tsp of active dry yeast and adjusting the bulk fermentation time to 2–3 hours.
Can I use whole wheat flour?
Yes, but start by substituting just 100–150g to keep the texture soft. You may need a little extra water as whole wheat absorbs more moisture.
What if I don’t have a loaf pan?
Use any oven-safe rectangular dish (like ceramic or glass) lined with parchment. Just make sure it’s similar in size and adjust baking times slightly.
How long can I cold-proof?
Up to 48 hours in the fridge is perfectly fine. The longer proof adds flavor but don’t let it go past 2 days or it may start to collapse.
Conclusion
This method has simplified my sourdough routine without sacrificing quality or flavor. The loaf pans make baking more manageable, the cold proofing adds flexibility, and the results are consistently delicious.
Whether you’re a seasoned sourdough baker or just starting out, this approach is approachable, efficient, and incredibly rewarding. Give it a try—you might find it becomes your new go-to method, too.
Print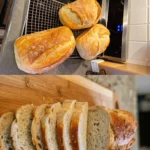
Homemade Sourdough Loaf Bread in a Pan
- Total Time: 17 to 49 hours (including rest and cold proofing)
- Yield: 3 medium loaves (8.5″ x 4.5″ pans)
- Diet: Vegetarian
Description
When I first began baking sourdough bread, I followed the traditional route using a Dutch oven. It gave me that rustic round shape and a hearty crust—but there was one thing I couldn’t quite get over: the size limitations. One loaf at a time just didn’t work for my needs, especially when I wanted to share or freeze extras.
That’s when I made the switch to loaf pans, and it completely changed the game. Not only does it allow me to bake three or even four loaves in one go, but it also gives my bread a more uniform, easy-to-slice shape that’s perfect for everyday use.
The best part? You can cold-proof directly in the loaf pan, which makes the whole process simpler and more flexible. Whether you’re making bread for your family, neighbors, or just your freezer, this method brings the joy of sourdough baking to a whole new level.
Ingredients
Here are the basic ingredients you’ll need to get started with this sourdough loaf recipe. They’re simple, but each plays an important role:
-
350ml lukewarm water
The water should feel slightly warm to the touch—not hot. Aim for around 80°F (27°C) to encourage fermentation. -
500g bread flour or all-purpose flour
Bread flour gives a chewier texture and better rise, but all-purpose flour also works well if that’s what you have on hand. -
2 tablespoons fine sea salt
Don’t skip this—it adds flavor and helps control fermentation. Fine salt blends into the dough more evenly than coarse varieties.
120g active sourdough starter
Your starter should be bubbly and recently fed—ideally within the last 4 to 12 hours. This ensures it’s strong enough to rise your dough.
This short and sweet list is all you need to create a flavorful, crusty, and beautifully shaped sourdough loaf.
Instructions
In a large bowl, stir the starter and water together until well combined. Add the flour and salt, then mix with a wooden spoon or your hands until it forms a shaggy, slightly sticky dough. Don’t worry if it’s not perfectly smooth yet—this stage is just about combining everything.
Cover the bowl with a clean towel or plastic wrap and let it sit at room temperature for 1 hour. This rest gives the flour time to absorb the water and starts the gluten development process.
Over the next 2 hours, you’ll perform 4 sets of stretch and folds, spaced 30 minutes apart. To do this, wet your hands, grab one edge of the dough, gently pull it upward without tearing, and fold it back over the rest of the dough. Repeat on all four sides. This technique strengthens the gluten structure without kneading.
Once all folds are complete, let the dough sit for another 4 to 8 hours, depending on room temperature. It should rise noticeably, appear puffier, and show some bubbles under the surface. A well-risen dough will jiggle slightly when you nudge the bowl.
Turn your dough out onto a lightly floured surface. Shape it gently into loaves, trying not to deflate it too much. Place each one into a parchment-lined loaf pan. Loaf pans should be about 8.5″ x 4.5″ in size.
Cover the pans with plastic wrap or a damp towel and place them in the fridge for 12 to 48 hours. This long, cold rest helps develop flavor and gives the dough strength for baking.
Take the loaves out and let them sit at room temperature for 1 hour. Meanwhile, preheat your oven to 500°F with the loaf pans inside. When ready, score the tops of the loaves using a sharp knife or bread lame, then reduce the oven temperature to 450°F, cover the pans (with foil or another loaf pan), and bake for 30 minutes.
After that, remove the cover and bake for another 15 minutes to develop a rich golden crust.
Once baked, carefully remove the loaves from the pans and let them cool on a wire rack for at least an hour. This step is crucial—the cooling period allows the crumb inside to finish setting.
Notes
This method is perfect for batch baking and ideal for those who want an easier, more flexible approach to sourdough. Cold proofing in loaf pans allows you to bake up to four loaves at once with beautiful structure and texture.
- Prep Time: 1 hour (mixing, folds, and shaping)
- Bulk + Cold Proofing: 4 to 8 hours room temperature bulk fermentation 12 to 48 hours cold proof in the fridge
- Cook Time: 45 minutes (30 minutes covered + 15 minutes uncovered)
- Category: Bread, Baking
- Method: Sourdough, Oven-Baked
- Cuisine: American, Artisan-style
Nutrition
- Serving Size: 1 slice
- Calories: 120 kcal
- Sugar: 0.2 g
- Sodium: 230 mg
- Fat: 0.5 g
- Saturated Fat: 0.1 g
- Unsaturated Fat: 0.3 g
- Trans Fat: 0g
- Carbohydrates: 24 g
- Fiber: 1.2 g
- Protein: 4 g
- Cholesterol: 0mg


