

Introduction to Easter Trifle Dessert
Ah, Easter! A time for family, fun, and, of course, fabulous desserts. This Easter Trifle Dessert is not just a treat; it’s a colorful delight that will bring smiles to everyone at the table. I know how busy life can get, especially when you’re juggling work, kids, and trying to put together a festive meal. This dessert is a quick solution for those hectic days, yet it’s stunning enough to impress your loved ones. With its vibrant layers and creamy goodness, it’s bound to become a favorite in your home!
Why You’ll Love This Easter Trifle Dessert
This Easter Trifle Dessert is a fantastic way to celebrate springtime! It’s easy to make, which is a huge plus for busy moms like us. The bright colors will delight your kids and guests alike, while the creamy layers offer a taste sensation that’s simply irresistible. Plus, it can be prepared ahead of time, saving you precious minutes on the big day. Who wouldn’t love that?
Ingredients for Easter Trifle Dessert
Gathering the right ingredients is half the fun of making this Easter Trifle Dessert. Here’s what you’ll need for this colorful delight:
- White Box Cake Mixes: Use 2 boxes to create your cake layers. Feel free to choose your favorite brand.
- Food Coloring: Red, blue, green, and yellow will help you achieve those bright layers. If you’re feeling adventurous, try adding more colors!
- Whipped Cream Cheese: This adds a rich creaminess to the filling. You can substitute it with mascarpone if you prefer.
- Sweetened Condensed Milk: This gives the filling a velvety sweetness. A great alternative is evaporated milk for a lighter option.
- Cool Whip: For that light and airy consistency in the cream layer. If you prefer homemade, feel free to whip up your own heavy cream.
All of these delightful ingredients come together to create layers of color and flavor that will wow your guests. For exact measurements, be sure to check the end of the article where you can find everything conveniently available for printing!
How to Make Easter Trifle Dessert
Step 1: Prepare the Cake Mixes
Start by preparing the two boxes of white cake mix according to the package instructions. It’s as easy as pie—just add eggs, water, and oil. Mix it up until it’s smooth and lump-free. This step sets the foundation for your delightful Easter Trifle Dessert.
Step 2: Color the Batter
Now for the fun part! Divide the cake batter equally among four bowls. This way, each bowl will become a vibrant layer in your trifle. Use red, blue, green, and yellow food coloring to create rich colors. Just a few drops of each color will do the trick. You’ll soon have a rainbow in your kitchen!
Step 3: Bake the Cake Layers
Preheat your oven and prepare your pans. Pour each colored batter into its own 8″ round cake pan. Bake them for 23-25 minutes, until they spring back when gently pressed. The smell that fills your kitchen is simply heavenly! Keep an eye on them; no one wants a burnt cake!
Step 4: Cool the Cakes
Once baked, let the cakes cool completely in the pans. This is crucial. If you try to assemble the trifle while the layers are warm, you’ll end up with a gooey mess! I usually set them aside for about 30 minutes; just long enough to tidy up my kitchen.
Step 5: Make the Cream Filling
While the cakes are cooling, it’s time to whip up that creamy filling! In a medium bowl, mix 8 ounces of whipped cream cheese with 14 ounces of sweetened condensed milk and 12 ounces of Cool Whip. Blend until the mixture is smooth and fluffy, creating a rich layer for your Easter Trifle Dessert.
Step 6: Crumble the Cakes
Once the cakes are cool, crumble each layer into bite-sized pieces. Set aside about ¼ cup of each color to use as a decorative topping later. This step not only gives your trifle texture but also enhances its color. Trust me, this is where the magic happens!
Step 7: Assemble the Trifle
Now, let’s get creative! In your trifle dish, alternate layers of colored cake and the cream filling. I love starting with purple, followed by yellow, then pink, and topping it off with blue. The layers should flow beautifully like a springtime garden. Finally, sprinkle the reserved cake crumbs on top for that perfect finishing touch.
Tips for Success
- Make sure the cake layers are completely cool before assembling the trifle.
- Use a trifle dish or clear glass bowl to showcase those beautiful layers.
- Feel free to experiment with colors to match your holiday theme.
- Consider refrigerating the assembled trifle for a few hours to let the flavors meld.
- Involve the kids in decorating—let them sprinkle the crumbs on top!
Equipment Needed
- Mixing Bowls: Essential for prepping your batter and cream filling. If you only have one, just wash it between uses!
- 8″ Round Cake Pans: You’ll need four. Alternatively, any similar-sized pans will work fine.
- Trifle Dish or Glass Bowl: Perfect for showcasing your beautiful layers. If unavailable, a clear serving dish can do the trick!
- Electric Mixer: Makes whipping cream and mixing easy. A whisk is a good workout if you don’t have one!
Variations
- Flavor Infusions: Add almond or vanilla extract to the cake batter for an extra flavor boost.
- Fruit Additions: Layer in fresh fruits like berries or sliced bananas between cake and cream for added freshness.
- Gluten-Free Option: Substitute traditional cake mixes with gluten-free ones for a tasty alternative.
- Dairy-Free Option: Use coconut cream or dairy-free whipped topping to create a deliciously creamy filling.
- Nutty Twist: Sprinkle chopped nuts like almonds or pecans between layers for a delightful crunch.
Serving Suggestions
- Pair your Easter Trifle Dessert with a light, fruity salad for a refreshing contrast.
- Serve with a chilled glass of lemonade or iced tea for a delightful spring beverage.
- For an elegant touch, garnish individual servings with fresh mint leaves or edible flowers.
- Consider presenting your trifle directly on the dining table for a stunning centerpiece.
FAQs about Easter Trifle Dessert
Can I make the Easter Trifle Dessert ahead of time?
Absolutely! This colorful dessert can be prepared a day in advance. Just assemble it in the trifle dish and refrigerate. The flavors blend beautifully overnight!
What if I don’t have a trifle dish?
No worries! You can use any clear glass bowl or even individual parfait glasses. The presentation will still shine through, showcasing those lovely layers!
Can I use homemade cake instead of box mixes?
Definitely! If you have a favorite homemade cake recipe, feel free to use it. Just ensure it’s baked evenly to produce those beautiful layers for your Easter Trifle Dessert.
How long can I store my trifle?
The trifle is best enjoyed within 2-3 days. After that, the layers may start to blend together, affecting the visual appeal.
What are some fun toppings for the trifle?
Think outside the box! You can top your trifle with shaved chocolate, sprinkles, or even a drizzle of caramel sauce for an extra treat!
Final Thoughts
Creating this Easter Trifle Dessert is more than just baking; it’s about crafting joy for your family and friends. As you layer those colorful cakes and fluffy cream, you’re nurturing connections and building memories. The smiles and delighted gasps when you present your masterpiece are truly priceless. Plus, it’s a simple way to elevate your holiday celebration without juggling complex recipes. So, roll up your sleeves, get the kids involved, and let this delightful dessert brighten your Easter table. It’s a sweet reminder that life, much like this trifle, is best enjoyed in layers!
Print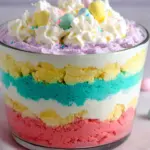
Easter Trifle Dessert
- Total Time: 1 hour
- Yield: Serves 12 1x
- Diet: Vegetarian
Description
Easter Trifle Dessert is a colorful and delightful layered dessert that combines different colored cake layers with a creamy filling.
Ingredients
- 2 white box cake mixes (prepared according to box directions)
- Red, blue, green, and yellow food coloring
- 8 ounces whipped cream cheese
- 14 ounces sweetened condensed milk
- 12 ounce tub Cool Whip
Instructions
- Prepare the cake mixes according to the box directions.
- Split batter evenly into 4 bowls.
- In the first bowl (to create the purple layer) add 6 red drops and 5 blue drops.
- In the second bowl (to create the yellow layer) add 5 yellow drops.
- In the third bowl (to create the pink layer) add 6 drops of red food coloring and 1 drop of blue.
- In the fourth bowl (to create the blue layer) add 4 blue drops and 2 green drops.
- Bake each layer in an 8″ round cake pan for 23-25 minutes.
- Allow cakes to cool. Set aside.
- In a medium bowl, mix whipped cream cheese, sweetened condensed milk and Cool Whip until well combined.
- Crumble each cake, setting aside a ¼ cup of each color for topping.
- To assemble trifle, alternate each color of cake with a layer of cream. It’s up to you how you would like to layer the colors, but I chose, purple, yellow, pink and blue at the top.
- To finish, sprinkle remaining cake crumbs on top.
Notes
- Ensure each cake layer is completely cooled before assembling the trifle.
- Feel free to customize the colors and layers as per your preference.
- This dessert is perfect for Easter celebrations and gatherings.
- Prep Time: 30 minutes
- Cook Time: 25 minutes
- Category: Dessert
- Method: Baking and Layering
- Cuisine: American
Nutrition
- Serving Size: 1 serving
- Calories: 350
- Sugar: 25g
- Sodium: 150mg
- Fat: 15g
- Saturated Fat: 8g
- Unsaturated Fat: 2g
- Trans Fat: 0g
- Carbohydrates: 45g
- Fiber: 1g
- Protein: 4g
- Cholesterol: 50mg