
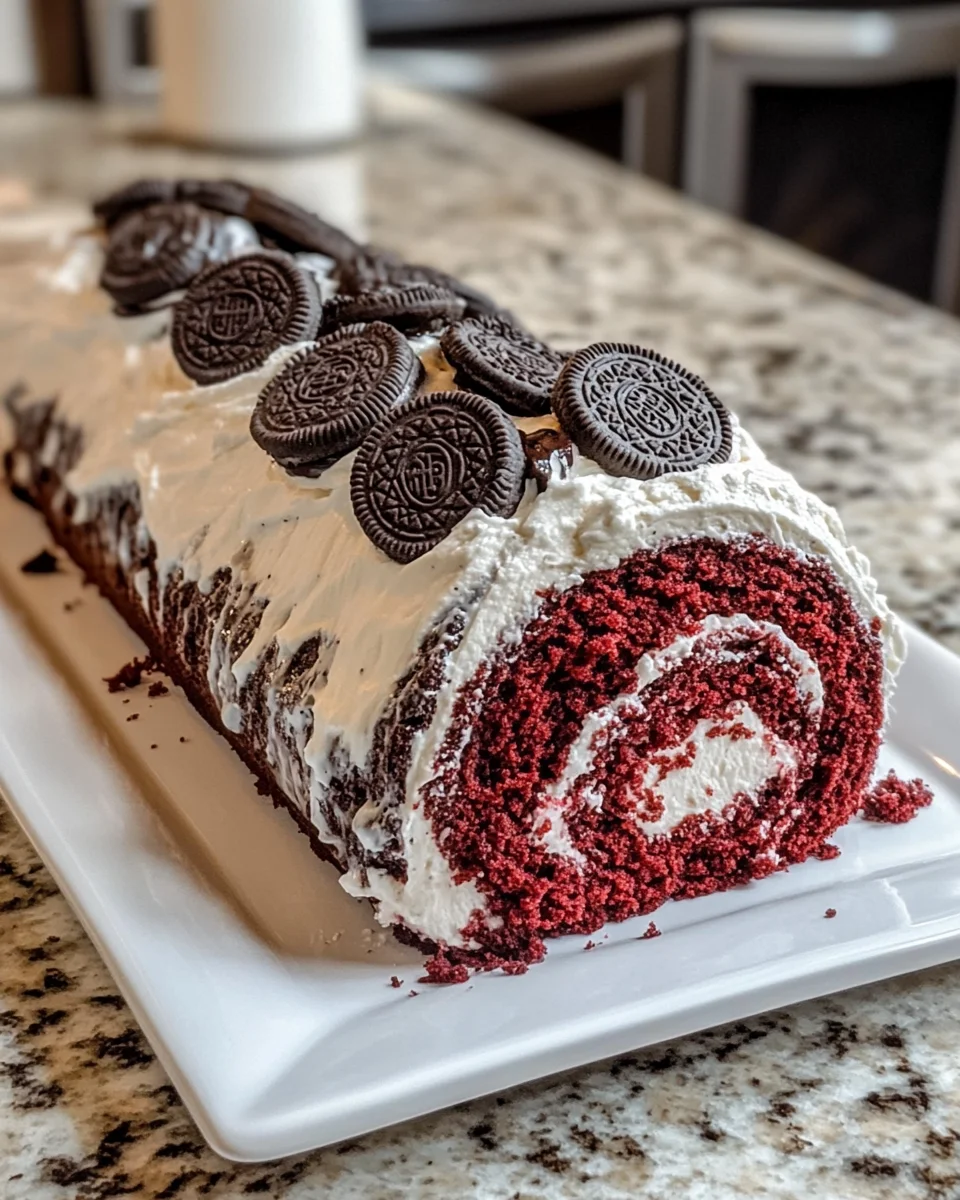
Introduction to Red Velvet Oreo Cake Roll
As a busy mom, I know how precious time can be, especially when it comes to whipping up something special in the kitchen. That’s why I’m excited to share my Red Velvet Oreo Cake Roll recipe with you! This delightful dessert is not only a feast for the eyes but also a quick solution for those days when you want to impress your loved ones without spending hours in the kitchen. With its rich red velvet flavor and creamy Oreo filling, this cake roll is sure to become a family favorite. Let’s dive into this sweet adventure together!
Why You’ll Love This Red Velvet Oreo Cake Roll
This Red Velvet Oreo Cake Roll is a delightful treat that combines ease and flavor in one beautiful package. It’s perfect for busy days when you need a quick dessert that still wows your family and friends. The rich, velvety cake paired with the creamy Oreo filling creates a taste sensation that’s hard to resist. Plus, it’s a fun way to bring a little joy to your kitchen!
Ingredients for Red Velvet Oreo Cake Roll
Gathering the right ingredients is the first step to creating your Red Velvet Oreo Cake Roll. Here’s what you’ll need:
- Eggs: These are the backbone of your cake, providing structure and moisture.
- Granulated Sugar: Sweetness is key! It helps create that lovely, tender crumb.
- Cocoa Powder: Just a touch adds depth to the red velvet flavor, balancing the sweetness.
- Red Food Coloring: This is what gives your cake that iconic red hue. Feel free to use natural alternatives if you prefer.
- All-Purpose Flour: The main dry ingredient that gives the cake its body. You can substitute with gluten-free flour if needed.
- Baking Powder: This leavening agent helps the cake rise, making it light and fluffy.
- Salt: A pinch enhances all the flavors, making them pop!
- Crushed Oreo Cookies: These add a delightful crunch and rich flavor to the filling. You can use any chocolate sandwich cookie if Oreos aren’t available.
- Cream Cheese: The star of the filling! It brings a creamy, tangy flavor that pairs perfectly with the sweetness.
- Butter: Softened butter adds richness to the filling, making it smooth and spreadable.
- Powdered Sugar: This sweetens the filling and gives it a lovely texture.
- Vanilla Extract: A splash of vanilla enhances the overall flavor, making it even more delicious.
- Additional Crushed Oreo Cookies: For garnish, these add a fun finishing touch to your cake roll.
For exact measurements, check the bottom of the article where you can find everything listed for easy printing. Happy baking!

How to Make Red Velvet Oreo Cake Roll
Step 1: Preheat and Prepare
First things first, let’s get that oven preheating to 350°F (175°C). While it warms up, grab a 10×15-inch jelly roll pan and line it with parchment paper. This little trick makes it super easy to remove the cake later. Trust me, you don’t want to wrestle with a sticky cake! Dust the parchment with a bit of powdered sugar to prevent sticking. This will help your Red Velvet Oreo Cake Roll come out perfectly smooth and ready for filling.
Step 2: Mix the Batter
In a large mixing bowl, beat together the eggs and granulated sugar until the mixture is thick and pale. It should look like sunshine in a bowl! Next, add in the cocoa powder, red food coloring, flour, baking powder, and salt. Mix everything until it’s well combined. The batter will be vibrant and smooth, a true testament to the classic red velvet flavor. Don’t be afraid to get in there and mix it well; this is where the magic begins!
Step 3: Bake the Cake
Now it’s time to pour that beautiful batter into your prepared jelly roll pan. Spread it evenly, making sure every corner is covered. Pop it into the oven and bake for 12-15 minutes. Keep an eye on it! You’ll know it’s done when a toothpick inserted in the center comes out clean. The aroma of red velvet will fill your kitchen, making it hard to resist sneaking a taste!
Step 4: Prepare the Cream Cheese Filling
While the cake is baking, let’s whip up that creamy filling. In a separate bowl, beat the softened cream cheese and butter together until smooth and fluffy. Add in the powdered sugar and vanilla extract, mixing until everything is well combined. Finally, fold in the crushed Oreo cookies. This filling is the heart of your Red Velvet Oreo Cake Roll, bringing a delightful crunch and creaminess that pairs perfectly with the cake.
Step 5: Roll the Cake
Once the cake is done baking, carefully turn it out onto a clean kitchen towel that’s been dusted with powdered sugar. Gently peel off the parchment paper. Now, roll the cake up with the towel from the short end. This helps shape it while it cools. Allow it to cool completely while rolled up. This step is crucial for keeping the cake from cracking when you fill it later. Patience is key!
Step 6: Fill and Roll Again
After the cake has cooled, it’s time to unroll it gently. Spread the cream cheese filling evenly over the surface, making sure to cover every inch. Then, roll the cake back up without the towel. This is where the magic happens! The filling will create a luscious center that complements the rich red velvet. Don’t worry if it’s not perfect; it’ll still taste amazing!
Step 7: Chill and Garnish
Now that your cake is rolled up, it’s time to chill it in the refrigerator for at least an hour. This helps it set and makes slicing easier. Once chilled, take it out and sprinkle additional crushed Oreo cookies over the top for a fun garnish. Slice it up, and get ready to enjoy this delicious Red Velvet Oreo Cake Roll. It’s a showstopper that’s sure to impress!
Tips for Success
- Always dust your kitchen towel with powdered sugar to prevent sticking.
- Let the cream cheese filling sit at room temperature for a few minutes for a smoother spread.
- Use a serrated knife to slice the cake roll for clean, even pieces.
- Experiment with different fillings, like chocolate ganache or whipped cream, for a twist.
- Store leftovers in an airtight container in the fridge for up to three days.

Equipment Needed
- 10×15-inch jelly roll pan (or a baking sheet with sides)
- Parchment paper (wax paper can be used in a pinch)
- Mixing bowls (a large one and a medium one)
- Electric mixer (a whisk works too, but it’ll take longer)
- Kitchen towel (a clean dish towel will do)
Variations
- Gluten-Free: Substitute all-purpose flour with a gluten-free blend to make this cake roll suitable for gluten-sensitive friends.
- Chocolate Lovers: Add a layer of chocolate ganache inside the roll for an extra chocolatey experience.
- Nutty Twist: Incorporate chopped walnuts or pecans into the cream cheese filling for a delightful crunch.
- Minty Fresh: Add a few drops of peppermint extract to the cream cheese filling for a refreshing mint flavor.
- Fruit Fusion: Mix in some crushed raspberries or strawberries into the filling for a fruity twist that complements the red velvet.
Serving Suggestions
- Pair your Red Velvet Oreo Cake Roll with a scoop of vanilla ice cream for a delightful contrast.
- Serve with a dollop of whipped cream and fresh berries for a pop of color.
- Enjoy with a cup of coffee or a glass of cold milk to enhance the flavors.
- For a festive touch, garnish with mint leaves or edible flowers.
FAQs about Red Velvet Oreo Cake Roll
Can I make this Red Velvet Oreo Cake Roll ahead of time?
Absolutely! You can prepare the cake roll a day in advance. Just make sure to store it in the refrigerator after chilling. This allows the flavors to meld beautifully, making it even more delicious!
What can I use instead of cream cheese?
If you’re not a fan of cream cheese, you can substitute it with mascarpone cheese or even whipped cream for a lighter filling. Just keep in mind that the flavor will change slightly, but it will still be tasty!
How do I store leftovers?
Leftovers can be stored in an airtight container in the fridge for up to three days. Just make sure to slice it before storing to keep it fresh and easy to serve!
Can I freeze the Red Velvet Oreo Cake Roll?
Yes, you can freeze the cake roll! Wrap it tightly in plastic wrap and then in aluminum foil. It can be frozen for up to three months. Just thaw it in the fridge overnight before serving.
What can I serve with the cake roll?
This cake roll pairs wonderfully with a scoop of vanilla ice cream or a dollop of whipped cream. You can also serve it with fresh berries for a pop of color and flavor!
Final Thoughts
Creating this Red Velvet Oreo Cake Roll is more than just baking; it’s about sharing joy and deliciousness with those you love. The vibrant colors and rich flavors bring a smile to everyone’s face, making it a perfect centerpiece for any gathering. I cherish the moments spent in the kitchen, crafting this delightful treat, and I hope you do too. Whether it’s a special occasion or just a sweet surprise for your family, this cake roll is sure to create lasting memories. So, roll up your sleeves and enjoy the sweet adventure that awaits!
Print
Red Velvet Oreo Cake Roll
- Total Time: 1 hour 35 minutes
- Yield: 8 servings 1x
- Diet: Vegetarian
Description
As a busy mom, I know how precious time can be, especially when it comes to whipping up something special in the kitchen. That’s why I’m excited to share my Red Velvet Oreo Cake Roll recipe with you! This delightful dessert is not only a feast for the eyes but also a quick solution for those days when you want to impress your loved ones without spending hours in the kitchen. With its rich red velvet flavor and creamy Oreo filling, this cake roll is sure to become a family favorite. Let’s dive into this sweet adventure together!
Ingredients
- 3 eggs
- 3/4 cup granulated sugar
- 2 tablespoons cocoa powder
- 2 tablespoons red food coloring
- 3/4 cup all-purpose flour
- 1 teaspoon baking powder
- 1/4 teaspoon salt
- 1 cup crushed Oreo cookies
- 8 oz cream cheese, softened
- 1/4 cup butter, softened
- 1 cup powdered sugar
- 1 teaspoon vanilla extract
- Additional crushed Oreo cookies for garnish
Instructions
- Preheat your oven to 350°F (175°C) and line a 10×15-inch jelly roll pan with parchment paper for easy removal.
- In a large mixing bowl, beat the eggs and granulated sugar together until the mixture becomes thick and pale. Add the cocoa powder, red food coloring, flour, baking powder, and salt, mixing until well combined.
- Pour the batter into the prepared jelly roll pan and spread it evenly. Bake for 12-15 minutes, or until a toothpick inserted comes out clean.
- While the cake is baking, beat the softened cream cheese and butter together until smooth. Add the powdered sugar and vanilla extract, mixing until well combined. Stir in the crushed Oreo cookies.
- Once the cake is done, immediately turn it out onto a clean kitchen towel dusted with powdered sugar. Carefully remove the parchment paper and roll the cake up with the towel from the short end. Allow the cake to cool completely while rolled.
- Once the cake has cooled, unroll it and spread the cream cheese filling evenly over the surface. Roll the cake back up without the towel.
- Chill the cake roll in the refrigerator for at least 1 hour to allow it to set.
- Before serving, sprinkle additional crushed Oreo cookies over the top of the cake roll for garnish. Slice and enjoy this delicious Red Velvet Oreo Cake Roll!
Notes
- Make sure to dust the kitchen towel with powdered sugar to prevent sticking.
- For a richer flavor, let the cream cheese filling sit at room temperature for a few minutes before spreading.
- Prep Time: 20 minutes
- Cook Time: 15 minutes
- Category: Dessert
- Method: Baking
- Cuisine: American
Nutrition
- Serving Size: 1 slice
- Calories: 320
- Sugar: 25g
- Sodium: 200mg
- Fat: 15g
- Saturated Fat: 8g
- Unsaturated Fat: 5g
- Trans Fat: 0g
- Carbohydrates: 40g
- Fiber: 1g
- Protein: 4g
- Cholesterol: 70mg


