
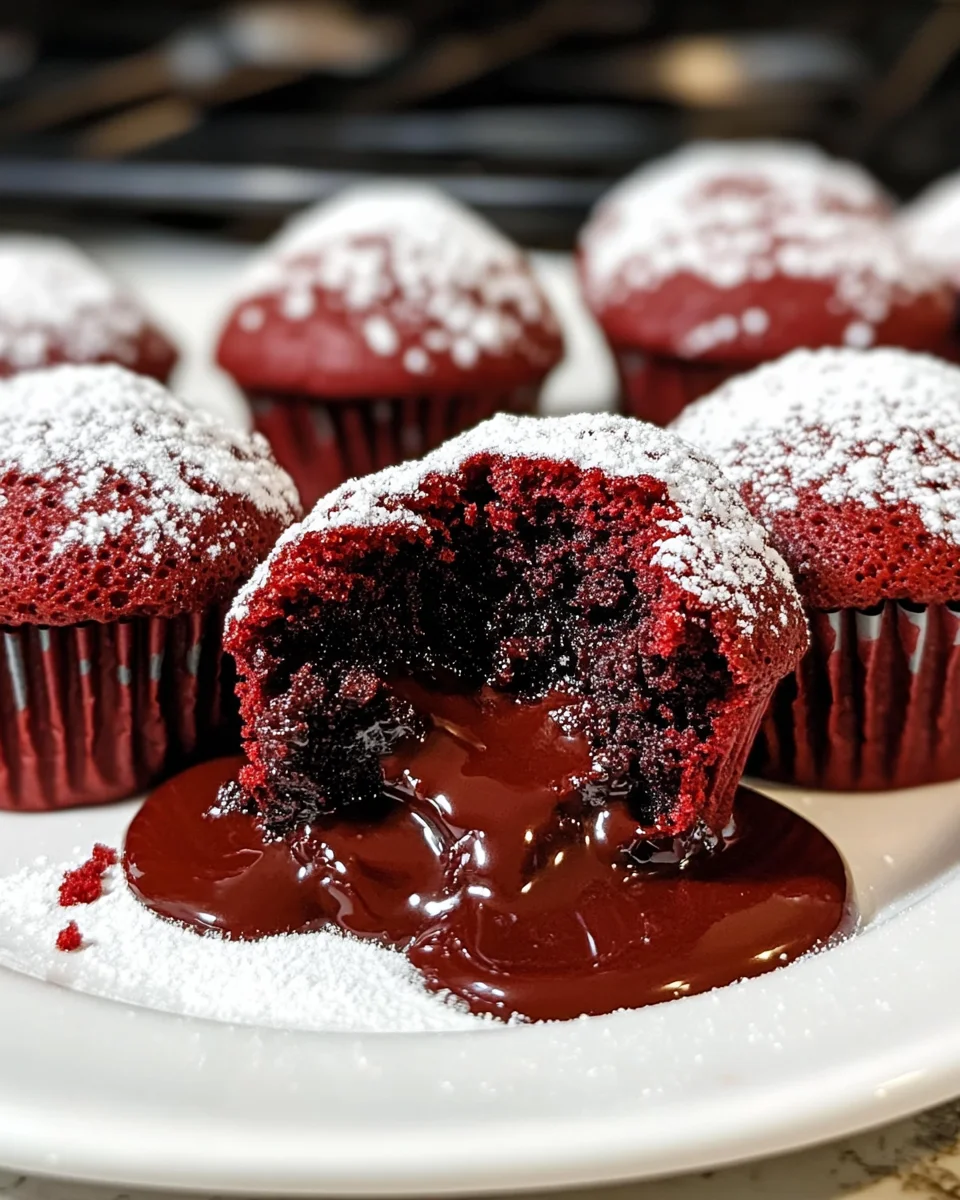
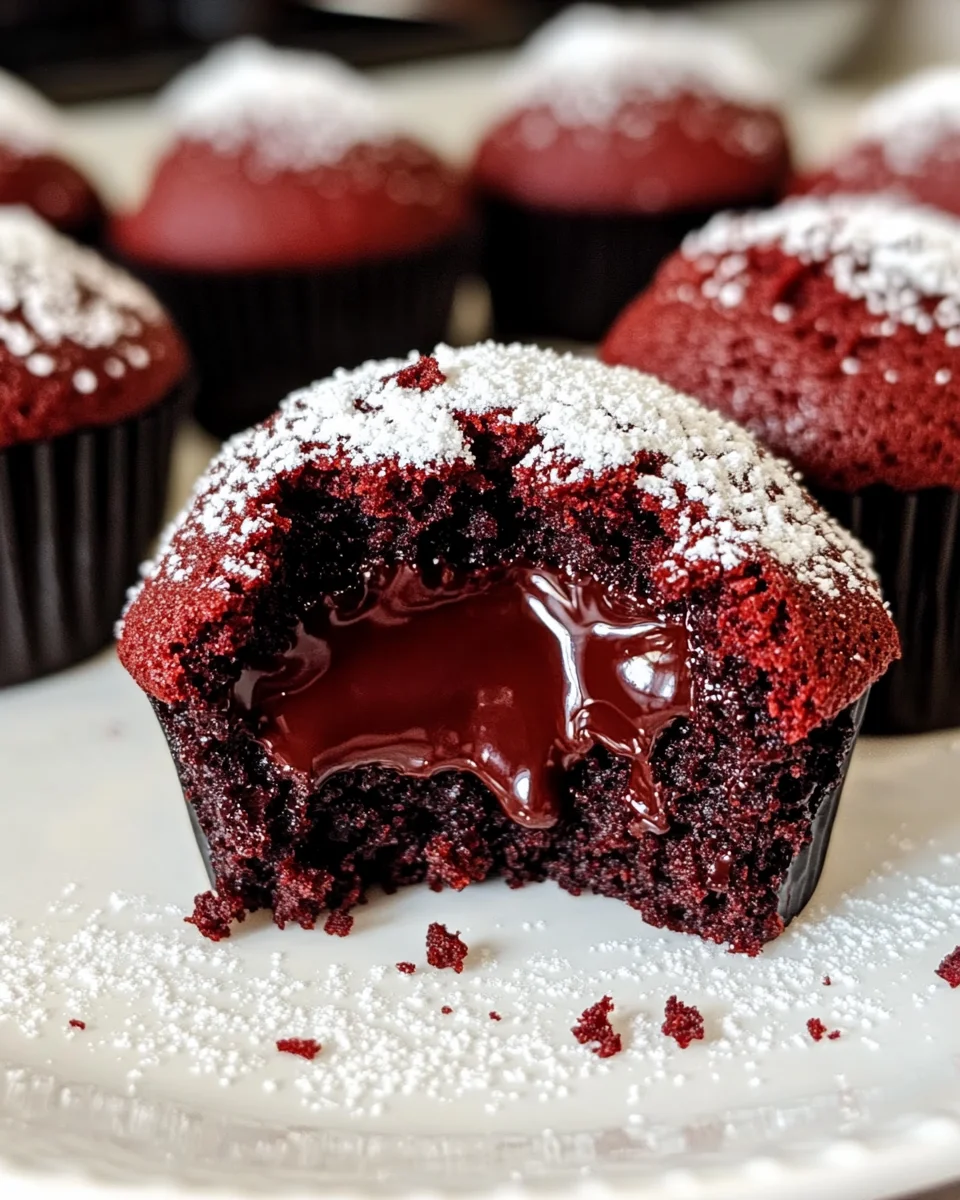
Introduction to Red Velvet Lava Cupcakes
Hey there, fellow dessert lovers! If you’re anything like me, you know that life can get pretty hectic. Between juggling work, family, and everything in between, finding time to whip up something special can feel impossible. That’s where these Red Velvet Lava Cupcakes come in! They’re not just a treat; they’re a delightful escape from the everyday hustle. Imagine biting into a soft, velvety cupcake, only to discover a warm, gooey chocolate center waiting to surprise you. Perfect for impressing guests or simply indulging yourself, these cupcakes are a quick solution for any busy day!
Why You’ll Love This Red Velvet Lava Cupcakes
These Red Velvet Lava Cupcakes are a dream come true for busy moms and professionals alike. They’re incredibly easy to make, taking just a few simple steps to create a dessert that looks and tastes gourmet. The rich, chocolatey center adds a touch of magic, making every bite feel like a special occasion. Plus, they’re perfect for satisfying those sweet cravings without spending hours in the kitchen!
Ingredients for Red Velvet Lava Cupcakes
Let’s dive into the delicious components that make these Red Velvet Lava Cupcakes a true delight! Here’s what you’ll need:
- Red Velvet Cake Mix: This is the star of the show! It provides that signature red color and rich flavor. You can use any brand you love, or even make your own from scratch if you’re feeling adventurous.
- Eggs: Essential for binding the ingredients together, eggs add moisture and richness to the cupcakes. If you’re looking for a vegan option, you can substitute with flax eggs or applesauce.
- Water: This helps to hydrate the cake mix. You can also use milk for a creamier texture.
- Oil: Vegetable oil keeps the cupcakes moist and tender. You can swap it for melted coconut oil or even applesauce for a lighter version.
- Semi-Sweet Baking Chocolate: This is what creates that luscious molten center. Feel free to experiment with dark chocolate for a richer flavor.
- Heavy Cream: Used to make the ganache, it gives that silky smooth texture. If you want a lighter option, you can use half-and-half or even coconut cream.
- Powdered Sugar: A light dusting on top adds a touch of sweetness and elegance. You can skip this if you prefer a less sweet finish.
For exact measurements, check the bottom of the article where you can find everything listed for easy printing. Now, let’s get ready to create some magic in the kitchen!

How to Make Red Velvet Lava Cupcakes
Now that we have our ingredients ready, let’s dive into the fun part: making these Red Velvet Lava Cupcakes! Follow these simple steps, and you’ll be on your way to dessert bliss.
Step 1: Prepare the Chocolate Ganache
First things first, let’s whip up that luscious chocolate ganache. Start by chopping or breaking the semi-sweet baking chocolate into small pieces. This helps it melt evenly. Place the chocolate in a medium-sized bowl. Next, heat the heavy cream over low heat until it just simmers. You can also do this in the microwave for about 45 seconds. Once the cream is hot, pour it over the chocolate. Stir until it’s melted and smooth. If it’s being stubborn, pop it in the microwave for another 15 seconds. Chill this mixture in the fridge until it hardens, which takes at least 2 hours. Trust me, this step is worth the wait!
Step 2: Preheat the Oven
While the ganache is chilling, it’s time to preheat your oven to 350°F. Preheating is crucial because it ensures even baking. While the oven warms up, line your muffin tins with cupcake liners. This makes for easy cleanup and helps the cupcakes come out perfectly shaped. Plus, who doesn’t love a cute cupcake liner?
Step 3: Mix the Cake Batter
Now, let’s get that cake batter ready! Follow the instructions on the red velvet cake mix box. Typically, you’ll need to combine the cake mix with eggs, water, and oil. Mix until everything is well combined, but don’t overdo it! You want a smooth batter without lumps. Fill each cupcake liner about halfway with the batter. Remember, don’t fill them too full, or they’ll overflow while baking. A little less than the recommended amount is just right!
Step 4: Add the Ganache
Once your ganache is chilled and your batter is ready, it’s time for the magic! Remove the ganache from the fridge and scoop out tablespoon-sized balls. I love using a cookie scoop for this—it makes it so easy! Place one ball of ganache right in the center of each cupcake batter. This is what will create that ooey-gooey center we all crave!
Step 5: Bake the Cupcakes
Now, it’s time to bake! Pop the muffin tins into your preheated oven and bake for 20 to 23 minutes. To check for doneness, insert a toothpick into the side of a cupcake, not the center. If it comes out clean, they’re ready! If you see batter on the toothpick, give them a few more minutes. The goal is to have a firm outer layer with that molten center waiting to be unleashed.
Step 6: Cool and Serve
Once baked, let the cupcakes cool in the pans for just a few minutes. Then, carefully remove them from the pans and peel off the liners. For a fun presentation, turn them upside down on a plate and sprinkle with powdered sugar. These Red Velvet Lava Cupcakes are best served warm. If they cool off, just pop them in the microwave for a few seconds to warm them up again. Trust me, your taste buds will thank you!
Tips for Success
- Make sure your chocolate ganache is fully chilled before adding it to the batter for the best lava effect.
- Don’t overfill the cupcake liners; half full is perfect to avoid overflow.
- Use a toothpick to check for doneness, inserting it into the side of the cupcake.
- Serve these cupcakes warm for that delightful molten center.
- Store any leftovers in an airtight container to keep them fresh.
Equipment Needed
- Muffin Tins: Essential for baking the cupcakes. If you don’t have one, a cupcake pan works just as well.
- Mixing Bowls: Use medium-sized bowls for mixing the batter and ganache. Any size will do!
- Cookie Scoop: Perfect for portioning the ganache. A tablespoon works too if you don’t have one.
- Whisk or Mixer: For mixing the batter. A whisk is great for a quick mix!
Variations
- Gluten-Free Option: Use a gluten-free red velvet cake mix to make these cupcakes suitable for those with gluten sensitivities.
- Vegan Twist: Substitute eggs with flax eggs and use plant-based milk and oil to create a vegan-friendly version.
- Flavor Infusion: Add a teaspoon of vanilla extract or almond extract to the batter for an extra layer of flavor.
- Nutty Delight: Fold in some chopped walnuts or pecans into the batter for a delightful crunch.
- Cheesecake Center: Swap the chocolate ganache for a cheesecake filling made with cream cheese, sugar, and vanilla for a different twist.
Serving Suggestions for Red Velvet Lava Cupcakes
- Pair with Ice Cream: A scoop of vanilla or cream cheese ice cream complements the warm cupcakes beautifully.
- Fresh Berries: Serve with strawberries or raspberries for a refreshing contrast to the rich chocolate.
- Presentation: Use elegant plates and garnish with mint leaves for a touch of sophistication.
- Drinks: Enjoy with a glass of cold milk or a warm cup of coffee to enhance the flavors.
FAQs about Red Velvet Lava Cupcakes
Got questions about these delightful Red Velvet Lava Cupcakes? I’ve got you covered! Here are some common queries that might pop up as you embark on this delicious baking adventure.
Can I make the ganache ahead of time?
Absolutely! You can prepare the chocolate ganache a day in advance. Just store it in the fridge until you’re ready to use it. This makes the process even quicker when you’re ready to bake!
What if I don’t have cupcake liners?
No worries! You can grease the muffin tins with butter or cooking spray instead. Just be sure to let the cupcakes cool a bit before removing them to avoid sticking.
How do I know when the cupcakes are done baking?
To check for doneness, insert a toothpick into the side of a cupcake. If it comes out clean, they’re ready! Remember, you want that molten center, so don’t check the middle.
Can I freeze these cupcakes?
Yes, you can freeze them! Just make sure they’re completely cooled. Wrap them tightly in plastic wrap and store in an airtight container. When you’re ready to enjoy, thaw and reheat in the microwave for a few seconds.
What’s the best way to serve these cupcakes?
These Red Velvet Lava Cupcakes are best served warm. A light dusting of powdered sugar adds a lovely touch. Pair them with ice cream or fresh berries for an extra special treat!
Final Thoughts
Creating these Red Velvet Lava Cupcakes is more than just baking; it’s about crafting moments of joy. Each bite reveals a warm, gooey center that feels like a hug from the inside out. Whether you’re celebrating a special occasion or simply treating yourself after a long day, these cupcakes bring a touch of magic to your table. They’re easy to make, yet they impress everyone who takes a bite. So, roll up your sleeves, gather your loved ones, and dive into this delightful adventure. Trust me, the smiles you’ll see will be worth every moment spent in the kitchen!
Print
Red Velvet Lava Cupcakes
- Total Time: 2 hours 38 minutes
- Yield: 12 cupcakes 1x
- Diet: Vegetarian
Description
Hey there, fellow dessert lovers! If you’re anything like me, you know that life can get pretty hectic. Between juggling work, family, and everything in between, finding time to whip up something special can feel impossible. That’s where these Red Velvet Lava Cupcakes come in! They’re not just a treat; they’re a delightful escape from the everyday hustle. Imagine biting into a soft, velvety cupcake, only to discover a warm, gooey chocolate center waiting to surprise you. Perfect for impressing guests or simply indulging yourself, these cupcakes are a quick solution for any busy day!
Ingredients
- 1 approximately 15 ounce box red velvet cake mix plus ingredients called for to make the cake (eggs, water, and oil)
- 8 ounces semi-sweet baking chocolate
- ½ cup heavy cream
- Powdered sugar for garnish
Instructions
- Chop or break up baking chocolate and place in a medium sized bowl. Heat the cream over low heat until it just simmers (or in the microwave for about 45 seconds). Pour over the chocolate. Stir until melted and smooth. (If it’s having a hard time melting, place it in the microwave for about 15 seconds.) Chill chocolate mixture until hardened, at least 2 hours.
- Preheat oven to 350 °F. Line muffin tins with cupcake liners.
- Mix up cake batter according to the box directions. Fill each liner about 1/2 full of batter. (You don’t want to fill them as full as 2/3, or they will spill over. A little less than is called for on the box is good.)
- Remove chocolate ganache from the refrigerator. Scoop 1 tablespoon balls (I used a cookie scoop) and place one ball in the center of each cupcake batter.
- Bake 20-23 minutes, until a toothpick inserted in the side of the cupcake (not the center!) comes out clean. Cool for just a few minutes in the pans.
- When ready to serve, remove the cupcakes from the pan and remove the liners. Turn upside down on a plate and sprinkle with powdered sugar.
- These are best served warm. If they cool off, just heat them for a few seconds in the microwave to heat.
Notes
- Ensure the chocolate ganache is fully chilled before adding to the cupcakes.
- For best results, serve immediately after baking.
- Can be reheated in the microwave for a few seconds if needed.
- Prep Time: 15 minutes
- Cook Time: 23 minutes
- Category: Dessert
- Method: Baking
- Cuisine: American
Nutrition
- Serving Size: 1 cupcake
- Calories: 350
- Sugar: 25g
- Sodium: 200mg
- Fat: 18g
- Saturated Fat: 10g
- Unsaturated Fat: 8g
- Trans Fat: 0g
- Carbohydrates: 40g
- Fiber: 1g
- Protein: 4g
- Cholesterol: 50mg


