Introduction to Mini Cheesecakes: Your Go-to Dessert for Any Occasion
Mini cheesecakes are a delightful treat that combines the creamy richness of a full-sized cheesecake with the convenience of a bite-sized snack. Whether you’re hosting a party, preparing for a family gathering, or just in the mood for something sweet, these miniature desserts are sure to impress. In this comprehensive guide, you’ll discover everything you need to know about making mini cheesecakes, from the essential ingredients and equipment to expert baking tips and creative variations. So, let’s get started and unlock the secrets to baking perfect mini cheesecakes every time!
Essential Ingredients and Equipment
What You Need to Make Mini Cheesecakes
Creating mini cheesecakes isn’t just about having the right ingredients; it’s also about using the proper tools. Below, we’ll explore both aspects to ensure your cheesecakes turn out wonderfully every time.
Key Ingredients Overview
The foundation of any good mini cheesecake recipe begins with the following key ingredients:
- Cream cheese: The star of the show, ensure you use full-fat cream cheese for that rich, smooth texture.
- Eggs: These help bind the mixture together and add to the creaminess.
- Sugar: Essential for sweetness, granulated sugar is most commonly used.
- Vanilla: A splash of vanilla extract enhances the flavor, giving the cheesecakes a classic taste.
- Crust materials: Typically, graham cracker crumbs mixed with butter form the base, but you can get creative here with other options like vanilla wafers or chocolate cookies.
Equipment Checklist
Having the right tools can make the process of making mini cheesecakes much smoother:
- Muffin tins: Essential for shaping your mini cheesecakes, use standard or mini-sized tins depending on your preference.
- Cupcake liners: These prevent sticking and make it easy to remove the cheesecakes after baking.
- Mixing bowls: For combining your ingredients.
- Electric mixer: This is ideal for beating the cream cheese mixture to the right consistency.
- Optional water bath setup: Though not necessary, using a water bath can help prevent cracks and ensure even baking.
By ensuring you have these ingredients and tools at the ready, you’re set up for success in your mini cheesecake adventure. In the next section, we’ll dive into the step-by-step process of making these irresistible treats. For more detailed instructions on baking techniques, check out Epicurious – Cheesecake Baking Tips, where you can find expert advice on creating the perfect dessert.
Classic Mini Cheesecake Recipe
Preparing Your Crust
Before diving into the creamy filling of the mini cheesecakes, you’ll start with the base that holds all that deliciousness together—the crust. Here’s how you can make a simple yet perfect crust:
- Combine the crumbs and sugar: In a bowl, mix graham cracker crumbs with a bit of granulated sugar for sweetness.
- Add melted butter: Pour melted butter over the mixture and stir until all the crumbs are moistened. This helps bind the crumbs together.
- Press into liners: Evenly distribute the crust mixture into your lined muffin tins, pressing down firmly to create a solid base.
Recipe Tip
For a twist, try using crushed vanilla wafers or chocolate cookies instead of graham crackers for a different flavor profile.
Cheesecake Filling and Baking
Now, for the main event—preparing your cheesecake filling and getting those mini delights into the oven:
- Mix the cream cheese: Start with room temperature cream cheese to ensure a smooth mixture. Beat it with an electric mixer until creamy.
- Add sugar and vanilla: Incorporate granulated sugar and a splash of vanilla extract, blending until just combined.
- Incorporate eggs: Add eggs one at a time, mixing on low speed just until incorporated. This prevents overbeating, which can introduce too many air bubbles.
How Long to Bake Mini Cheesecakes
- Preheat your oven to 325°F (163°C).
- Spoon the filling into the crust-lined muffin cups, filling them nearly to the top.
- Bake for about 20-25 minutes, or until the centers are just set and no longer jiggly.
- Cool in the pan on a wire rack for an hour before chilling in the fridge.
Storing Your Mini Cheesecakes
Once cooled, transfer the cheesecakes to an airtight container. They can be refrigerated for up to 4 days, making them a fantastic make-ahead dessert option for any event.
Decoration and Topping Ideas
After your mini cheesecakes have chilled, it’s time to add some flair with toppings:
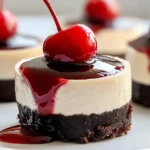
- Classic fruit toppings: Add a spoonful of cherry, blueberry, or strawberry pie filling.
- Fresh fruit: Arrange slices of fresh strawberries, raspberries, or kiwis on top.
- Sauces: Drizzle with chocolate, caramel, or raspberry sauce for a gourmet touch.

Creative Variations of Mini Cheesecakes
Chocolate, Fruit, and No-Bake Options
Once you’ve mastered the basic mini cheesecake recipe, you might want to spice things up with some variations that can add a new twist to your dessert repertoire.
Chocolate Mini Cheesecakes
For chocolate lovers, you can enhance the cheesecake base by adding melted chocolate or cocoa powder to the mix. Consider using a chocolate cookie crust to double down on the chocolatey goodness.
Fruit Swirl Mini Cheesecakes
Incorporate fruit into your mini cheesecakes by swirling fruit puree or jam into the batter before baking. This not only adds flavor but also creates a visually stunning marble effect. Top with fresh fruit slices or a dollop of whipped cream for extra appeal.
No-Bake Mini Cheesecakes
If you’re short on time or prefer not to turn on the oven, no-bake mini cheesecakes are a perfect choice. These involve mixing the cream cheese with condensed milk and lemon juice, then setting the mixture in the fridge. They’re refreshingly cool and creamy, ideal for warm weather gatherings.
Dietary Adaptations
Gluten-Free Mini Cheesecakes
Switch out the regular graham crackers for a gluten-free variety or make a crust using almond flour and butter. This simple swap allows those with gluten sensitivities to enjoy the same delicious dessert.
Vegan Mini Cheesecakes
For a dairy-free version, use vegan cream cheese and a plant-based thickener instead of eggs. These can be just as creamy and satisfying as the traditional recipe and are great for accommodating different dietary needs.
Frequently Asked Questions About Mini Cheesecakes
Handling Common Queries
When it comes to baking mini cheesecakes, several questions often arise. Addressing these can help you refine your technique and assure the best results.
How Long Do Mini Cheesecakes Last?
Stored properly in an airtight container in the refrigerator, mini cheesecakes can last up to 4 days.Should you wish to preserve them for an extended period, they are well-suited for freezing.
Just wrap each cheesecake individually in plastic wrap and store them in a freezer bag for up to 2 months. Thaw overnight in the refrigerator before serving.
Can Mini Cheesecakes Be Frozen?
Absolutely! Freezing mini cheesecakes is a great way to extend their shelf life and enjoy them later. Follow the storage tips mentioned above for best results.
Sinking often occurs if the cheesecakes are overbaked or if there’s a sudden change in temperature. To prevent this, avoid opening the oven door frequently during baking and let them cool gradually in the oven after turning it off.
Can I Make Mini Cheesecakes Without a Muffin Tin?
While a muffin tin is ideal for ensuring uniform size and shape, you can use individual ramekins or small cups as an alternative. Just be mindful of potential variations in baking times.
How Can I Prevent Cracks in My Mini Cheesecakes?
Cracks can be prevented by ensuring the batter is not overmixed (which can incorporate too much air) and by baking the cheesecakes in a moist environment, such as using a water bath as previously mentioned. Also, letting them cool slowly in the oven helps minimize the risk of cracking.
Advanced Baking Techniques for Mini Cheesecakes
Mastering the Finer Details
Enhancing your mini cheesecake baking skills involves understanding and applying some more nuanced techniques.
Water Bath Method Explained
Using a water bath can seem daunting, but it’s quite straightforward and can drastically improve the texture of your cheesecakes by providing a gentle heat and reducing temperature fluctuations.
- Prepare the water bath: Place your muffin tin or ramekins in a larger baking tray. Pour hot water into the tray until it reaches halfway up the sides of the muffin cups or ramekins.
- Bake as usual: The steam from the water will envelop the cheesecakes, allowing them to bake gently and evenly.
Decorative Tips
Presentation can make a big difference in how your mini cheesecakes are received.
- Piping techniques: Using a piping bag with a star nozzle can add an elegant touch to your toppings, whether it’s whipped cream, mousse, or chocolate ganache.
- Garnishes: A simple mint leaf, a sprinkle of powdered sugar, or a few fresh berries can transform the look of your cheesecakes from simple to spectacular.
Taking the time to master these advanced techniques will not only improve the quality of your mini cheesecakes but also increase your confidence in the kitchen, making baking more enjoyable and fulfilling.
Wrapping Up Your Mini Cheesecake Mastery
Celebrating Your Success
Congratulations on embarking on this delightful journey into the world of mini cheesecakes! By now, you’ve learned not just the basics but also some advanced techniques to enhance your baking skills. Whether you’ve followed the classic recipes or experimented with creative variations and decorative tips, you’re well-equipped to impress at any gathering or simply enjoy a sweet treat at home.
Encouragement to Experiment
One of the joys of baking is the endless opportunity for creativity. With the foundation you’ve built, why not experiment with different flavors, textures, and toppings? Try incorporating seasonal fruits, explore exotic spices, or even adapt the recipes to meet various dietary needs. Each batch of mini cheesecakes offers a canvas for your culinary artistry.
Sharing Your Creations
Baking is more enjoyable when you can share the results with others. Consider bringing your mini cheesecakes to social gatherings, offering them at family events, or even packing them as thoughtful homemade gifts. The smiles and compliments you’ll receive are sure to be as satisfying as the cheesecakes themselves.
Continuing Your Baking Journey
With the basics under your belt, consider exploring other baking challenges. Perhaps delve into full-sized cheesecakes, or expand your repertoire to include other types of mini desserts, such as tarts or eclairs. Each recipe you master will not only add to your skill set but also to your confidence in the kitchen.
Final Thoughts
Mini cheesecakes are more than just a dessert; they’re a testament to the joy and creativity of baking. As you continue to refine your techniques and expand your culinary boundaries, remember that every mistake is a learning opportunity and every success a cause for celebration. Keep exploring, keep experimenting, and most importantly, keep enjoying the delicious rewards of your baking endeavors.