
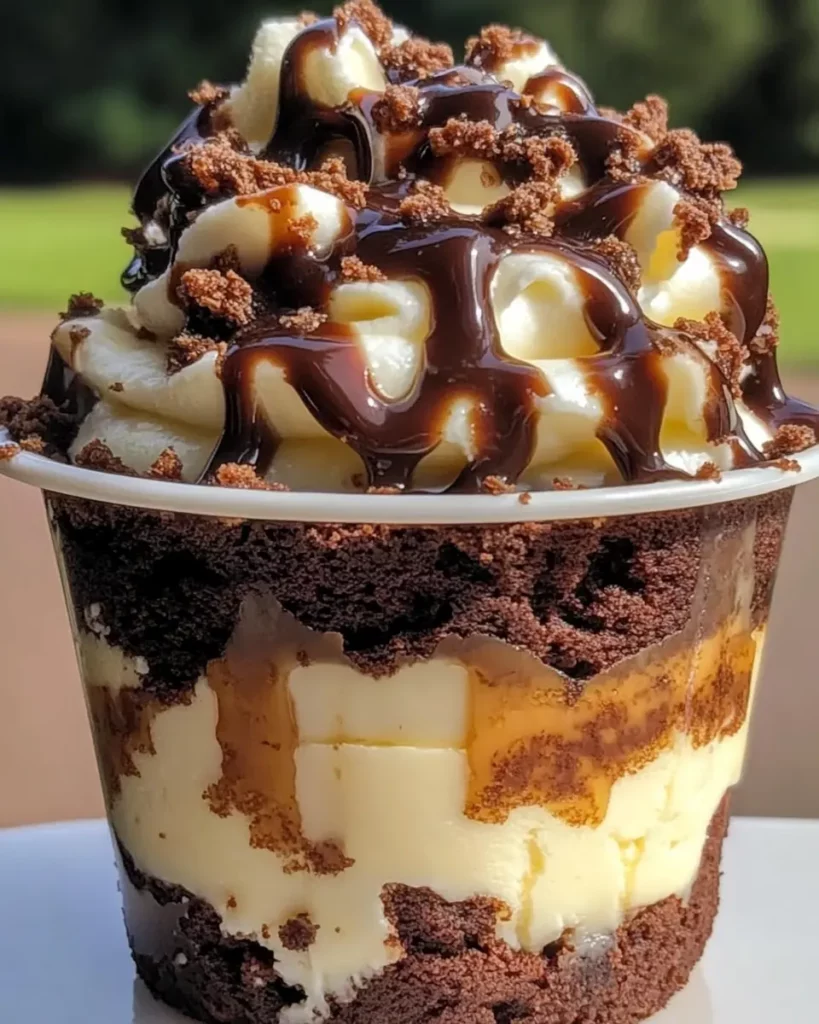
Indulge in these rich and dreamy Loaded Brownie Cheesecake Cups—each bite layers fudgy brownie crumbles, a light and creamy cheesecake filling, and a drizzle of decadent chocolate ganache and gooey caramel. Perfect for parties, dessert tables, or a special treat just because!
Ingredients
Brownie Layer:
- 2 cups crumbled fudgy brownies (use your favorite homemade or store-bought)
Cheesecake Filling:
- 1½ cups cream cheese, softened
- ½ cup powdered sugar
- 1 teaspoon vanilla extract
- 1 cup heavy whipping cream, whipped to stiff peaks
- Toppings:
- Chocolate ganache (melted semi-sweet chocolate + heavy cream)
- Caramel sauce
- Extra brownie crumbs for sprinkling

Instructions
- Prepare the Brownie Base:
Crumble the brownies into small chunks and press about 2 tablespoons into the bottom of each serving cup or jar. Gently press to form a layer. - Make the Cheesecake Filling:
In a large bowl, beat the softened cream cheese until smooth. Add powdered sugar and vanilla extract and mix until fully incorporated. Gently fold in the whipped cream until light and fluffy. - Assemble the Cups:
Spoon or pipe the cheesecake filling over the brownie layer. Smooth the tops. - Add the Toppings:
Drizzle with chocolate ganache and caramel sauce. Sprinkle with extra brownie crumbles for the perfect finish. - Chill:
Refrigerate for at least 2 hours before serving to set.
Notes
- For best results, use a dense, fudgy brownie not cakey.
- Want extra indulgence? Add chopped nuts or mini chocolate chips between the layers.
- These can be made a day ahead and stored in the fridge.
Helpful Tips
- Use fudgy brownies for the best texture. Cakey brownies can crumble too easily and won’t give that rich, chewy bite you’re looking for in the base. You can use homemade or store-bought—whatever saves you time!
- Soften your cream cheese fully before mixing. This ensures a smooth, lump-free filling. Let it sit at room temperature for about 30 minutes before starting.
- Whip the cream to stiff peaks before folding it into the cream cheese mixture. This step adds lightness to the cheesecake layer, giving it that mousse-like texture without needing to bake.
- Chill thoroughly. These cups need at least 2 hours in the fridge to firm up and let the layers set properly. Overnight chilling is even better if you’re prepping ahead!
- Make it fancy. Piping the cheesecake filling into your cups with a piping bag adds a polished touch. No piping bag? A zip-top bag with the corner snipped off works just as well.
- Customize your toppings. Crushed Oreos, chopped nuts, mini chocolate chips, or fresh berries can be delicious additions. Don’t be afraid to get creative!
- Serving tip: These are perfect in clear dessert cups or small mason jars to show off the layers. They’re great for parties and make-ahead desserts.
- Storage: Keep leftovers refrigerated in an airtight container for up to 4 days. The layers hold up beautifully!
Conservation and Storage
To keep your Loaded Brownie Cheesecake Cups tasting fresh and delicious, proper storage is key!
Refrigeration:
These no-bake treats should always be stored in the refrigerator. After assembling, cover each cup tightly with plastic wrap or store them in an airtight container. This prevents the cheesecake layer from drying out and keeps the toppings from becoming runny. Stored properly, they’ll stay fresh for up to 4 days.
Make-Ahead Option:
Planning for a party or gathering? These cups are an excellent make-ahead dessert. You can fully assemble them the night before and store them chilled. For the best presentation, wait to add the chocolate ganache, caramel sauce, and extra brownie crumbs until just before serving to keep the toppings glossy and picture-perfect.
Freezing (Optional):
While these cups are best enjoyed fresh, you can freeze them if needed. To freeze, skip the toppings and place the cups in a freezer-safe container. Wrap them well to avoid freezer burn. When ready to serve, thaw in the fridge overnight, then add toppings just before serving. Note: Freezing may slightly alter the texture of the whipped filling, making it denser.
Transport Tips:
Bringing these to a party or picnic? Store them in a cooler with ice packs to maintain their structure and creaminess while on the go.
Pro Tip: Label your containers with the date so you know how long they’ve been stored. Freshness matters, especially with cream-based desserts!
Serving Suggestions
Loaded Brownie Cheesecake Cups are as fun to serve as they are to eat! These indulgent layered desserts shine on any dessert table and can be easily dressed up or kept simple depending on the occasion.
Individual portions make them perfect for parties, potlucks, and special celebrations. Serve them in clear glass dessert cups, small mason jars, or even decorative plastic cups to show off the beautiful brownie and cheesecake layers. For a fancy touch, garnish with a swirl of whipped cream, a chocolate curl, or a fresh raspberry on top.
Want to elevate the experience? Try serving them slightly chilled but not ice-cold—taking them out of the fridge about 10–15 minutes before serving helps bring out the full creamy texture and rich flavors.
For plated dessert vibes, place the cup on a small dessert plate, add a drizzle of caramel or ganache around the base, and a few chocolate shavings or nuts on the side. It’s a simple way to turn a casual treat into a gourmet presentation!
Hosting a dessert bar? Line them up with mini spoons, assorted toppings (like crushed cookies, chopped nuts, or mini marshmallows), and let guests customize their own cups for a build-your-own experience.
Pairings: These cups go beautifully with a hot espresso, a glass of cold milk, or even a splash of dessert wine or Baileys for an adults-only pairing.
Whether you’re serving them at a cozy gathering or a festive event, these cheesecake cups always impress!
Frequently Asked Questions
Can I use store-bought brownies?
Absolutely! Store-bought fudgy brownies work great and save time. Just make sure they’re rich and chewy, not dry or cakey, for the best texture in your cups.
Can I make these ahead of time?
Yes! These cups are perfect for prepping ahead. You can make and refrigerate them up to 24 hours before serving. For best results, add the toppings (ganache, caramel, and crumbs) right before serving to keep them looking fresh and beautiful.
Can I freeze the cheesecake cups?
You can, but it’s best to freeze them before adding toppings. Wrap the cups tightly and freeze for up to 1 month. Thaw overnight in the refrigerator, then top and serve. Note: freezing may slightly change the texture of the whipped cheesecake filling.
Can I make them gluten-free?
Definitely! Just use your favorite gluten-free brownie recipe or store-bought GF brownies. All other ingredients are naturally gluten-free.
Can I use whipped topping instead of fresh whipped cream?
Yes, whipped topping (like Cool Whip) can be used in place of homemade whipped cream for convenience. Just fold it in gently to keep the filling light and fluffy.
What’s the best way to transport these?
Use jars with lids or cover each dessert cup tightly with plastic wrap. Place in a sturdy container and keep them cool with ice packs during travel.
Conclusion
Loaded Brownie Cheesecake Cups are the kind of dessert that feels like a celebration in every bite rich, creamy, and loaded with indulgent layers of flavor. Whether you’re treating yourself after a long day, serving them at a special gathering, or surprising guests with something a little extra, these no-bake cups never fail to impress.
What makes them so irresistible is their combination of textures: the chewy, fudgy brownie base, the light and fluffy whipped cheesecake filling, and those luscious toppings that make each spoonful a moment to savor. And the best part? They’re easy to make ahead, customizable, and completely fuss-free—no oven required!
These cups are also a great way to use up leftover brownies or get creative with store-bought ones. Plus, they offer a beautiful presentation with very little effort, making them ideal for parties, holidays, or even dessert-for-two nights at home.
So, whether you serve them in elegant glasses or fun jars, topped with ganache, caramel, or your own twist, one thing is guaranteed: there won’t be any leftovers. Every layer tells a sweet story and everyone will be asking for more.
Go ahead, save this recipe, share it with friends, and don’t forget to take a picture before they disappear. These Loaded Brownie Cheesecake Cups are as photogenic as they are delicious.
If you loved these Loaded Brownie Cheesecake Cups, you’ll definitely want to check out this tasty twist:
👉 Brownie Cheesecake Cups by Simply Stacie – A rich, chocolatey dessert featuring layers of fudgy brownies and creamy cheesecake. A must-try for brownie and cheesecake lovers alike!
Print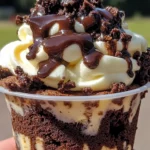
Loaded Brownie Cheesecake Cup – Easy No-Bake Dessert
- Total Time: 2 hours 20 minutes
- Yield: 6–8 cups 1x
- Diet: Vegetarian
Description
Indulge in these rich and dreamy Loaded Brownie Cheesecake Cups—each bite layers fudgy brownie crumbles, a light and creamy cheesecake filling, and a drizzle of decadent chocolate ganache and gooey caramel. Perfect for parties, dessert tables, or a special treat just because!
Ingredients
Brownie Layer:
2 cups crumbled fudgy brownies (use your favorite homemade or store-bought)
Cheesecake Filling:
-
½ cup powdered sugar
-
1 teaspoon vanilla extract
-
1 cup heavy whipping cream, whipped to stiff peaks
1½ cups cream cheese, softened
Toppings:
-
Caramel sauce
-
Extra brownie crumbs for sprinkling
Chocolate ganache (melted semi-sweet chocolate + heavy cream)
Instructions
-
Prepare the Brownie Base:
Crumble the brownies into small chunks and press about 2 tablespoons into the bottom of each serving cup or jar. Gently press to form a layer. -
Make the Cheesecake Filling:
In a large bowl, beat the softened cream cheese until smooth. Add powdered sugar and vanilla extract and mix until fully incorporated. Gently fold in the whipped cream until light and fluffy. -
Assemble the Cups:
Spoon or pipe the cheesecake filling over the brownie layer. Smooth the tops. -
Add the Toppings:
Drizzle with chocolate ganache and caramel sauce. Sprinkle with extra brownie crumbles for the perfect finish.
-
Chill:
Refrigerate for at least 2 hours before serving to set.
Notes
-
For best results, use a dense, fudgy brownie not cakey.
-
Want extra indulgence? Add chopped nuts or mini chocolate chips between the layers.
-
These can be made a day ahead and stored in the fridge.
- Prep Time: 20 minutes
- Cook Time: 0 minutes
- Category: Dessert
- Method: No-Bake
- Cuisine: American
Nutrition
- Serving Size: 1 cup
- Calories: 430
- Sugar: 27g
- Sodium: 170mg
- Fat: 31g
- Saturated Fat: 19g
- Unsaturated Fat: 10g
- Trans Fat: 0g
- Carbohydrates: 35g
- Fiber: 1g
- Protein: 2g
- Cholesterol: 95mg


