

Introduction to Hillbilly Pie (Old-Fashioned Poor Man’s Cherry Pie)
Let me tell you, there’s just something magical about Hillbilly Pie, also known as Old-Fashioned Poor Man’s Cherry Pie. This delightful dessert has a way of bringing warmth and comfort to any table. As a busy mom, I know how precious time can be. That’s why this pie is my go-to dessert for when I want to impress my loved ones without spending hours in the kitchen. Imagine that flaky crust cradling a sweet cherry filling, all topped with a golden layer of goodness. It’s a slice of home, and you’ll love every bite!
Why You’ll Love This Hillbilly Pie
Hillbilly Pie is truly a gem for anyone navigating the chaos of daily life. It’s incredibly easy to make, taking just under two hours from start to finish. With its vibrant cherry filling and flaky crust, every bite is a taste of nostalgia. Plus, it offers a delightful sweetness without breaking the bank. Whether it’s for a family gathering or a quiet night in, this pie brings comfort and joy in every slice.
Ingredients for Hillbilly Pie
Gathering the right ingredients is the first step to making your Hillbilly Pie a success! Here’s what you’ll need to whip up this crowd-pleasing dessert:
- All-purpose flour: Essential for both the pie crust and the topping, it helps create that lovely flaky texture.
- Salt: Just a pinch enhances the flavor, balancing the sweet taste of the cherries.
- Unsalted butter: The star player! Cold and cubed, it creates the perfect buttery, flaky crust.
- Ice water: This cold addition keeps the dough from getting tough and ensures a tender crust.
- Cherry pie filling: The heart of this recipe! Using canned cherry pie filling saves time; look for one with whole cherries for that homemade touch.
- Cornstarch: A thickener that makes the cherry filling glossy and prevents it from being too runny.
- Sugar: A little granulated sugar adds just the right sweetness to the batter topping.
- Baking powder: This helps the topping rise, creating a nice, airy texture.
- Milk: Adds moisture to the topping, resulting in a tender crumb.
- Melted butter: Drizzling in melted butter makes the topping rich and flavorful.
If you’re feeling adventurous, you can swap the cherry filling for other fruits like blueberries or peaches. Don’t forget that exact quantities are at the bottom of the article, available for printing, making it easy for you to dive right into this culinary adventure!
How to Make Hillbilly Pie
Step 1: Prepare the Pie Crust
Let’s get our hands a little messy! Start by mixing one and a half cups of all-purpose flour with half a teaspoon of salt in a bowl. Next, cut in half a cup of very cold, cubed unsalted butter until the mixture becomes crumbly, resembling sand. This step is crucial because that cold butter is what gives our crust its lovely flakiness. Now, slowly add three to four tablespoons of ice water, one tablespoon at a time. Mix until the dough just comes together but avoid overworking it. Once it’s ready, press the dough into an 8×8 inch baking dish. Don’t forget to chill the crust in the fridge for about 15 minutes to keep that perfect texture!
Step 2: Preheat the Oven
While the crust is chilling, go ahead and preheat your oven to 350°F (175°C). Preheating is essential. It ensures a beautifully baked crust instead of a soggy one. Believe me, your pie deserves this little patience!
Step 3: Bake the Crust
Now it’s time for the dough to shine! Place your chilled crust in the preheated oven and bake for about 10 minutes. You’re looking for it to be set but not browned, so keep an eye on it. The goal here is to maintain that beautiful flaky texture, allowing it to act as a sturdy base for the cherry goodness that’s about to come!
Step 4: Prepare the Cherry Filling
Once the crust is out of the oven, it’s cherry time! Grab your can of cherry pie filling and stir in one tablespoon of cornstarch until it’s smooth and glossy. This step is important. The cornstarch helps thicken the filling, ensuring it doesn’t overwhelm our lovely crust. Spoon that vibrant filling evenly over the warm crust. This will help meld the flavors together beautifully!
Step 5: Create the Topping
Let’s whip up the topping! In a bowl, mix one cup of all-purpose flour, half a cup of granulated sugar, and half a teaspoon of baking powder. This blend will create a fluffy, sweet batter. Gradually stir in half a cup of milk, followed by another half cup of melted butter. You want a thick, pourable batter that’s silky and rich. The texture should remind you of a cake batter—it will rise and create that delightful golden topping that is the hallmark of this old-fashioned pie!
Step 6: Assemble the Pie
Grab your bowl of batter and gently pour it over the cherry filling. Don’t just dump it all at once; let it settle naturally into rustic waves. This lovely layering will make each slice a visual treat as well as a delicious one. Make sure the cherries are covered, but allow some peek-throughs for charm!
Step 7: Bake the Pie
It’s baking time again! Place your assembled pie back in the oven and bake uncovered for 40 to 45 minutes. You’ll know it’s ready when the topping is deeply golden and the cherries are bubbling happily around the edges. It’s that delightful time when the kitchen is filled with the sweetest aroma. Keep an eye on it; every oven is a little different!
Step 8: Rest the Pie
Oh, the waiting game! After removing the pie from the oven, let it rest for at least 30 minutes. This step is crucial! It helps the filling set, ensuring clean slices and an inviting appearance. Patience is key here; trust me, this will be worth the wait!
Tips for Success
- Ensure your butter is very cold for a flaky crust.
- Don’t overmix the dough; a little crumbly is perfect.
- Chill your pie crust before baking to keep its shape.
- Let the pie rest long enough to set; it’ll slice cleaner.
- Feel free to experiment with different fruit fillings for variety.
Equipment Needed
- Mixing bowls: A large for mixing crust and filling, a medium for the topping.
- 8×8-inch baking dish: Perfect for this pie; a pie plate works too!
- Whisk and spatula: Essential for mixing and spreading.
- Baking sheet: Use it to catch any drips; a cookie sheet works well.
Variations on Hillbilly Pie
- Berry Medley: Replace the cherry filling with a mix of blueberries, raspberries, and blackberries for a delicious berry pie.
- Peach Perfection: Swap the cherries for sliced peaches for a sweet summer twist.
- Chocolate Delight: Add chocolate chips to the topping for a rich, decadent flavor that pairs beautifully with cherries.
- Nutty Addition: Sprinkle chopped nuts, like walnuts or pecans, into the topping for an added crunch.
- Gluten-Free Version: Use a gluten-free flour blend in place of all-purpose flour for a gluten-free treat; ensure the pie filling is also gluten-free!
- Lower Sugar Option: Substitute the granulated sugar with a natural sweetener like honey or maple syrup to cut down on sugar.
Serving Suggestions for Hillbilly Pie
- Serve warm with a scoop of vanilla ice cream melting on top for a delightful contrast.
- Pair it with freshly whipped cream for an extra touch of elegance.
- A side of tart yogurt can balance the pie’s sweetness beautifully.
- For drinks, consider a cup of coffee or sweet tea for a cozy feeling.
FAQs about Hillbilly Pie
Can I use fresh cherries instead of canned?
Absolutely! Fresh cherries will bring a vibrant flavor. Just make sure to pit and slice them, and add some sugar to sweeten since they can be less sweet than canned filling.
How long will Hillbilly Pie last?
This pie can be stored in the refrigerator for up to four days. Just cover it with plastic wrap to keep it fresh. Though, I doubt it will last that long—it’s too delicious!
Can I freeze Hillbilly Pie?
Yes, you can freeze it! Just let it cool completely, then wrap it tightly in plastic wrap and aluminum foil. It lasts for about three months in the freezer.
What can I substitute for the butter?
If you’re looking for a dairy-free option, try coconut oil or a plant-based butter alternative. These work well in the crust and topping, keeping that delightful taste.
What makes this pie an “old-fashioned” recipe?
Hillbilly Pie is considered old-fashioned because it uses simple, accessible ingredients, much like desserts from days gone by. It captures the essence of comfort food that brings back memories of family kitchens!
Final Thoughts
There’s something truly special about creating a delicious Hillbilly Pie. It’s not just a treat; it’s a reminder of simpler times. Whether you’re making it for a family dinner or a quiet evening at home, each slice is filled with love and nostalgia. Plus, with its ease and delightful taste, this recipe turns hectic days into cherished memories. I hope you enjoy every moment of baking and savoring your own Hillbilly Pie. So, gather your loved ones, share a slice, and embrace the joy of homemade goodness. Happy baking!
Print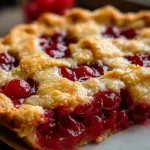
Hillbilly Pie
- Total Time: 1 hour 55 minutes
- Yield: 8 servings 1x
- Diet: Vegetarian
Description
Hillbilly Pie, also known as Old-Fashioned Poor Man’s Cherry Pie, is a delightful dessert that combines a flaky crust with sweet cherry filling and a rustic, golden topping.
Ingredients
- 1½ cups all-purpose flour
- ½ teaspoon salt
- ½ cup unsalted butter, cold and cubed
- 3–4 tablespoons ice water
- 1 can (21 oz) cherry pie filling (with whole cherries)
- 1 tablespoon cornstarch
- 1 cup all-purpose flour
- ½ cup granulated sugar
- ½ teaspoon baking powder
- ½ cup milk
- ½ cup unsalted butter, melted
Instructions
- In a bowl, mix 1½ cups flour with salt. Cut in the cold butter until crumbly, then add ice water one tablespoon at a time until the dough just comes together. Press evenly into an 8×8-inch baking dish and chill. (15 minutes ⏱️)
- Preheat the oven to 350°F (175°C) while the crust chills. (5 minutes ⏱️)
- Bake the chilled crust just until set but not browned, keeping it sturdy and flake-filled. (10 minutes ⏱️)
- Stir the cornstarch into the cherry pie filling until smooth and glossy, then spoon evenly over the warm crust. (5 minutes ⏱️)
- In a bowl, whisk together 1 cup flour, sugar, and baking powder. Stir in the milk, then the melted butter, creating a thick but pourable batter. (5 minutes ⏱️)
- Gently pour the batter over the cherries, letting it settle naturally into rustic waves without spreading too much. (3 minutes ⏱️)
- Bake uncovered until the topping is deeply golden and the cherries are bubbling around the edges. (40–45 minutes ⏱️)
- Let the pie rest so it finishes setting and slices cleanly, revealing those beautiful layers. (30 minutes ⏱️)
Notes
- For best results, ensure the butter is very cold before using it in the crust.
- This pie can be served warm or at room temperature.
- Feel free to substitute the cherry filling with other fruit fillings if desired.
- Prep Time: 15 minutes
- Cook Time: 70 minutes
- Category: Dessert
- Method: Baking
- Cuisine: American
Nutrition
- Serving Size: 1 slice
- Calories: 320
- Sugar: 15g
- Sodium: 150mg
- Fat: 15g
- Saturated Fat: 8g
- Unsaturated Fat: 7g
- Trans Fat: 0g
- Carbohydrates: 45g
- Fiber: 2g
- Protein: 3g
- Cholesterol: 30mg