
Introduction to Double Chocolate Ricotta Marble Cake
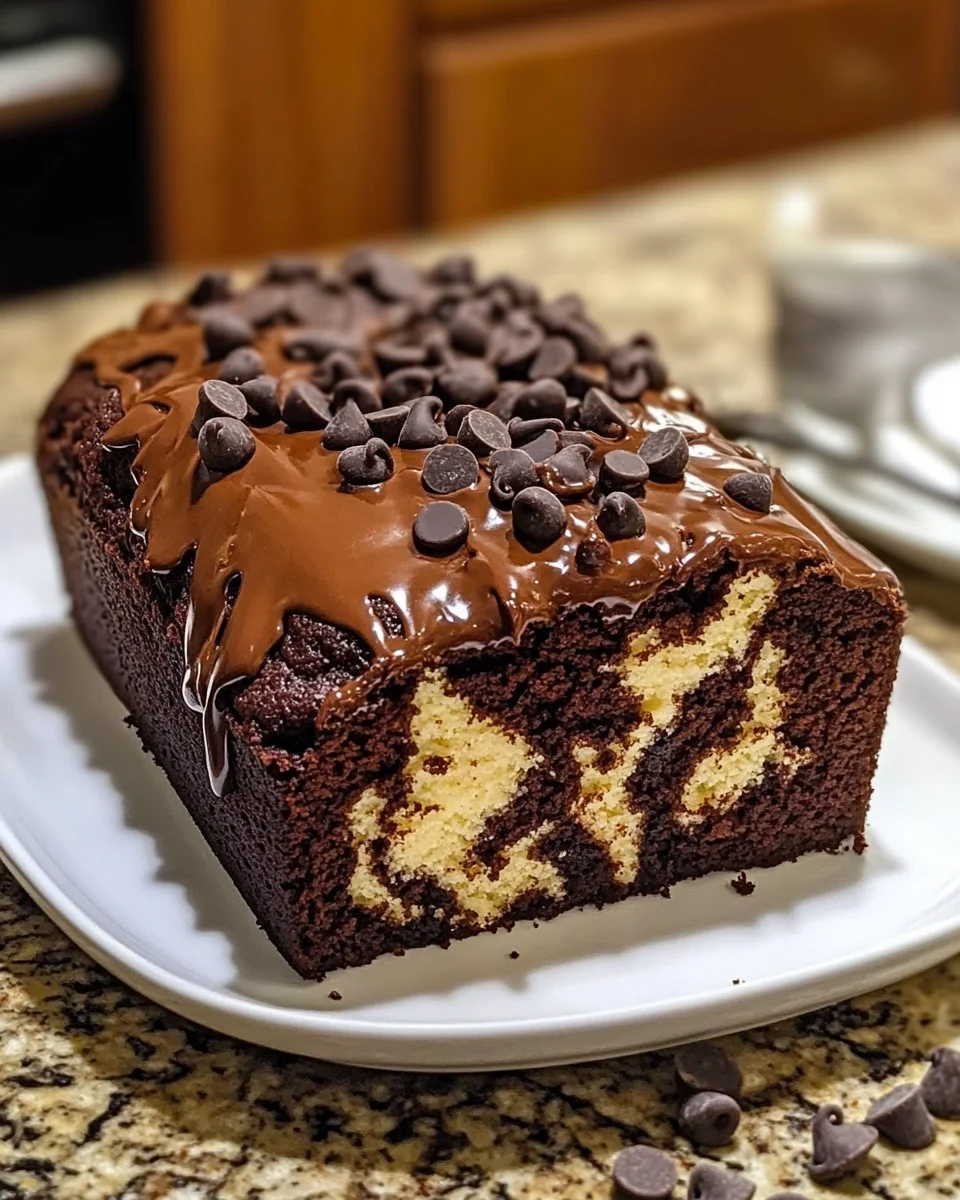
As a busy mom, I know how precious time can be, especially when it comes to baking. That’s why I absolutely adore this Double Chocolate Ricotta Marble Cake! It’s the perfect blend of rich chocolate and creamy ricotta, making it a delightful treat for any occasion. Whether you’re looking to impress guests or simply want to indulge after a long day, this cake is your go-to solution. With its moist texture and beautiful marbled appearance, it’s sure to bring smiles to your loved ones’ faces. Trust me, this cake is a slice of happiness!
Why You’ll Love This Double Chocolate Ricotta Marble Cake
This Double Chocolate Ricotta Marble Cake is a dream come true for busy cooks like us! It’s incredibly easy to whip up, taking just over an hour from start to finish. The combination of rich chocolate and creamy ricotta creates a flavor explosion that’s simply irresistible. Plus, it’s a fantastic way to impress family and friends without spending all day in the kitchen. Who wouldn’t love a slice of this decadent delight?
Ingredients for Double Chocolate Ricotta Marble Cake
Gathering the right ingredients is key to creating this delicious Double Chocolate Ricotta Marble Cake. Here’s what you’ll need:
- All-purpose flour: The backbone of the cake, providing structure and texture.
- Baking powder: This helps the cake rise, giving it that lovely fluffy texture.
- Baking soda: Works alongside baking powder for an extra lift.
- Salt: Enhances the flavors, balancing the sweetness of the cake.
- Unsweetened cocoa powder: Adds rich chocolate flavor without extra sugar.
- Ricotta cheese: The star ingredient! It adds moisture and a creamy texture.
- Granulated sugar: Sweetens the cake and helps create a tender crumb.
- Unsalted butter: Provides richness and flavor; make sure it’s softened for easy mixing.
- Eggs: Bind the ingredients together and add moisture.
- Vanilla extract: A splash of this adds warmth and depth to the flavor.
- Milk: Keeps the batter moist and helps achieve the right consistency.
- Dark chocolate chips: For topping, they add a delightful chocolatey crunch.
- Melted dark chocolate: Drizzled on top for an extra layer of decadence.
For those looking to switch things up, consider using whole wheat flour for a healthier twist or swapping in Greek yogurt for the ricotta. You can find all the exact measurements at the bottom of the article, ready for printing!

How to Make Double Chocolate Ricotta Marble Cake
Step 1: Preheat and Prepare
First things first, preheat your oven to 350°F (175°C). While it warms up, grab your loaf or bundt pan and grease it well. A light dusting of flour will help the cake slide out easily once it’s baked. Trust me, you don’t want a cake disaster!
Step 2: Mix Dry Ingredients
In a large bowl, whisk together the all-purpose flour, baking powder, baking soda, salt, and cocoa powder. This step is crucial for even distribution of the leavening agents. A well-mixed dry blend sets the stage for a perfectly risen Double Chocolate Ricotta Marble Cake!
Step 3: Cream Butter and Sugar
In another bowl, beat the softened unsalted butter and granulated sugar together until it’s light and fluffy. This process usually takes about 3-5 minutes. The fluffiness is key to a tender cake, so don’t rush it! You’ll love the sweet aroma filling your kitchen.
Step 4: Incorporate Eggs and Ricotta
Now, add the eggs one at a time, mixing well after each addition. Then, gently fold in the ricotta cheese and vanilla extract. This creamy mixture is what makes the cake so moist and delicious. It’s like a hug in cake form!
Step 5: Combine Wet and Dry Ingredients
Gradually add the dry ingredients to the wet mixture, alternating with the milk. Start and end with the dry ingredients. Mix until just combined; overmixing can lead to a dense cake. We want a light, airy texture for our Double Chocolate Ricotta Marble Cake!
Step 6: Create the Marble Effect
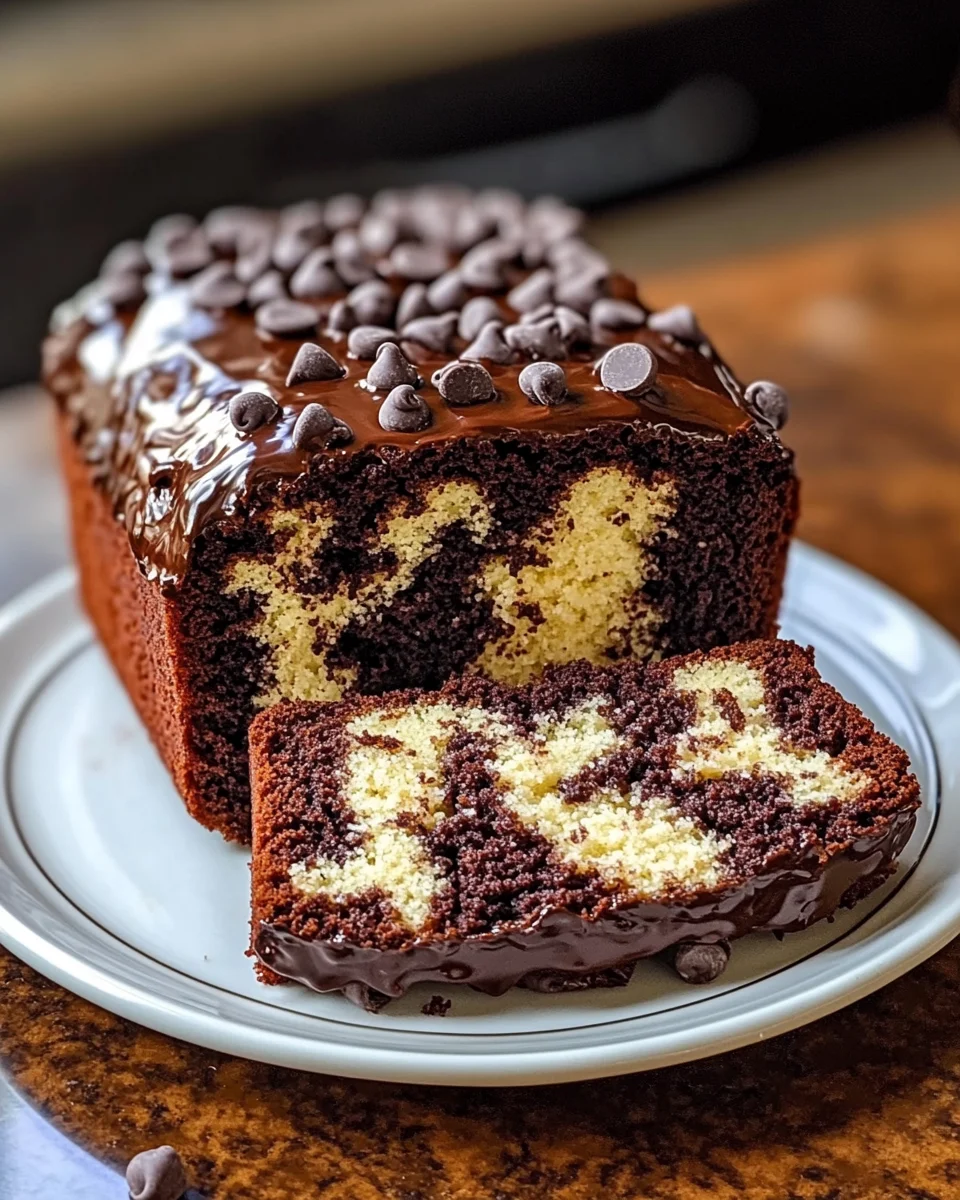
Divide the batter into two bowls. In one bowl, add a bit more cocoa powder and a splash of milk for the chocolate layer. Alternate spoonfuls of the vanilla and chocolate batters into your prepared pan. Use a knife to swirl them together gently, creating a beautiful marbled effect.
Step 7: Bake the Cake
Pop your cake into the preheated oven and bake for 50-55 minutes if using a loaf pan, or 45-50 minutes for a bundt pan. To check for doneness, insert a toothpick into the center. If it comes out clean, your cake is ready to shine!
Step 8: Cool and Drizzle
Once baked, let the cake cool in the pan for about 10 minutes. Then, transfer it to a wire rack to cool completely. Drizzle the melted dark chocolate over the top and sprinkle with chocolate chips. This final touch makes it irresistible!
Tips for Success
- Use room temperature ingredients for better mixing.
- Don’t skip the greasing and flouring of the pan; it prevents sticking.
- For a richer flavor, opt for high-quality cocoa powder and chocolate.
- Let the cake cool completely before drizzling chocolate to avoid melting.
- Experiment with add-ins like nuts or dried fruit for extra texture.
Equipment Needed
- Loaf or Bundt Pan: Either works well; choose based on your preference.
- Mixing Bowls: A set of various sizes is handy for mixing ingredients.
- Whisk: Essential for blending dry ingredients smoothly.
- Electric Mixer: Makes creaming butter and sugar a breeze.
- Spatula: Perfect for folding in ingredients and scraping the bowl.
Variations
- Gluten-Free: Substitute all-purpose flour with a gluten-free blend for a delicious gluten-free version.
- Healthier Option: Use whole wheat flour and reduce the sugar for a lighter take on this cake.
- Fruit Add-Ins: Fold in some fresh raspberries or chopped cherries for a fruity twist.
- Nutty Delight: Add chopped walnuts or pecans for a crunchy texture that complements the cake.
- Vegan Version: Replace eggs with flax eggs and use plant-based butter and milk for a vegan-friendly treat.
Serving Suggestions
- Pair slices of the Double Chocolate Ricotta Marble Cake with a scoop of vanilla ice cream for a delightful contrast.
- Serve with fresh berries on the side for a pop of color and freshness.
- A drizzle of caramel sauce adds an extra layer of sweetness.
- Enjoy with a cup of coffee or tea for a cozy afternoon treat.
- For a festive touch, dust with powdered sugar before serving.
FAQs about Double Chocolate Ricotta Marble Cake
Can I use low-fat ricotta cheese?
Absolutely! While full-fat ricotta adds richness, low-fat ricotta can still work well in this Double Chocolate Ricotta Marble Cake. Just keep in mind that the texture might be slightly different.
How do I store leftovers?
Store any leftover cake in an airtight container at room temperature for up to three days. If you want to keep it longer, wrap it tightly in plastic wrap and freeze for up to two months.
Can I make this cake ahead of time?
Yes! This cake actually tastes even better the next day. You can bake it a day in advance and let it sit covered at room temperature. Just drizzle the chocolate right before serving.
What can I substitute for eggs?
If you need an egg substitute, try using flax eggs. Mix one tablespoon of ground flaxseed with three tablespoons of water for each egg. Let it sit for a few minutes until it thickens.
Can I add other flavors to the cake?
Definitely! Feel free to experiment with flavors like orange zest or almond extract. These can add a delightful twist to your Double Chocolate Ricotta Marble Cake!
Final Thoughts
Every time I bake this Double Chocolate Ricotta Marble Cake, it feels like a warm hug from the inside out. The rich chocolate mingling with the creamy ricotta creates a symphony of flavors that dances on your taste buds. It’s not just a cake; it’s a celebration of life’s little moments. Whether it’s a family gathering or a quiet evening at home, this cake brings joy and comfort. I hope you find as much happiness in baking and sharing it as I do. So, roll up your sleeves and let the magic unfold in your kitchen!
Print
Double Chocolate Ricotta Marble Cake
- Total Time: 1 hour 15 minutes
- Yield: 12 servings 1x
- Diet: Vegetarian
Description
As a busy mom, I know how precious time can be, especially when it comes to baking. That’s why I absolutely adore this Double Chocolate Ricotta Marble Cake! It’s the perfect blend of rich chocolate and creamy ricotta, making it a delightful treat for any occasion. Whether you’re looking to impress guests or simply want to indulge after a long day, this cake is your go-to solution. With its moist texture and beautiful marbled appearance, it’s sure to bring smiles to your loved ones’ faces. Trust me, this cake is a slice of happiness!
Ingredients
- 2 cups all-purpose flour
- 1 ½ tsp baking powder
- ½ tsp baking soda
- ¼ tsp salt
- ½ cup unsweetened cocoa powder
- 1 cup ricotta cheese (full-fat recommended)
- 1 cup granulated sugar
- ½ cup unsalted butter, softened
- 3 large eggs
- 1 tsp vanilla extract
- ¾ cup milk
- ½ cup dark chocolate chips (for topping)
- ½ cup melted dark chocolate (for drizzle)
Instructions
- Preheat your oven to 350°F (175°C). Grease and flour a loaf or bundt pan.
- In a bowl, whisk together the flour, baking powder, baking soda, salt, and cocoa powder. Set aside.
- In a large mixing bowl, beat the butter and sugar until light and fluffy.
- Mix in the eggs one at a time, followed by the ricotta cheese and vanilla extract until well combined.
- Gradually add the dry ingredients, alternating with milk, until the batter is smooth.
- Divide the batter into two bowls. Add cocoa powder and an extra splash of milk to one half for the chocolate layer. Alternate spoonfuls of vanilla and chocolate batter into the pan, then use a knife to swirl gently.
- Bake for 50-55 minutes (for a loaf pan) or 45-50 minutes (for a bundt pan), until a toothpick inserted in the center comes out clean.
- Let the cake cool before drizzling melted dark chocolate over the top and sprinkling with chocolate chips.
- Slice and enjoy this rich, moist, and chocolatey masterpiece.
Notes
- For a richer flavor, use high-quality dark chocolate.
- Store leftovers in an airtight container at room temperature for up to 3 days.
- This cake can be frozen for up to 2 months; wrap it tightly in plastic wrap.
- Prep Time: 20 minutes
- Cook Time: 50-55 minutes
- Category: Dessert
- Method: Baking
- Cuisine: American
Nutrition
- Serving Size: 1 slice
- Calories: 350
- Sugar: 20g
- Sodium: 150mg
- Fat: 15g
- Saturated Fat: 8g
- Unsaturated Fat: 5g
- Trans Fat: 0g
- Carbohydrates: 45g
- Fiber: 2g
- Protein: 6g
- Cholesterol: 70mg


