
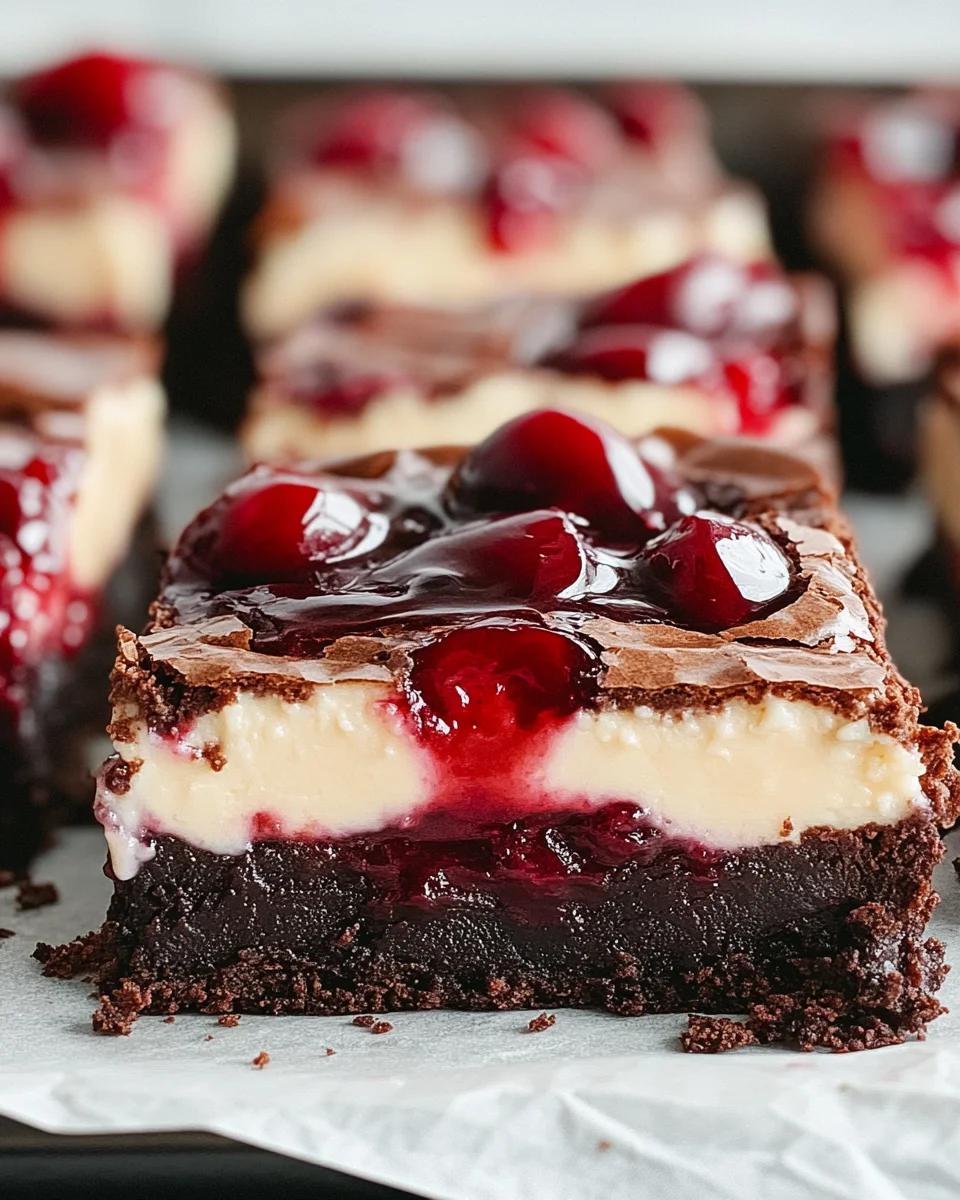
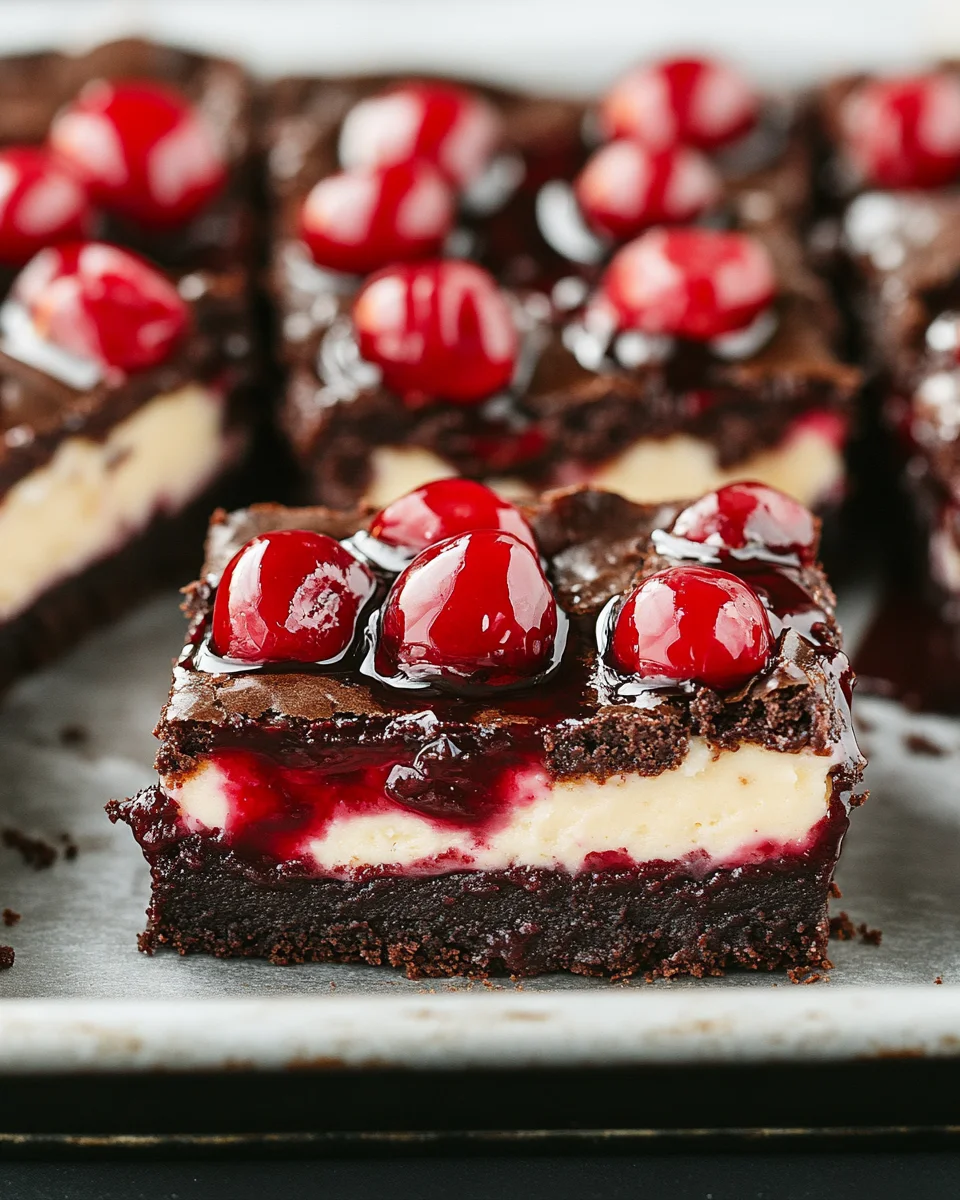
Introduction to Cherry Cheesecake Brownies
As a busy mom, I know how precious time can be, especially when it comes to whipping up something sweet. That’s why I’m excited to share my Cherry Cheesecake Brownies with you! These delightful treats combine the rich, fudgy goodness of brownies with a creamy cheesecake layer, all topped with luscious cherry filling. They’re perfect for a quick dessert after dinner or a special treat to impress your loved ones. Trust me, once you try these brownies, they’ll become a go-to recipe in your kitchen!
Why You’ll Love This Cherry Cheesecake Brownies
These Cherry Cheesecake Brownies are a dream come true for busy lives! They’re quick to prepare, taking just 20 minutes of your time. The combination of rich chocolate and creamy cheesecake is simply irresistible. Plus, they’re a hit with both kids and adults alike, making them perfect for family gatherings or last-minute potlucks. You’ll love how easy they are to make and how they disappear in a flash!
Ingredients for Cherry Cheesecake Brownies
Gathering the right ingredients is the first step to creating these Cherry Cheesecake Brownies. Here’s what you’ll need:
- Unsalted butter: This adds richness and moisture to the brownies. Melt it for a smooth batter.
- Granulated sugar: Sweetens the brownies and cheesecake, balancing the flavors perfectly.
- Eggs: Essential for binding the ingredients together, giving the brownies their structure.
- Vanilla extract: A splash of this adds a warm, inviting flavor to both layers.
- Unsweetened cocoa powder: This is what gives the brownies their deep chocolate flavor. Use high-quality cocoa for the best results.
- All-purpose flour: Helps create a tender texture in the brownies, making them chewy and delicious.
- Salt: Just a pinch enhances the sweetness and balances the flavors.
- Baking powder: This leavening agent helps the brownies rise slightly, giving them a nice texture.
- Cream cheese: The star of the cheesecake layer! It should be softened for easy mixing.
- Cherry pie filling: This adds a burst of fruity flavor and a beautiful topping. Strain it to avoid excess liquid.
For exact measurements, check the bottom of the article where you can find everything listed for easy printing. Feel free to get creative! You can swap the cherry filling for other fruits or even add a sprinkle of nuts for extra crunch. The possibilities are endless!

How to Make Cherry Cheesecake Brownies
Now that you have your ingredients ready, let’s dive into the fun part—making these Cherry Cheesecake Brownies! Follow these simple steps, and you’ll have a delicious dessert that will wow your family and friends.
Step 1: Preheat and Prepare
First things first, preheat your oven to 350°F (175°C). This ensures your brownies bake evenly. While the oven warms up, grease a 9×13-inch baking pan or line it with parchment paper. This will make it easier to lift out the brownies later. Trust me, you’ll thank yourself for this little step!
Step 2: Make the Brownie Batter
In a large bowl, whisk together the melted butter and granulated sugar until they’re well combined. The mixture should look smooth and glossy. Next, add in the eggs and vanilla extract, mixing until everything is blended perfectly. Now, sift in the cocoa powder, flour, salt, and baking powder. Stir gently until just combined. Remember, over-mixing can lead to tough brownies, and we want them soft and fudgy!
Step 3: Spread the Brownie Layer
Once your brownie batter is ready, it’s time to spread it into the prepared baking pan. Use a spatula to evenly distribute the batter, making sure it reaches all corners. This layer is the foundation of your Cherry Cheesecake Brownies, so take your time to get it just right!
Step 4: Prepare the Cheesecake Mixture
In a separate bowl, beat the softened cream cheese until it’s creamy and smooth. This is where the magic happens! Add the granulated sugar, egg, and vanilla extract, mixing until everything is well combined. You want this mixture to be silky and luscious, just like a good cheesecake should be.
Step 5: Layer the Cheesecake
Now, carefully spread the cheesecake mixture over the brownie layer in the pan. Use a spatula to smooth it out evenly. This is where the two worlds of brownie and cheesecake collide, creating a beautiful dessert that’s hard to resist!
Step 6: Add Cherry Filling
Next, it’s time to add the cherry pie filling. Evenly distribute it over the cheesecake layer. Then, take a knife or toothpick and gently swirl the cherry filling into the cheesecake. This creates a lovely marbled effect that not only looks stunning but also adds bursts of cherry flavor in every bite!
Step 7: Bake the Brownies
Pop the pan into your preheated oven and bake for 35-40 minutes. Keep an eye on them! You’ll know they’re done when the center is set and a toothpick inserted comes out with a few moist crumbs. This is the moment you’ve been waiting for!
Step 8: Cool and Refrigerate
Once baked, allow the brownies to cool completely in the pan on a wire rack. This step is crucial for achieving the perfect texture. After they’ve cooled, refrigerate them for at least 2 hours before cutting into squares. This helps the flavors meld together beautifully. Plus, they’re easier to cut when chilled!
Tips for Success
- Always use room temperature cream cheese for a smooth cheesecake layer.
- Don’t skip straining the cherry pie filling; excess liquid can make the brownies soggy.
- For a richer flavor, consider using dark chocolate cocoa powder.
- Let the brownies cool completely before refrigerating for the best texture.
- Use a sharp knife to cut clean squares for a beautiful presentation.
Equipment Needed
- Baking pan: A 9×13-inch pan is ideal, but you can use any similar-sized dish.
- Mixing bowls: Use medium and large bowls for mixing ingredients.
- Whisk: A whisk or electric mixer works well for blending the batter.
- Spatula: A rubber spatula is perfect for spreading the batter evenly.
- Wire rack: If you don’t have one, a cutting board can work for cooling.
Variations
- Fruit Swaps: Try using blueberry or raspberry pie filling instead of cherry for a different fruity twist.
- Nutty Delight: Add chopped walnuts or pecans to the brownie batter for a delightful crunch.
- Gluten-Free Option: Substitute all-purpose flour with a gluten-free blend to make these brownies suitable for gluten-sensitive friends.
- Chocolate Lovers: Mix in chocolate chips into the brownie batter for an extra chocolatey experience.
- Vegan Version: Use a plant-based butter and substitute eggs with flaxseed meal or applesauce for a vegan-friendly treat.
Serving Suggestions
- Pair with Ice Cream: Serve warm brownies with a scoop of vanilla or cherry ice cream for a delightful contrast.
- Garnish: Top with whipped cream and fresh cherries for an elegant touch.
- Drinks: Enjoy with a cup of coffee or a glass of sweet iced tea.
- Presentation: Cut into neat squares and arrange on a decorative platter for gatherings.
FAQs about Cherry Cheesecake Brownies
Can I use fresh cherries instead of cherry pie filling?
Absolutely! Fresh cherries can be a delightful alternative. Just pit and slice them, then toss them with a bit of sugar to enhance their sweetness. This will give your brownies a fresh, fruity flavor!
How do I store leftover Cherry Cheesecake Brownies?
Store any leftovers in an airtight container in the refrigerator. They’ll stay fresh for up to 5 days. Just remember to let them come to room temperature before serving for the best taste!
Can I freeze these brownies?
Yes, you can freeze Cherry Cheesecake Brownies! Wrap them tightly in plastic wrap and then place them in a freezer-safe container. They can be frozen for up to 3 months. Just thaw them in the fridge before enjoying!
What can I substitute for cream cheese?
If you’re looking for a lighter option, you can use Greek yogurt or mascarpone cheese. Both will give you a creamy texture, but the flavor will be slightly different. Experiment to find your favorite!
Can I make these brownies ahead of time?
Definitely! These brownies are perfect for making ahead. Just bake, cool, and refrigerate them. They’ll taste even better the next day as the flavors meld together beautifully!
Final Thoughts
Making Cherry Cheesecake Brownies is more than just baking; it’s about creating sweet memories in the kitchen. The joy of watching my family’s faces light up as they take that first bite is priceless. These brownies are a delightful blend of flavors and textures, making them a perfect treat for any occasion. Whether it’s a busy weeknight or a special gathering, this recipe brings a touch of happiness to the table. I hope you enjoy making and sharing these delicious brownies as much as I do. Happy baking, and may your kitchen always be filled with love and laughter!
Print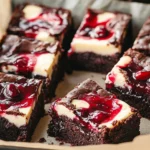
Cherry Cheesecake Brownies
- Total Time: 2 hours 60 minutes
- Yield: 12 servings 1x
- Diet: Vegetarian
Description
As a busy mom, I know how precious time can be, especially when it comes to whipping up something sweet. That’s why I’m excited to share my Cherry Cheesecake Brownies with you! These delightful treats combine the rich, fudgy goodness of brownies with a creamy cheesecake layer, all topped with luscious cherry filling. They’re perfect for a quick dessert after dinner or a special treat to impress your loved ones. Trust me, once you try these brownies, they’ll become a go-to recipe in your kitchen!
Ingredients
- 1/2 cup (115g) unsalted butter, melted
- 1 cup (200g) granulated sugar
- 2 large eggs
- 2 teaspoons vanilla extract
- 1/3 cup (35g) unsweetened cocoa powder
- 1/2 cup (65g) all-purpose flour
- 1/4 teaspoon salt
- 1/4 teaspoon baking powder
- 8 ounces (225g) cream cheese, softened
- 1/3 cup (65g) granulated sugar
- 1 large egg
- 1 teaspoon vanilla extract
- 1 can (21 ounces) cherry pie filling, strained to remove excess liquid
Instructions
- Preheat your oven to 350°F (175°C). Grease a 9×13-inch (23×33 cm) baking pan or line it with parchment paper.
- In a large bowl, whisk together the melted butter and granulated sugar until well combined.
- Add the eggs and vanilla extract, mixing until smooth.
- Sift in the cocoa powder, flour, salt, and baking powder. Stir until just combined; avoid over-mixing.
- Spread the brownie batter evenly into the prepared baking pan.
- In a separate bowl, beat the softened cream cheese until creamy.
- Add the granulated sugar, egg, and vanilla extract, beating until smooth and well combined.
- Carefully spread the cheesecake mixture over the brownie layer in the pan.
- Evenly distribute the strained cherry pie filling over the cheesecake layer.
- Use a knife or toothpick to gently swirl the cherry filling into the cheesecake layer for a marbled effect.
- Bake in the preheated oven for 35-40 minutes, or until the center is set and a toothpick inserted into the center comes out with a few moist crumbs.
- Allow the brownies to cool completely in the pan on a wire rack. Once cooled, refrigerate for at least 2 hours before cutting into squares. Store leftovers in the refrigerator.
Notes
- For best results, use room temperature cream cheese.
- Make sure to strain the cherry pie filling to avoid excess liquid.
- These brownies can be stored in the refrigerator for up to 5 days.
- Prep Time: 20 minutes
- Cook Time: 40 minutes
- Category: Dessert
- Method: Baking
- Cuisine: American
Nutrition
- Serving Size: 1 square
- Calories: 250
- Sugar: 20g
- Sodium: 150mg
- Fat: 12g
- Saturated Fat: 7g
- Unsaturated Fat: 3g
- Trans Fat: 0g
- Carbohydrates: 32g
- Fiber: 1g
- Protein: 3g
- Cholesterol: 50mg


