
You know those recipes that feel fancy but come together in minutes—and taste like you spent hours on them? That’s exactly what Cheesecake Deviled Strawberries are. These little bites are sweet, creamy, tangy, and absolutely adorable, perfect for everything from brunch trays to wedding showers to Friday-night “I need something sweet” moments.
Every time I make these, they get more love than any elaborate dessert on the table. They’re elegant enough for a party, easy enough for a weekday, and nostalgic in the best way (think: a twist on strawberry shortcake meets classic cheesecake).
Before we dive in, don’t forget to subscribe to get all my favorite recipes delivered right to your inbox. You’ll want to keep this one handy—it’s the kind you’ll be making on repeat.
Overview of the Recipe
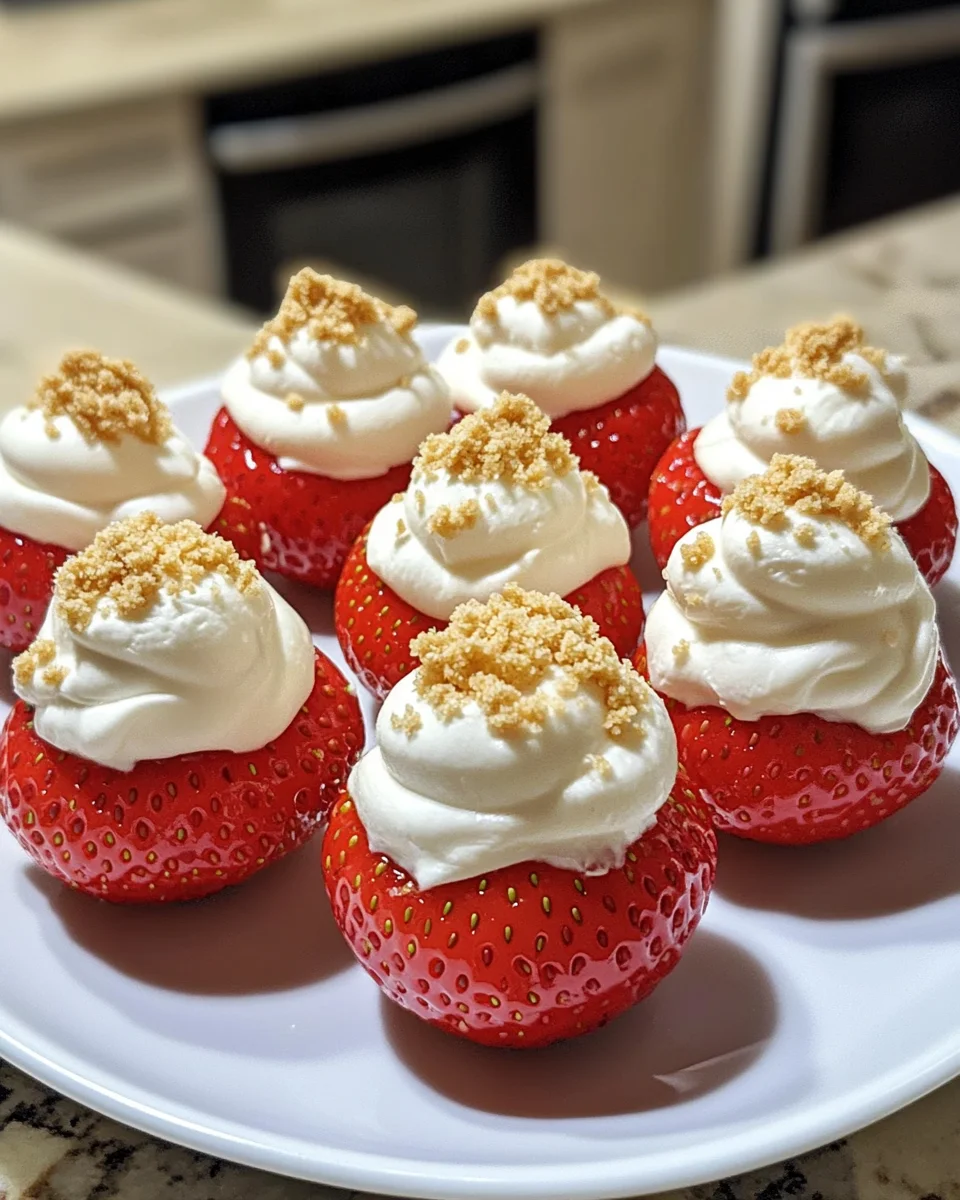
Cheesecake Deviled Strawberries are exactly what they sound like—juicy, ripe strawberries halved and filled with a smooth, lightly sweetened cheesecake filling, piped right into the center where the stem used to be. They’re a finger food dessert that feels special without being fussy. And the best part? No baking required.
Reasons to Love This Recipe
- No-Bake & No-Fuss: All you need is a mixer and a piping bag!
- Cute & Crowd-Pleasing: These are always the first to go at parties.
- Naturally Gluten-Free: No swaps needed for those with sensitivities.
- Make-Ahead Friendly: They hold up well in the fridge for a few hours.
- Great for Kids or Elegant Events: Adaptable for all occasions.
What Do They Taste Like?
Imagine biting into a cold, juicy strawberry and finding a creamy, tangy cheesecake surprise inside. The texture contrast is dreamy—silky filling against that tender, slightly crisp berry. It’s sweet, refreshing, and decadent, all in one heavenly bite.
Benefits of These Cheesecake Strawberries
- Quick & Easy: Done in under 30 minutes, start to finish.
- No Oven Needed: A lifesaver in warm weather!
- Portion-Controlled: Built-in bite-size indulgence.
- Impressive Presentation: Piping the filling makes them look professionally made.
Ingredients
- 1 lb fresh strawberries (about 20 large strawberries)
- 8 oz cream cheese, softened
- ¼ cup powdered sugar
- ½ tsp vanilla extract
- 2–3 graham crackers, crushed (for garnish)
- Optional: zest of 1 lemon or 1 tsp lemon juice (for brightness)
Necessary Tools
- Sharp paring knife
- Hand mixer or stand mixer
- Piping bag and star tip (or a zip-top bag with corner snipped)
- Bowl for mixing
- Small spoon or melon baller (to hollow berries)
Ingredient Additions & Substitutions
- Sweeteners: Swap powdered sugar with maple syrup or honey, adjusting to taste.
- Flavoring: Try almond extract, citrus zest, or a touch of cinnamon in the filling.
- Toppings: Drizzle with chocolate, top with mini chocolate chips, or sprinkle crushed Oreos instead of graham crackers.
- Dairy-Free: Use a dairy-free cream cheese alternative and plant-based sweetener.
Instructions
- Prep the Strawberries:
Wash and dry the strawberries. Slice off the stems to create a flat base, then cut each berry in half lengthwise. Use a small spoon or melon baller to carefully scoop out a bit of the center to make room for the filling. - Make the Filling:
In a medium bowl, beat cream cheese until smooth. Add powdered sugar, vanilla, and lemon zest (if using). Beat until fluffy and well combined. - Pipe the Filling:
Transfer the cheesecake mixture into a piping bag fitted with a star tip. Pipe into the hollow of each strawberry half, creating a beautiful swirl. - Add Toppings:
Sprinkle crushed graham crackers over the tops for that classic cheesecake vibe. - Chill or Serve:
Serve immediately, or chill for 30–60 minutes to firm up the filling slightly.
What to Serve With Cheesecake Deviled Strawberries
These beauties pair perfectly with:
- A glass of bubbly or rosé
- Coffee or espresso for brunch spreads
- Mini cupcakes, fruit skewers, or chocolate truffles on a dessert board
They’re also lovely with a dollop of whipped cream or drizzle of chocolate sauce if you’re feeling extra.

Helpful Tips
I’ve made these Cheesecake Deviled Strawberries for everything from baby showers to backyard dinners, and no matter the setting, they always get the same response: gone in minutes. Over time, I’ve picked up a few small tricks that make this sweet bite even more delightful—and a whole lot easier to pull off.
1. Choose Large, Firm Strawberries
Bigger berries give you more space to pipe in that luscious cheesecake filling, and firmer ones hold up better once filled. Look for ones that are bright red with no mushy spots.
2. Let the Cream Cheese Soften Completely
Room temperature cream cheese is key to a smooth, pipe-able filling. If it’s too cold, you’ll end up with lumps—and no one wants that! Let it sit out for at least 30 minutes before mixing.
3. Don’t Skip Drying the Berries
After rinsing, take a moment to dry the strawberries well. Excess moisture in the hollowed centers can make the filling slide around or turn watery as it chills.
4. Use a Star Tip for a Pretty Finish
It’s a simple touch, but piping with a star tip makes each little berry look extra special. It turns a casual treat into something party-worthy, no extra effort required.
5. Chill Before Serving
These taste amazing right after piping, but a short rest in the fridge (even 30 minutes) firms up the filling and lets the flavors meld. Plus, cold berries on a warm day? Absolute bliss.
6. Crush the Graham Crackers Last
Wait to crush and sprinkle the graham crackers until just before serving, especially if you’re chilling the berries. This keeps that lovely crunch from getting soft too quickly.
7. Try a Test Berry
Before you pipe the whole batch, try filling one strawberry and giving it a taste. You can adjust the sweetness, tanginess, or even the piping technique if needed. It’s a fun excuse to sneak a bite.
8. Use a Zip-Top Bag in a Pinch
No piping bag? No problem. Just spoon the filling into a sturdy zip-top bag, snip a corner, and pipe away. It still looks great and gets the job done beautifully.
9. Store in a Single Layer
If making ahead, store the strawberries in a single layer in a shallow container. Layering or stacking can squish the filling and make them messy when serving.
10. Make it Your Own
Don’t be afraid to get creative! Add lemon zest, swirl in a little berry jam, or drizzle with chocolate. These strawberries are the perfect canvas for a bit of fun.
Storage Instructions
One of the many things I adore about Cheesecake Deviled Strawberries is how easy they are to make ahead—but there are a few key tricks to storing them well so they stay just as delicious as when you first piped them.
Store in a Single Layer
Once the strawberries are filled and topped, place them in a shallow airtight container in a single layer. If you stack them, even gently, the filling can smudge or squish, and the berries can start to weep.
Chill Immediately
Pop them into the fridge as soon as they’re prepped. They’ll stay fresh and firm for up to 24 hours. Any longer, and the strawberries will begin to soften too much and release juices, which can make the filling a bit runny.
Use a Paper Towel Liner (Optional but Helpful)
Line the bottom of your container with a paper towel to absorb any excess moisture from the strawberries. This helps preserve the filling’s texture and keeps everything tidy.
Wait to Garnish
If you’re topping with crushed graham crackers (or any crunchy element), wait to sprinkle until just before serving. If added too early, they’ll soften from the berry’s natural juices and lose their crunch.
Can You Freeze Them?
Not recommended. Freezing changes the texture of both the strawberries and the cream cheese filling—they thaw mushy and watery. These beauties are best enjoyed fresh from the fridge.
Substitutions and Variations
One of the best things about Cheesecake Deviled Strawberries is how forgiving and fun they are to customize. Once you’ve got the basic idea down—juicy berries + creamy filling—you can take this in so many directions. Whether you’re adapting for dietary needs or just feeling adventurous, there’s room to play here!
Flavor Twists for the Filling
- Add Lemon or Orange Zest: A little citrus brightens up the cheesecake filling beautifully. Just a pinch makes it pop.
- Swirl in Jam or Pureed Berries: Fold in a teaspoon or two of strawberry, raspberry, or blueberry jam for a fruity swirl in the cheesecake base.
- Make It Chocolatey: Add 1–2 tablespoons of unsweetened cocoa powder or a little melted chocolate for a chocolate cheesecake variation.
- Spice It Up: A tiny pinch of cinnamon or nutmeg adds warmth, especially nice for fall or holiday versions.
Swap the Sweetener
- Honey or Maple Syrup: Natural sweeteners can be used in place of powdered sugar—start with a tablespoon and adjust to taste.
- Low-Carb Option: Use a powdered erythritol or monk fruit blend for a keto-friendly version.
Change Up the Toppings
- Chocolate Drizzle: Melt a little dark or white chocolate and drizzle it over the top for a fancier presentation.
- Mini Chocolate Chips or Chopped Nuts: Press them gently into the filling for a little texture and crunch.
- Crushed Cookies: Swap graham crackers for crushed Oreos, Biscoff cookies, or even gingersnaps for a seasonal twist.
- Sprinkles: Great for birthdays or themed parties—color coordinate to match the event!
Try a New Filling Base
- Mascarpone Cheese: Use half mascarpone, half cream cheese for a richer, silkier texture.
- Whipped Cream Cheese: This makes the filling even lighter and fluffier—no need to whip it much more.
- Greek Yogurt Blend: For a tangier, lighter version, mix cream cheese with a few spoonfuls of thick Greek yogurt.
Make It Vegan or Dairy-Free
- Use a plant-based cream cheese alternative and a vegan powdered sugar substitute (or maple syrup).
- Coconut whipped cream also works for a super light, dairy-free filling—just know it won’t hold its shape as firmly.
Go Beyond Strawberries
While strawberries are the classic base for this recipe, the cheesecake filling pairs beautifully with other fruits too:
- Raspberries: Just a small dollop of filling on top, no scooping needed.
- Peach or Nectarine Slices: Lay out the fruit and pipe a swirl of filling on each piece.
- Mini Bell Peppers: Yes, for a savory version! Try mixing a little goat cheese into the filling and skipping the sugar.
Frequently Asked Questions
Can I make these ahead of time?
Yes—just prep and pipe them up to 24 hours in advance, and keep them chilled until serving.
Do I have to use a piping bag?
Nope! A zip-top bag with the corner snipped works just fine. Or use a spoon for a more rustic look.
Can I make this keto/low-carb?
Yes! Use a sugar-free sweetener like monk fruit and skip the graham cracker topping.
Can I use frozen strawberries?
Fresh is definitely best here—frozen berries won’t hold their shape or texture well once thawed.
Conclusion
Cheesecake Deviled Strawberries are proof that simple can still be stunning. They’re easy to love, endlessly customizable, and always a hit with guests (and, let’s be honest—yourself). Whether you’re celebrating something special or just craving a no-bake treat, these sweet little bites deliver every time.
If you make them, I’d love to see your creations! Share a photo on Pinterest or tag me—your take might just inspire the next variation. And if you haven’t already, subscribe so you don’t miss out on more easy desserts like this one.
Print
Cheesecake Deviled Strawberries
- Total Time: 20–50 minutes
- Yield: Approx. 20 filled strawberry halves
- Diet: Gluten Free
Description
Cheesecake Deviled Strawberries are exactly what they sound like—juicy, ripe strawberries halved and filled with a smooth, lightly sweetened cheesecake filling, piped right into the center where the stem used to be. They’re a finger food dessert that feels special without being fussy. And the best part? No baking required.
Ingredients
-
8 oz cream cheese, softened
-
¼ cup powdered sugar
-
½ tsp vanilla extract
-
2–3 graham crackers, crushed (for garnish)
-
Optional: zest of 1 lemon or 1 tsp lemon juice (for brightness)
1 lb fresh strawberries (about 20 large strawberries)
Instructions
-
Prep the Strawberries:
Wash and dry the strawberries. Slice off the stems to create a flat base, then cut each berry in half lengthwise. Use a small spoon or melon baller to carefully scoop out a bit of the center to make room for the filling. -
Make the Filling:
In a medium bowl, beat cream cheese until smooth. Add powdered sugar, vanilla, and lemon zest (if using). Beat until fluffy and well combined. -
Pipe the Filling:
Transfer the cheesecake mixture into a piping bag fitted with a star tip. Pipe into the hollow of each strawberry half, creating a beautiful swirl. -
Add Toppings:
Sprinkle crushed graham crackers over the tops for that classic cheesecake vibe. -
Chill or Serve:
Serve immediately, or chill for 30–60 minutes to firm up the filling slightly.
Notes
-
For best results, use large, ripe but firm strawberries—they’re easier to fill and hold their shape beautifully.
-
Make sure cream cheese is fully softened before mixing to ensure a smooth, creamy filling.
-
Want an extra fancy finish? Add a drizzle of chocolate or a fresh mint leaf on each strawberry.
-
These are best eaten the same day, but can be prepped a few hours in advance and chilled.
-
Easily scalable—double the recipe for a party or cut it in half for a cozy night in.
- Prep Time: 20 minutes
- Cook Time: 0 minutes
- Category: Dessert, No-Bake Treat
- Method: No-Bake, Mixing
- Cuisine: American
Nutrition
- Serving Size: 2 halves
- Calories: 90
- Sugar: 6g
- Sodium: 65mg
- Fat: 6g
- Saturated Fat: 3.5g
- Unsaturated Fat: 2.5g
- Trans Fat: 0g
- Carbohydrates: 7g
- Fiber: 1g
- Protein: 1g
- Cholesterol: 15mg


