
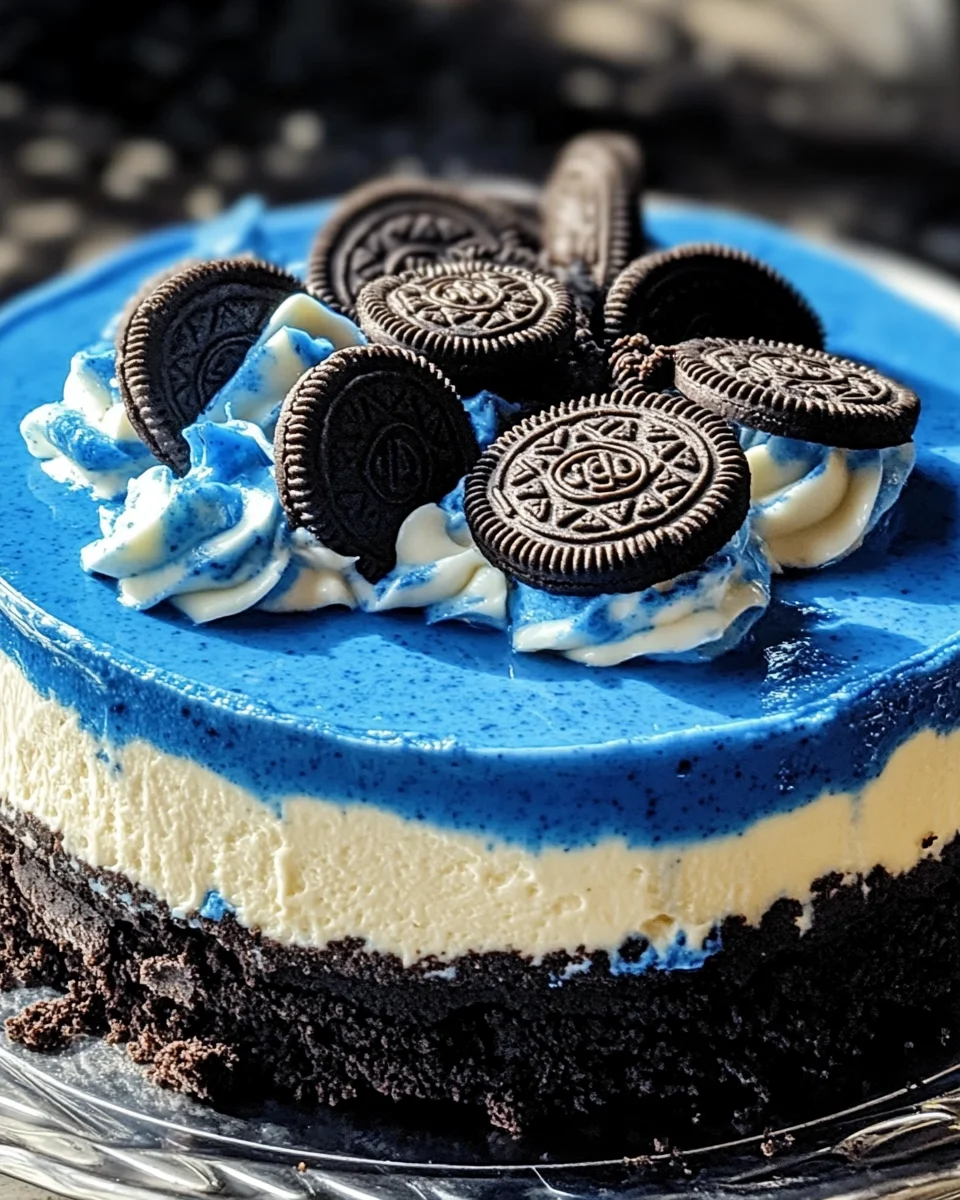
Introduction to Blue Velvet Oreo Cheesecake
As a busy mom, I know how precious time can be, especially when it comes to whipping up something special in the kitchen. That’s why I absolutely adore this Blue Velvet Oreo Cheesecake! It’s not just a dessert; it’s a vibrant, delicious treat that can turn an ordinary day into a celebration. The rich flavors of cream cheese and chocolate, combined with that stunning blue hue, make it perfect for impressing family and friends. Plus, it’s surprisingly easy to make, so you can enjoy the sweet moments without the stress!
Why You’ll Love This Blue Velvet Oreo Cheesecake
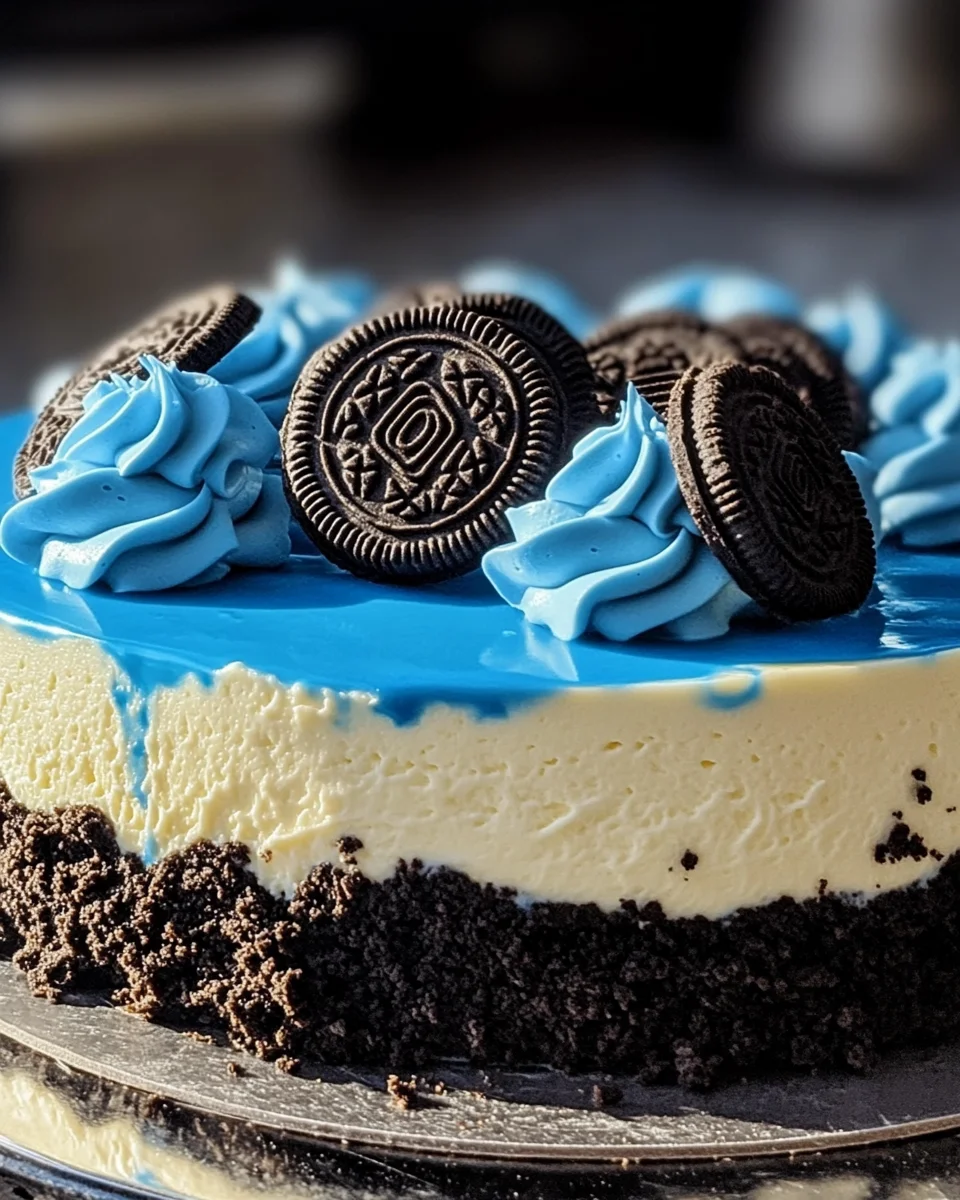
This Blue Velvet Oreo Cheesecake is a delightful blend of flavors that will make your taste buds dance! It’s incredibly easy to prepare, making it a perfect choice for busy days. The vibrant color adds a fun twist, making it a showstopper at any gathering. Plus, the creamy texture paired with the crunch of Oreos creates a heavenly experience. Trust me, once you try it, you’ll be hooked!
Ingredients for Blue Velvet Oreo Cheesecake
Gathering the right ingredients is the first step to creating your Blue Velvet Oreo Cheesecake masterpiece. Here’s what you’ll need:
- Oreo cookies: These are the star of the crust! Their chocolatey goodness adds a delightful crunch.
- Unsalted butter: This helps bind the Oreo crumbs together, creating a rich base for your cheesecake.
- Cream cheese: The heart of the cheesecake, it gives that creamy texture we all love.
- Granulated sugar: Sweetens the filling, balancing the flavors beautifully.
- Unsweetened cocoa powder: Adds a deep chocolate flavor, enhancing the overall taste.
- Eggs: These are essential for binding the ingredients and giving the cheesecake its structure.
- Sour cream: This adds a tangy richness that elevates the flavor profile.
- Heavy cream: Used in both the filling and the whipped topping, it adds a luxurious creaminess.
- Vanilla extract: A splash of this enhances the sweetness and adds depth to the flavor.
- White vinegar: This may sound odd, but it helps stabilize the cheesecake and adds a subtle tang.
- Blue food coloring: This is what gives your cheesecake that stunning blue hue! Use gel or liquid, depending on your preference.
- Powdered sugar: For sweetening the whipped cream topping, it dissolves easily for a smooth finish.
- Crushed Oreo cookies: These are for garnishing, adding a delightful crunch on top.
For exact measurements, check the bottom of the article where you can find everything listed for easy printing. Happy baking!

How to Make Blue Velvet Oreo Cheesecake
Now that you have all your ingredients ready, let’s dive into the fun part—making your Blue Velvet Oreo Cheesecake! Follow these simple steps, and you’ll be on your way to creating a dessert that will wow everyone.
Step 1: Prepare the Springform Pan
Start by preheating your oven to 325°F (160°C). Grease a 9-inch springform pan with a little butter or cooking spray. This will help your cheesecake release easily later. Line the bottom with parchment paper for extra protection. Trust me, this little step makes a big difference!
Step 2: Make the Oreo Crust
Next, grab those Oreo cookies and crush them into fine crumbs. You can use a food processor for this, or place them in a sealed bag and smash them with a rolling pin. Mix the crumbs with melted butter until it resembles wet sand. Press this mixture evenly into the bottom of your prepared springform pan. Pop it in the fridge while you prepare the filling. This helps it set nicely!
Step 3: Prepare the Cheesecake Filling
In a large mixing bowl, beat the softened cream cheese until it’s smooth and creamy. Add in the granulated sugar and cocoa powder, mixing until fully combined. Now, add the eggs one at a time, mixing well after each addition. This ensures a silky texture. Then, stir in the sour cream, heavy cream, vanilla extract, white vinegar, and blue food coloring. Mix until everything is smooth and you achieve your desired blue hue. It’s like painting a masterpiece!
Step 4: Bake the Cheesecake
Pour the cheesecake filling over your chilled crust, smoothing the top with a spatula. Wrap the outside of the springform pan in aluminum foil to prevent water from seeping in. Place it in a large roasting pan and add hot water until it reaches halfway up the sides of the springform pan. This water bath helps the cheesecake bake evenly. Bake for 60-70 minutes, or until the center is slightly jiggly but the edges are set. Your kitchen will smell heavenly!
Step 5: Cool and Chill
Once baked, carefully remove the cheesecake from the water bath and let it cool to room temperature. This is crucial! After it cools, refrigerate it for at least 6 hours, or overnight if you can wait. Chilling enhances the flavor and texture, making it even more delicious.
Step 6: Add Whipped Cream Topping
When you’re ready to serve, whip the heavy cream and powdered sugar together until stiff peaks form. Spread or pipe this fluffy goodness over the chilled cheesecake. For a fun touch, sprinkle crushed Oreos on top for that extra crunch. It’s like a cherry on top, but way better!
Step 7: Serve and Enjoy
Carefully remove the springform pan and transfer your stunning Blue Velvet Oreo Cheesecake to a serving plate. Slice it up and serve chilled. Watch as your family and friends dive in, their faces lighting up with joy. You’ve just created a dessert that’s not only beautiful but also delicious!
Tips for Success
- Make sure your cream cheese is at room temperature for easy mixing.
- Don’t skip the water bath; it prevents cracks and ensures even baking.
- For a deeper blue color, add more food coloring gradually.
- Chill the cheesecake overnight for the best flavor and texture.
- Use a hot knife to slice for clean, beautiful pieces.
Equipment Needed
- 9-inch springform pan: Essential for easy removal; a regular cake pan works in a pinch.
- Food processor: Great for crushing Oreos; a rolling pin and bag will do just fine.
- Mixing bowls: Use any size you have; just ensure they’re sturdy.
- Whisk or electric mixer: For beating the cream cheese; a good old-fashioned whisk works too!
Variations of Blue Velvet Oreo Cheesecake
- Gluten-Free: Substitute regular Oreos with gluten-free Oreo cookies to make this cheesecake suitable for gluten-sensitive friends.
- Chocolate Lovers: Add chocolate chips to the cheesecake filling for an extra chocolatey experience.
- Fruit Twist: Top the cheesecake with fresh blueberries or a berry compote for a fruity contrast to the rich flavors.
- Vegan Option: Use vegan cream cheese and coconut cream for the whipped topping to create a plant-based version.
- Mini Cheesecakes: Make individual servings by using a muffin tin instead of a springform pan for bite-sized treats.
Serving Suggestions for Blue Velvet Oreo Cheesecake
- Fresh Berries: Serve with a side of fresh strawberries or blueberries for a pop of color and freshness.
- Coffee or Tea: Pair with a warm cup of coffee or herbal tea to balance the sweetness.
- Presentation: Garnish with mint leaves for a touch of elegance and a splash of green.
- Chocolate Sauce: Drizzle chocolate sauce over each slice for an extra indulgent treat.
FAQs about Blue Velvet Oreo Cheesecake
Can I make Blue Velvet Oreo Cheesecake ahead of time?
Absolutely! In fact, making it a day in advance is ideal. Chilling overnight enhances the flavors and gives the cheesecake a perfect texture. Just keep it covered in the fridge until you’re ready to serve.
What can I use instead of cream cheese?
If you’re looking for a lighter option, you can use Greek yogurt or ricotta cheese. However, keep in mind that the texture and flavor will differ slightly. For a vegan alternative, try using cashew cream or a store-bought vegan cream cheese.
How do I store leftovers?
Store any leftover Blue Velvet Oreo Cheesecake in an airtight container in the refrigerator. It should stay fresh for about 3-4 days. Just be sure to keep it covered to prevent it from absorbing any odors from the fridge!
Can I freeze Blue Velvet Oreo Cheesecake?
Yes, you can freeze it! Wrap the cheesecake tightly in plastic wrap and then in aluminum foil. It can be frozen for up to 2 months. When you’re ready to enjoy it, thaw it in the fridge overnight before serving.
What’s the best way to slice the cheesecake?
For clean slices, use a hot knife! Dip your knife in hot water, wipe it dry, and then slice. This method helps prevent the cheesecake from cracking and gives you those beautiful, smooth edges.
Final Thoughts
Creating this Blue Velvet Oreo Cheesecake is more than just baking; it’s about crafting a moment of joy for yourself and your loved ones. The vibrant blue hue and rich flavors bring a sense of celebration to any occasion, big or small. I love how this dessert can turn a simple family dinner into a festive gathering. Plus, the smiles on my family’s faces when they take that first bite? Priceless! So, roll up your sleeves, embrace the fun of baking, and let this delightful cheesecake become a cherished part of your culinary adventures!
Print
Blue Velvet Oreo Cheesecake
- Total Time: 7 hours
- Yield: 12 servings 1x
- Diet: Vegetarian
Description
As a busy mom, I know how precious time can be, especially when it comes to whipping up something special in the kitchen. That’s why I absolutely adore this Blue Velvet Oreo Cheesecake! It’s not just a dessert; it’s a vibrant, delicious treat that can turn an ordinary day into a celebration. The rich flavors of cream cheese and chocolate, combined with that stunning blue hue, make it perfect for impressing family and friends. Plus, it’s surprisingly easy to make, so you can enjoy the sweet moments without the stress!
Ingredients
- 24 Oreo cookies (with filling)
- 1/4 cup (60 g) unsalted butter, melted
- 16 oz (450 g) cream cheese, softened
- 1 cup (200 g) granulated sugar
- 1/4 cup (30 g) unsweetened cocoa powder
- 3 large eggs
- 1/2 cup (120 ml) sour cream
- 1/4 cup (60 ml) heavy cream
- 1 tbsp vanilla extract
- 1 tsp white vinegar
- Blue food coloring (gel or liquid, to desired shade)
- 1 cup (240 ml) heavy whipping cream
- 2 tbsp powdered sugar
- 6–8 crushed Oreo cookies
Instructions
- Preheat your oven to 325°F (160°C). Grease a 9-inch springform pan and line the bottom with parchment paper.
- Crush the Oreos into fine crumbs using a food processor or by placing them in a sealed bag and smashing with a rolling pin. Combine the crumbs with melted butter and press the mixture evenly into the bottom of the springform pan. Refrigerate while preparing the filling.
- In a large mixing bowl, beat the cream cheese until smooth and creamy. Add the granulated sugar and cocoa powder, mixing until fully incorporated. Beat in the eggs one at a time, mixing well after each addition. Add the sour cream, heavy cream, vanilla extract, vinegar, and blue food coloring. Mix until smooth and the desired blue color is achieved.
- Pour the cheesecake filling over the prepared crust. Smooth the top with a spatula. Wrap the outside of the pan in aluminum foil and place it in a large roasting pan. Add hot water to the roasting pan until it reaches halfway up the sides of the springform pan (this creates a water bath). Bake for 60-70 minutes, or until the center is slightly jiggly but the edges are set.
- Remove the cheesecake from the water bath and let it cool to room temperature. Refrigerate for at least 6 hours or overnight for best results.
- Whip the heavy cream and powdered sugar together until stiff peaks form. Spread or pipe the whipped cream over the chilled cheesecake. Sprinkle with crushed Oreos for garnish.
- Carefully remove the springform pan and transfer the cheesecake to a serving plate. Slice and serve chilled.
Notes
- For a deeper blue color, add more blue food coloring as desired.
- Ensure the cream cheese is at room temperature for easier mixing.
- Chilling overnight enhances the flavor and texture of the cheesecake.
- Prep Time: 30 minutes
- Cook Time: 70 minutes
- Category: Dessert
- Method: Baking
- Cuisine: American
Nutrition
- Serving Size: 1 slice
- Calories: 450
- Sugar: 30g
- Sodium: 300mg
- Fat: 30g
- Saturated Fat: 15g
- Unsaturated Fat: 10g
- Trans Fat: 0g
- Carbohydrates: 40g
- Fiber: 2g
- Protein: 6g
- Cholesterol: 100mg


