
Introduction to Baked Mini Egg Cheesecake for Easter
As a passionate home cook, I find that Easter is one of those magical times of the year when the air is filled with joy, laughter, and the sweet scent of chocolate. It’s a season that invites creativity in the kitchen, and what better way to celebrate than with a delightful dessert? This Baked Mini Egg Cheesecake for Easter is not just a treat; it’s a celebration on a plate!
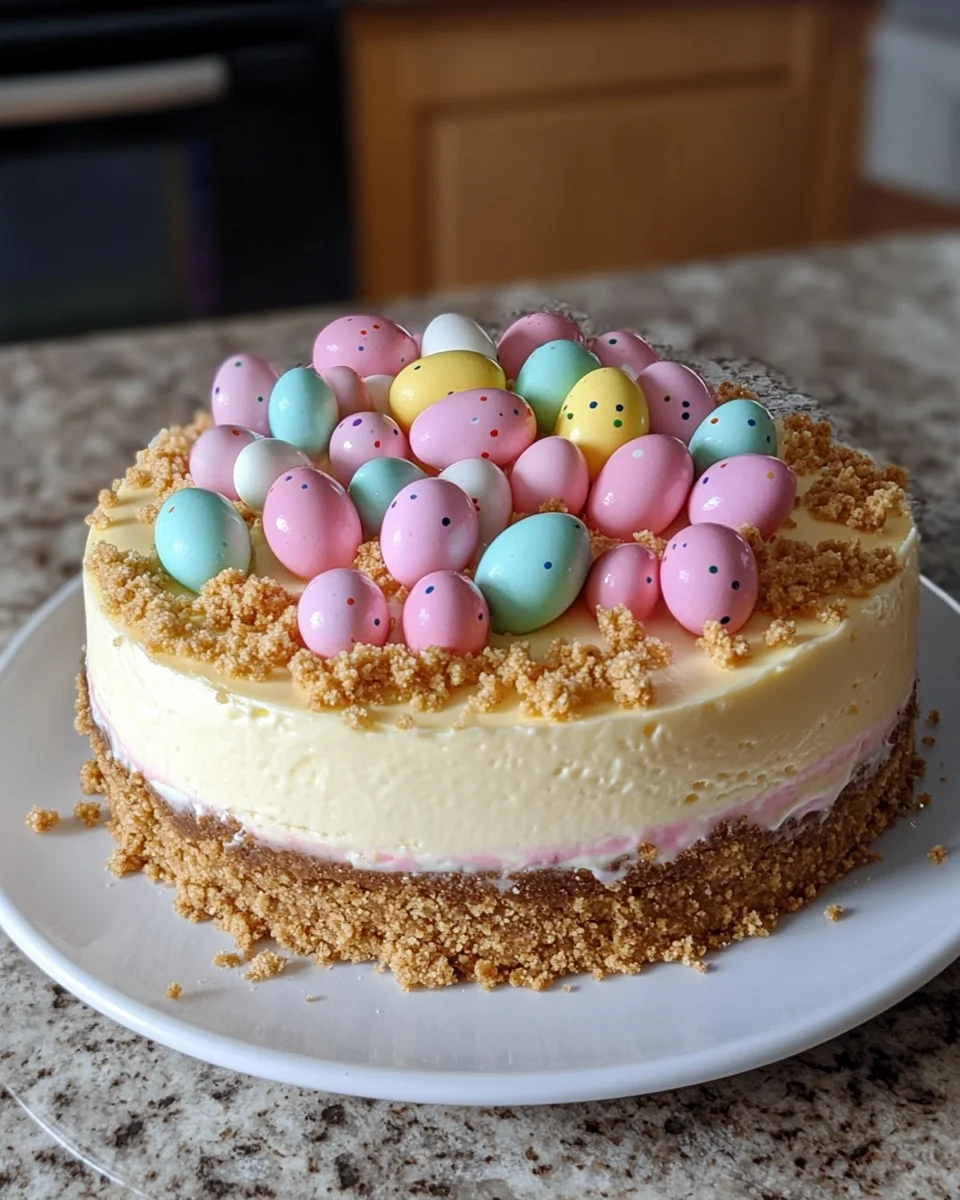
Every year, I look forward to gathering with family and friends, sharing stories, and, of course, indulging in delicious food. This cheesecake has become a staple at our Easter gatherings. The creamy filling, combined with the crunchy graham cracker crust, creates a perfect harmony of textures. And let’s not forget the colorful mini chocolate eggs that add a festive touch! They remind me of the joy of Easter egg hunts from my childhood, where every hidden egg was a treasure waiting to be discovered.
Ingredients for Baked Mini Egg Cheesecake for Easter
Before we embark on this delightful baking journey, let’s gather our ingredients. Having everything ready makes the process smoother and more enjoyable. I always find that when I have my ingredients prepped, it feels like I’m setting the stage for a beautiful performance in the kitchen!
Main Ingredients
- 1 1/2 cups graham cracker crumbs
- 1/4 cup powdered sugar
- 4 tablespoons butter, melted
- 2 (8-ounce) packages cream cheese, softened
- 2/3 cup sugar
- 2 eggs, room temperature
- 1 teaspoon vanilla extract
- Pink food coloring (to your desired shade)
- 2 cups mini chocolate Easter eggs
When selecting your ingredients, I recommend using high-quality cream cheese. It makes a world of difference in the creaminess of your cheesecake. I often opt for brands that are made with real ingredients, as they yield a richer flavor. And don’t skimp on the butter; it’s the secret to a perfectly crumbly crust!
Optional Add-ons
- Fresh berries (like strawberries or raspberries) for garnish
- Whipped cream for serving
- Chocolate drizzle for an extra touch of sweetness
- Other seasonal candies, like jelly beans, for decoration
Feel free to get creative with your toppings! I love adding fresh berries for a burst of color and flavor. They not only look beautiful but also balance the sweetness of the cheesecake. And if you’re feeling adventurous, a drizzle of chocolate sauce can take this dessert to the next level!
Now that we have our ingredients ready, let’s move on to the fun part—preparing our Baked Mini Egg Cheesecake for Easter!

How to Prepare Baked Mini Egg Cheesecake for Easter
Now that we have our ingredients ready, it’s time to roll up our sleeves and dive into the fun of baking! I always find that the process of making this cheesecake is just as enjoyable as eating it. So, let’s get started with the step-by-step instructions to create this delightful Baked Mini Egg Cheesecake for Easter!
Step 1: Prepare the Crust
First things first, we need to create that delicious graham cracker crust. In a mixing bowl, combine the graham cracker crumbs, powdered sugar, and melted butter. Stir until the mixture resembles wet sand and starts to stick together. This is where the magic begins!
Tips for a Perfect Crust
- Make sure your butter is melted but not too hot. If it’s too hot, it can make the crumbs soggy.
- Press the mixture firmly into the bottom and up the sides of your pie pan. This helps create a sturdy crust that holds everything together.
- For an extra crunch, consider adding a pinch of cinnamon to the crust mixture. It adds a lovely warmth!
Step 2: Make the Cheesecake Filling
While the crust is baking, let’s whip up the creamy filling! In a large mixing bowl, beat the softened cream cheese and sugar together until smooth. I love using an electric mixer for this part; it makes the process so much easier!
Next, add in the eggs, pink food coloring, and vanilla extract. Beat until everything is fully combined and the mixture is silky smooth. The pink color is what makes this cheesecake so festive!
Tips for Creamy Filling
- Ensure your cream cheese is at room temperature. This helps it blend smoothly without lumps.
- Don’t overmix the eggs; just mix until combined. Overmixing can lead to cracks in your cheesecake.
- Feel free to adjust the amount of food coloring to achieve your desired shade of pink!
Step 3: Assemble the Cheesecakes
Once your crust is baked and cooled slightly, it’s time to pour in that luscious cheesecake filling. Spread it evenly over the crust, making sure to reach the edges. This is where I get excited, as it starts to look like a real cheesecake!
Tips for Layering
- Use a spatula to smooth the top of the filling. A smooth surface makes for a beautiful presentation!
- Don’t worry if it’s not perfect; the mini chocolate eggs will cover any imperfections later!
Step 4: Bake the Cheesecakes
Now, it’s time to bake! Place the cheesecake back in the oven and let it bake for about 30 minutes. You’ll know it’s done when the edges are set, but the center still has a slight jiggle. This is key to a creamy texture!
Tips for Baking
- Keep an eye on the cheesecake as it bakes. Ovens can vary, and you don’t want it to overbake.
- If you notice the edges browning too quickly, you can cover them with foil to prevent burning.
Step 5: Cool and Decorate
Once baked, remove the cheesecake from the oven and immediately top it with the mini chocolate Easter eggs. I love how they look like little treasures on top of the cheesecake! Let it cool to room temperature before transferring it to the fridge.
Chill the cheesecake for at least 4 hours, or overnight if you can wait. This allows the flavors to meld beautifully!
Tips for Decoration
- For an extra festive touch, sprinkle some colorful sprinkles around the mini eggs.
- When serving, consider adding a dollop of whipped cream on the side for an extra treat!
And there you have it! Your Baked Mini Egg Cheesecake for Easter is ready to impress. I can already picture the smiles on everyone’s faces as they take their first bite!
Equipment Needed for Baked Mini Egg Cheesecake for Easter
Before we dive into the baking process, let’s gather the essential tools that will make our cheesecake adventure a breeze! Having the right equipment on hand not only simplifies the process but also adds to the fun of creating this delightful dessert.
- 9-inch Pie Pan: This is where our cheesecake will take shape. If you don’t have a pie pan, a springform pan works beautifully too!
- Mixing Bowls: You’ll need a couple of mixing bowls—one for the crust and another for the filling. I love using glass bowls because they’re easy to clean and you can see the ingredients mixing!
- Electric Mixer: An electric mixer makes whipping the cream cheese a breeze. If you don’t have one, a whisk will do, but it may take a bit more elbow grease!
- Spatula: A rubber spatula is perfect for spreading the cheesecake filling evenly and scraping down the sides of the bowl.
- Measuring Cups and Spoons: Accurate measurements are key to a successful cheesecake, so don’t forget these handy tools!
- Cooling Rack: This is optional, but it helps the cheesecake cool evenly after baking. If you don’t have one, just place the pie pan on a heat-safe surface.
With these tools at your side, you’re all set to create a scrumptious Baked Mini Egg Cheesecake for Easter. Let’s get ready to bake and enjoy the sweet aroma that fills the kitchen!
Variations of Baked Mini Egg Cheesecake for Easter
As a home cook, I love experimenting with recipes to create new flavors and textures. This Baked Mini Egg Cheesecake for Easter is no exception! Here are a few delightful variations that can add a twist to your traditional cheesecake:
- Fruit-Infused Cheesecake: Swap out the pink food coloring for a fruit puree, like strawberry or raspberry. This not only adds a beautiful color but also a burst of fruity flavor!
- Chocolate Cheesecake: For chocolate lovers, mix in some cocoa powder into the cream cheese filling. You can even use chocolate graham crackers for the crust!
- Nutty Crunch: Add crushed nuts, like pecans or walnuts, to the crust for an extra crunch. It adds a delightful texture that pairs beautifully with the creamy filling.
- Caramel Drizzle: Drizzle some caramel sauce over the top before adding the mini chocolate eggs. The sweet and salty combination is simply irresistible!
- Seasonal Flavors: Consider adding spices like cinnamon or nutmeg to the filling for a warm, cozy flavor that’s perfect for Easter.
These variations not only keep things exciting but also allow you to tailor the cheesecake to your family’s tastes. I often find that trying something new can lead to delightful surprises in the kitchen. So, don’t hesitate to get creative and make this recipe your own!
Cooking Notes for Baked Mini Egg Cheesecake for Easter
As I’ve learned through my culinary adventures, a few cooking notes can make all the difference in achieving the perfect Baked Mini Egg Cheesecake for Easter. Here are some tips that I always keep in mind while baking:
- Room Temperature Ingredients: Make sure your cream cheese and eggs are at room temperature. This helps them blend smoothly, creating a creamy filling without lumps.
- Don’t Rush the Cooling: Allow the cheesecake to cool completely at room temperature before refrigerating. This step is crucial for preventing cracks and ensuring a smooth texture.
- Chill Time is Key: Patience is a virtue! Letting the cheesecake chill for at least 4 hours (or overnight) allows the flavors to meld beautifully and enhances the overall taste.
- Check for Doneness: When baking, the center should still have a slight jiggle. This indicates that it will set perfectly as it cools.
- Storage Tips: If you have leftovers (which is rare in my house!), store the cheesecake in an airtight container in the fridge for up to 5 days. It’s just as delicious the next day!
By keeping these cooking notes in mind, you’ll be well on your way to creating a stunning Baked Mini Egg Cheesecake that will impress everyone at your Easter gathering. Happy baking!
Serving Suggestions for Baked Mini Egg Cheesecake for Easter
When it comes to serving my Baked Mini Egg Cheesecake for Easter, I like to make it a festive experience! Presentation is key, and there are so many delightful ways to serve this creamy treat. Here are some of my favorite serving suggestions that add a special touch:
- Garnish with Fresh Berries: A handful of fresh strawberries or raspberries on the side not only adds a pop of color but also a refreshing contrast to the rich cheesecake.
- Whipped Cream Delight: A dollop of whipped cream on top or alongside the cheesecake elevates the dessert to a whole new level of indulgence. You can even add a sprinkle of chocolate shavings for extra flair!
- Chocolate Drizzle: Drizzling some melted chocolate over the cheesecake before serving creates a beautiful and delicious finish. It’s like a cherry on top, but better!
- Mini Egg Surprise: For an extra festive touch, place a few mini chocolate Easter eggs on each plate as a sweet surprise for your guests. It’s a fun way to tie in the theme of the dessert!
- Serve with Coffee or Tea: Pairing the cheesecake with a warm cup of coffee or tea makes for a delightful after-meal treat. The flavors complement each other beautifully!
These serving suggestions not only enhance the visual appeal of your cheesecake but also create a memorable experience for everyone at the table. I can already imagine the smiles as they dig into this delicious dessert!
Tips for Baked Mini Egg Cheesecake for Easter
As I’ve baked this Baked Mini Egg Cheesecake for Easter multiple times, I’ve gathered a few handy tips that can make your baking experience even smoother and more enjoyable. These little nuggets of wisdom can help ensure that your cheesecake turns out perfectly every time!
- Prep Ahead: If you’re hosting an Easter gathering, consider making the cheesecake a day in advance. This allows the flavors to develop and saves you time on the big day!
- Use a Water Bath: For an ultra-creamy texture, try baking your cheesecake in a water bath. Wrap the outside of your pie pan with foil and place it in a larger pan filled with hot water. This helps regulate the temperature and prevents cracks.
- Experiment with Flavors: Don’t hesitate to add your favorite flavors to the filling. A splash of almond extract or a hint of lemon zest can elevate the taste and make it uniquely yours!
- Check for Doneness: Remember, the cheesecake will continue to set as it cools. It’s better to underbake slightly than to overbake, so keep an eye on it!
- Let It Rest: After baking, let the cheesecake sit in the oven with the door slightly ajar for about 30 minutes. This gradual cooling helps prevent cracks.
With these tips in your back pocket, you’ll be well-equipped to create a stunning Baked Mini Egg Cheesecake that will be the star of your Easter celebration. Happy baking, and enjoy every delicious bite!
Breakdown of Time for Baked Mini Egg Cheesecake for Easter
As a home cook, I know that timing is everything in the kitchen. When making my Baked Mini Egg Cheesecake for Easter, I like to keep track of the time to ensure everything goes smoothly. Here’s a quick breakdown of the time you’ll need for each step:
- Prep Time: 20 minutes – This includes gathering your ingredients, preparing the crust, and mixing the cheesecake filling.
- Cooking Time: 40 minutes – This covers the baking time for the crust and the cheesecake itself.
- Chilling Time: 4 hours (or overnight) – This is essential for the cheesecake to set properly and for the flavors to meld together.
Total Time: Approximately 4 hours and 60 minutes (or 5 hours) – This includes prep, cooking, and chilling time. While the active cooking time is relatively short, the chilling time is crucial for achieving that perfect creamy texture.
By keeping this timeline in mind, you can plan your baking adventure with ease. I often find that having a clear schedule helps me enjoy the process even more. So, roll up your sleeves, and let’s get baking!
Nutritional Information for Baked Mini Egg Cheesecake for Easter
As a passionate home cook, I believe that enjoying delicious desserts like this Baked Mini Egg Cheesecake for Easter can be part of a balanced lifestyle. While this cheesecake is a delightful treat, it’s always good to know what we’re indulging in. Here’s a general breakdown of the nutritional information per slice, assuming the cheesecake is cut into 12 servings:
- Calories: Approximately 250
- Fat: 15g
- Saturated Fat: 8g
- Cholesterol: 70mg
- Sodium: 180mg
- Carbohydrates: 28g
- Fiber: 1g
- Sugar: 18g
- Protein: 4g
Keep in mind that these values can vary based on the specific brands of ingredients you use and any optional add-ons you choose to include. I often find that sharing this cheesecake with family and friends makes it even more special, and it’s all about enjoying those moments together. So, while we savor each bite, let’s celebrate the joy of Easter and the deliciousness of homemade treats!
Frequently Asked Questions about Baked Mini Egg Cheesecake for Easter
As I’ve shared my Baked Mini Egg Cheesecake for Easter with friends and family, I’ve received quite a few questions along the way. It’s always fun to see the excitement and curiosity about this delightful dessert! Here are some of the most frequently asked questions, along with my answers to help you on your cheesecake journey.
Can I make this cheesecake ahead of time?
Absolutely! In fact, I recommend making it a day in advance. This allows the flavors to develop and gives you one less thing to worry about on Easter day. Just be sure to cover it well in the fridge to keep it fresh!
Can I use a different type of crust?
Yes, you can! While I love the classic graham cracker crust, you can experiment with other options like Oreo cookies or even a nut-based crust for a gluten-free version. Just make sure to adjust the measurements accordingly!
What if I don’t have pink food coloring?
No worries! If you don’t have pink food coloring, you can skip it altogether or use a natural alternative like beet juice for a hint of color. The cheesecake will still taste amazing without it!
How do I store leftovers?
If you have any leftovers (which is rare in my house!), store the cheesecake in an airtight container in the fridge. It should stay fresh for up to 5 days. Just be sure to keep it covered to prevent it from drying out.
Conclusion on Baked Mini Egg Cheesecake for Easter
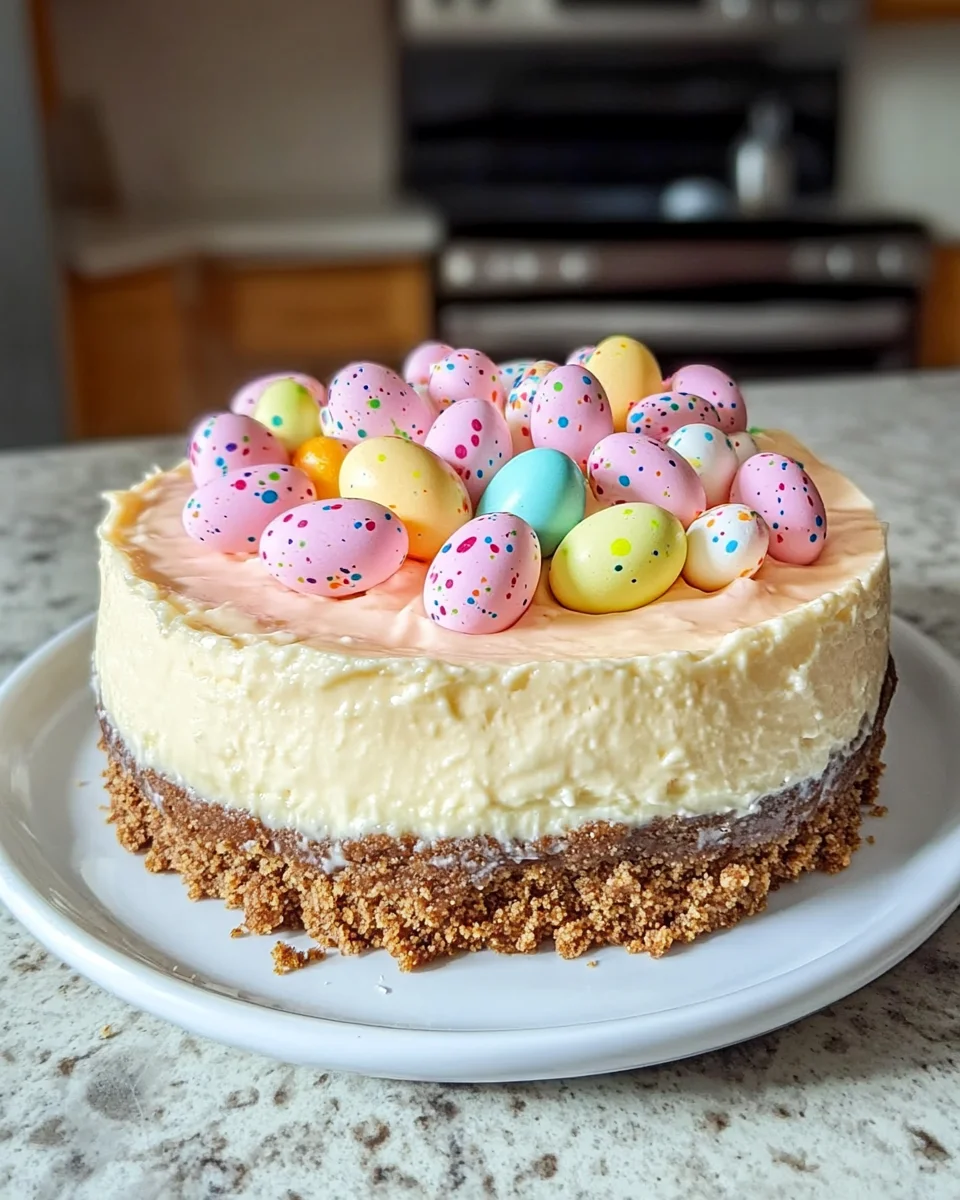
As I reflect on my culinary journey with the Baked Mini Egg Cheesecake for Easter, I can’t help but smile at the joy it brings to my family and friends. This dessert is more than just a sweet treat; it’s a celebration of togetherness, creativity, and the spirit of Easter. The creamy filling, crunchy graham cracker crust, and colorful mini chocolate eggs create a delightful harmony that captures the essence of the holiday.
Print
Baked Mini Egg Cheesecake for Easter: A Sweet Delight!
- Total Time: 5 hours
- Yield: 12 servings 1x
- Diet: Vegetarian
Description
A delightful Baked Mini Egg Cheesecake perfect for Easter celebrations, featuring a creamy filling, crunchy graham cracker crust, and colorful mini chocolate eggs.
Ingredients
- 1 1/2 cups graham cracker crumbs
- 1/4 cup powdered sugar
- 4 tablespoons butter, melted
- 2 (8-ounce) packages cream cheese, softened
- 2/3 cup sugar
- 2 eggs, room temperature
- 1 teaspoon vanilla extract
- Pink food coloring (to your desired shade)
- 2 cups mini chocolate Easter eggs
Instructions
- Prepare the crust by combining graham cracker crumbs, powdered sugar, and melted butter in a mixing bowl.
- Make the cheesecake filling by beating softened cream cheese and sugar until smooth, then adding eggs, pink food coloring, and vanilla extract.
- Assemble the cheesecakes by pouring the filling over the baked and cooled crust.
- Bake the cheesecakes in the oven for about 30 minutes until the edges are set.
- Cool the cheesecake and decorate with mini chocolate Easter eggs before chilling in the fridge for at least 4 hours.
Notes
- Use high-quality cream cheese for a richer flavor.
- Let the cheesecake cool completely before refrigerating to prevent cracks.
- Chill for at least 4 hours for the best texture.
- Store leftovers in an airtight container in the fridge for up to 5 days.
- Prep Time: 20 minutes
- Cook Time: 40 minutes
- Category: Dessert
- Method: Baking
- Cuisine: American
Nutrition
- Serving Size: 1 slice
- Calories: 250
- Sugar: 18g
- Sodium: 180mg
- Fat: 15g
- Saturated Fat: 8g
- Carbohydrates: 28g
- Fiber: 1g
- Protein: 4g
- Cholesterol: 70mg


