

Introduction to Raspberry Cheesecake Truffles
Let me tell you, there’s something truly magical about making Raspberry Cheesecake Truffles. These little bites of heaven not only satisfy a sweet tooth but are also a fantastic way to impress your family or friends. Perfect for those busy days when you need a quick indulgence, they can brighten up any gathering. Plus, they’re no-bake! With just a few simple ingredients, you can whip up these delightful treats without breaking a sweat. So, whether it’s a special occasion or just because, let’s dive into this easy recipe that’s sure to bring smiles all around.
Why You’ll Love This Raspberry Cheesecake Truffles
These Raspberry Cheesecake Truffles are a dream come true! Not only are they incredibly easy to make, but they also require minimal time. Imagine luscious cheesecake flavors mingling with bright raspberry notes, all wrapped in a satisfying chocolate coating. They’re perfect for busy evenings or last-minute gatherings. You can whip them up in no time and watch everyone’s faces light up with joy!
Ingredients for Raspberry Cheesecake Truffles
Every sweet bite of Raspberry Cheesecake Truffles starts with a handful of delightful ingredients. Here’s what you’ll need to create these luscious morsels:
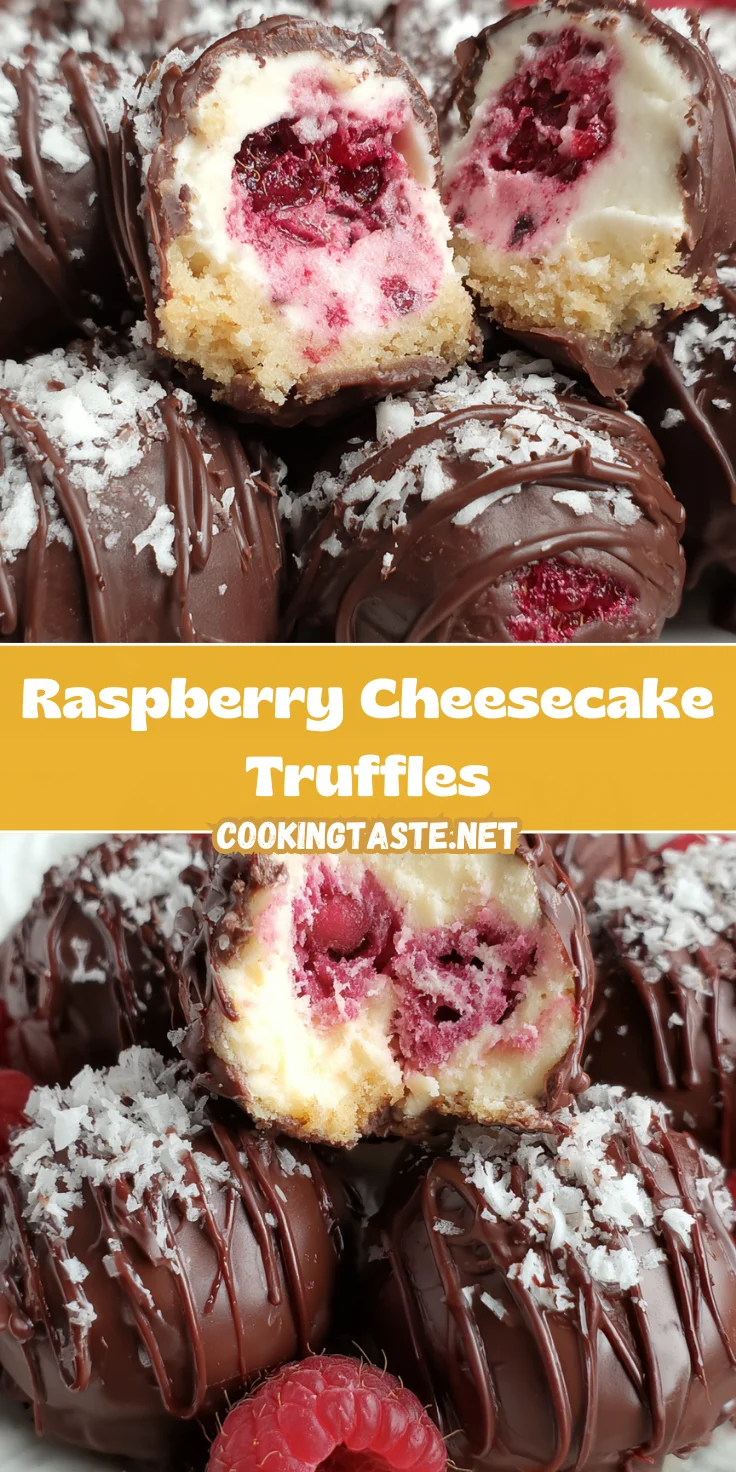
- Cream Cheese: This is the base of our truffles. Use softened cream cheese for a smooth and creamy filling. It provides that rich cheesecake flavor we all love.
- Powdered Sugar: A sprinkle of sweetness, this ingredient helps balance the tanginess of cream cheese. Plus, it dissolves quickly into the mixture for a delightful texture.
- Whipped Topping: Think of this as the fluffy cloud that lightens the truffle mixture. You can use store-bought options like Cool Whip or make your own for a fresher taste.
- Vanilla Extract: Just a teaspoon of this magical liquid adds warmth and depth, enhancing the overall flavors without overpowering them.
- Fresh Raspberries: These jewels add vibrancy and a burst of tartness. Always choose fresh raspberries for the best flavor, and ensure they’re patted dry before adding.
- Graham Cracker Crumbs: This ingredient gives our truffles a nod to classic cheesecake crust, adding a bit of crunch and nostalgic flavor.
- Semi-Sweet Baking Chocolate: The rich chocolate coating is what makes these truffles indulgent. Coarsely chopped, it will melt beautifully, creating a perfect shell.
For those with dietary restrictions or preferences, feel free to experiment! You can substitute low-fat cream cheese for a lighter version, use gluten-free graham crackers, or opt for dark chocolate for a bolder taste. The exact measurements for these ingredients are at the bottom of the article and available for printing, making it easy for you to get started!
How to Make Raspberry Cheesecake Truffles
Making Raspberry Cheesecake Truffles is a fun and straightforward journey. Follow these simple steps, and you’ll have delightful treats in no time!
Step 1: Prepare the Cream Cheese Base
Start by taking a mixing bowl and adding your softened cream cheese, powdered sugar, and vanilla extract. Using an electric mixer, blend everything until the mixture is light and fluffy. This is essential because it combines flavors and creates a smooth texture. Once fluffy, gently fold in the fresh raspberries. This step is crucial as it allows the raspberries to add a burst of freshness to each truffle without smashing them too much.
Step 2: Fold in Whipped Topping
Next, bring in the whipped topping. This ingredient lifts the filling and gives it an airy texture. Carefully fold it into the cream cheese mixture using a spatula. Then add the graham cracker crumbs. Together, they create that classic cheesecake profile. Folding helps maintain the lightness of the mixture while ensuring everything is well combined.
Step 3: Chill the Mixture
Once combined, it’s time to chill! Transfer the mixture into the freezer for about 2 hours. This step helps the mixture firm up, making it easier to scoop and roll into balls later. Just remember to cover it well to avoid freezer burn. Chilling is crucial because we want our truffle filling to hold its shape when forming them!
Step 4: Form the Truffles
After the mixture has chilled, grab a tray and line it with parchment paper. Using a tablespoon or a small scoop, portion out the chilled mixture. Roll each portion into a ball in your hands. If the mixture is too soft, don’t fret! Just pop it back in the freezer for a few more minutes until it’s manageable.
Step 5: Freeze Until Solid
Now, arrange your truffle balls on the prepared tray and freeze until they are completely solid, which takes about 2 additional hours. This step is vital because a well-frozen truffle will hold up beautifully during our chocolate-dipping adventure.
Step 6: Melt the Chocolate
While the truffles are freezing, let’s melt the semi-sweet baking chocolate. Place it in a microwave-safe bowl and heat it in increments of 30 seconds, stirring in between. Once melted, allow it to cool for 5 minutes. This cooling period is important to avoid melting the truffles. You want just the right temperature for a smooth dip!
Step 7: Dip Each Truffle
Now comes the fun part! Working in small batches, take a few frozen truffles from the freezer. Dip each one into the melted chocolate using a fork or spoon, ensuring they are completely covered. Gently tap against the bowl to remove excess chocolate, and place them back on the parchment-lined tray. If any spots remain uncovered, just patch them up with a little extra melted chocolate.
Step 8: Decorate and Set
Feeling fancy? Use any remaining melted chocolate to drizzle over your truffles. Transfer the chocolate into a small piping bag or a zip lock bag and snip off a corner. This final touch adds visual appeal. Once decorated, let the truffles sit at room temperature for a short while to allow the chocolate to set beautifully.
Step 9: Storage Tips
To keep your Raspberry Cheesecake Truffles fresh, store them in an airtight container in the refrigerator or freezer. They will last up to two weeks in the fridge. Always allow them to sit at room temperature briefly before serving since they soften quickly when warm. Enjoy the delightful burst of flavors and creamy textures!
Tips for Success
- Use room temperature cream cheese to blend smoothly.
- Don’t skimp on chilling time; it helps with rolling and dipping.
- Be patient while melting chocolate; stir well to achieve a silky texture.
- For uniform truffles, use a scoop or cookie dough baller.
- Keep a towel nearby to wipe your hands; it keeps things tidy!
Equipment Needed for Raspberry Cheesecake Truffles
- Mixing Bowl: Any large mixing bowl will do; glass or stainless steel works best.
- Electric Mixer: A hand mixer or stand mixer makes blending easy, but whisking by hand works, too.
- Spatula: Essential for folding ingredients; a silicone one prevents scratching your bowls.
- Parchment Paper: Line trays for easy cleanup; wax paper can be a substitute if needed.
- Cookie Scoop or Tablespoon: For uniform truffles; a teaspoon also works in a pinch.
Variations of Raspberry Cheesecake Truffles
- Chocolate Coating Variations: Swap semi-sweet chocolate for white chocolate or dark chocolate for a different flavor profile.
- Nutty Twist: Roll your truffles in crushed nuts like almonds or hazelnuts for an extra crunch and flavor.
- Berry Medley: Substitute raspberries with other berries like strawberries, blueberries, or blackberries for a fruity spin.
- Vegan Version: Use vegan cream cheese, coconut whipped cream, and dairy-free chocolate to make these truffles plant-based.
- Flavoring Options: Add a splash of lemon or orange zest to the mixture for a citrusy brightness that complements the raspberries.
- Cheesecake Swirl: Incorporate caramel or chocolate sauce into the filling for a marbled effect and added flavor.
Serving Suggestions for Raspberry Cheesecake Truffles
- Serve truffles on a beautiful platter garnished with fresh raspberries for a pop of color.
- Pair with a scoop of vanilla ice cream to elevate the dessert experience.
- Enjoy with a cup of herbal tea or a glass of sparkling wine for a festive touch.
- Dust with cocoa powder or crushed graham crackers for added texture and visual appeal.
- Create individual gift boxes for a charming presentation at parties or gatherings.
FAQs about Raspberry Cheesecake Truffles
Can I use frozen raspberries instead of fresh?
While fresh raspberries are best for that burst of flavor, you can use frozen ones if needed. Just make sure to thaw and drain them well to avoid excess moisture in your Raspberry Cheesecake Truffles.
How long do these truffles last?
Your truffles can stay fresh in the fridge for up to two weeks. Just remember to store them in an airtight container to maintain their wonderful taste and texture!
Can I make these truffles ahead of time?
Absolutely! One of the best things about Raspberry Cheesecake Truffles is that they can be made days in advance. This makes them a fantastic option for parties or gatherings, allowing you to enjoy the moment without stress.
What’s the best way to serve these truffles?
For an elegant presentation, serve your truffles on a beautiful platter, garnished with some fresh raspberries. They pair wonderfully with coffee, hot tea, or even a glass of sparkling wine!
Can I customize the flavors of these truffles?
Definitely! Feel free to experiment with different berry flavors or even add a bit of citrus zest. The flexibility of this recipe allows you to get creative with your Raspberry Cheesecake Truffles!
Final Thoughts
Making Raspberry Cheesecake Truffles is more than just whipping up a dessert; it’s about creating delightful moments to share with loved ones. The joy of seeing everyone’s faces light up with each bite can’t be beaten! These truffles meld the tangy, sweet flavors of cheesecake with the burst of fresh raspberries, all wrapped in a luscious chocolate shell. Whether enjoyed solo with a cup of coffee or shared at a gathering, every truffle feels like a sweet hug. So go ahead, indulge yourself and spread the joy of these heavenly treats!
Print
Raspberry Cheesecake Truffles
- Total Time: 4 hours
- Yield: 24 truffles 1x
- Diet: Vegetarian
Description
Delicious and indulgent raspberry cheesecake truffles coated in a rich chocolate shell.
Ingredients
- 227 g cream cheese, softened
- 60 g powdered sugar
- 180 ml whipped topping (such as Cool Whip)
- 1 teaspoon vanilla extract
- 110 g fresh raspberries, washed and well dried
- 75 g graham cracker crumbs
- 425 g semi-sweet baking chocolate, coarsely chopped
Instructions
- In a mixing bowl, use an electric mixer to blend the cream cheese, powdered sugar, and vanilla extract until the mixture is light and fluffy. Gently incorporate the raspberries into the cream cheese mixture.
- Add the whipped topping and fold it in using a spatula. Stir in graham cracker crumbs and mix until fully combined.
- Place the filling in the freezer for 2 hours to firm up.
- Line a tray with parchment paper. Using a tablespoon or small scoop, portion the chilled mixture and roll each into a ball. If the mixture is too soft, return it to the freezer until manageable.
- Arrange the balls on the prepared tray and freeze until completely solid, approximately 2 additional hours.
- Melt the chopped semi-sweet chocolate, then let it cool for 5 minutes to avoid melting the truffles during dipping.
- Working in small batches, remove a few frozen truffles from the freezer at a time. Dip each truffle into the melted chocolate using a fork or spoon and ensure complete coverage. Place dipped truffles back on the parchment-lined tray. If necessary, patch uncovered spots with extra melted chocolate.
- Transfer any remaining melted chocolate into a small piping or zip lock bag, snip the corner, and drizzle over truffles for decoration.
- Store the truffles in the freezer or refrigerator. Allow to sit at room temperature briefly before serving, as they soften quickly.
Notes
- For best results, use fresh raspberries.
- Truffles can be stored for up to two weeks in the refrigerator.
- Make sure to prevent chocolate from overheating to avoid a burnt taste.
- Prep Time: 30 minutes
- Cook Time: 10 minutes
- Category: Dessert
- Method: No-Bake
- Cuisine: American
Nutrition
- Serving Size: 1 truffle
- Calories: 120
- Sugar: 9 g
- Sodium: 50 mg
- Fat: 7 g
- Saturated Fat: 4 g
- Unsaturated Fat: 3 g
- Trans Fat: 0 g
- Carbohydrates: 12 g
- Fiber: 1 g
- Protein: 2 g
- Cholesterol: 15 mg


