

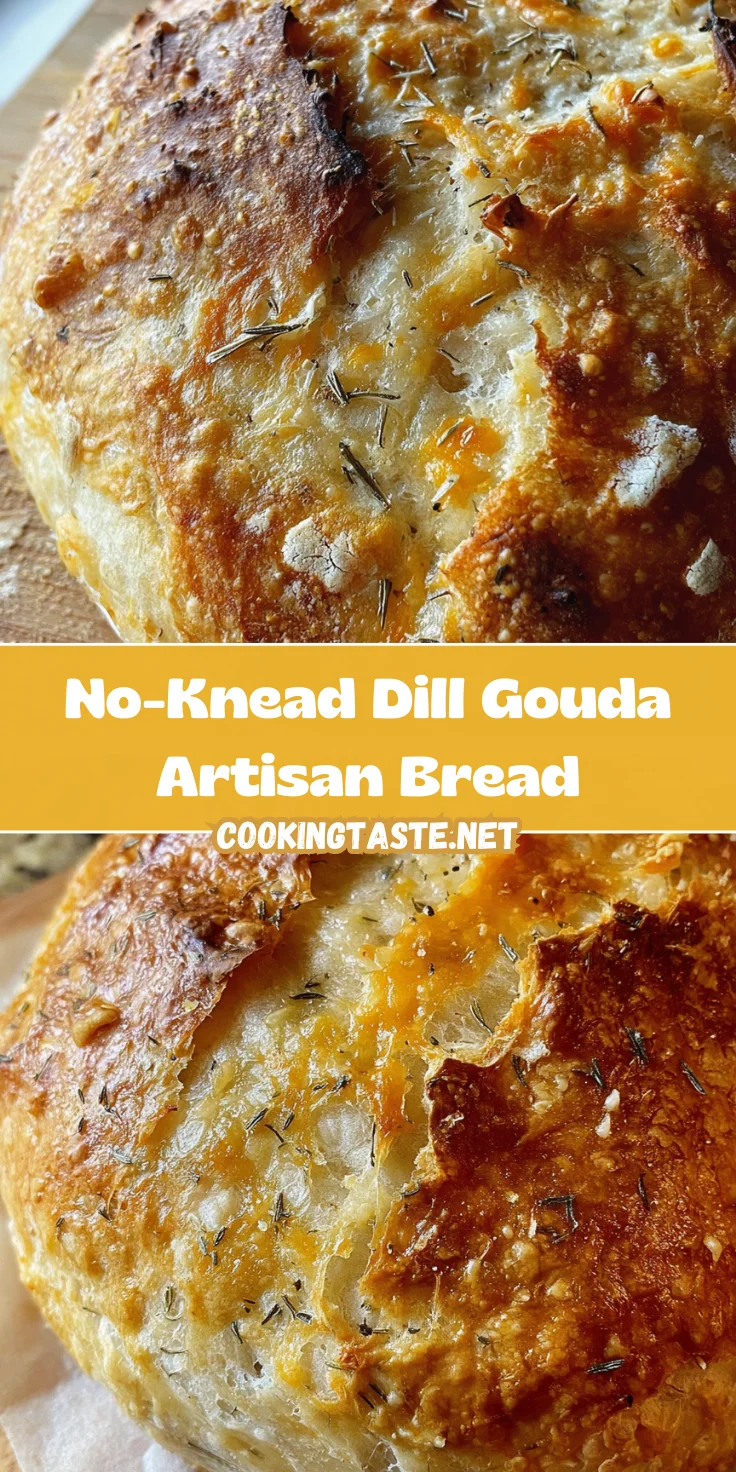
Introduction to No-Knead Dill Gouda Artisan Bread
There’s something magical about baking bread that fills your home with warmth and comfort. As a passionate home cook, I love sharing easy recipes that make life simpler for busy moms and professionals like us. Enter the No-Knead Dill Gouda Artisan Bread—a delightful creation that requires minimal effort while delivering rich flavors that will impress everyone at the table.
This recipe is perfect for those who crave homemade goodness but feel overwhelmed by the thought of traditional bread-making. With just a little time and love, you’ll have a crusty, golden loaf that can elevate any meal.
Why You’ll Love This No-Knead Dill Gouda Artisan Bread
This No-Knead Dill Gouda Artisan Bread is a game changer in my kitchen! Imagine coming home to the aroma of warm, cheesy bread without the hassle of kneading. It’s perfect for busy days—just mix, let it rise, and bake. Plus, the savory dill and gooey Gouda create a flavor explosion that’s hard to resist. Your family will be begging for seconds, and you’ll feel like a baking superstar!
Ingredients for No-Knead Dill Gouda Artisan Bread
To whip up this scrumptious No-Knead Dill Gouda Artisan Bread, you’ll need a handful of simple ingredients that pack a flavorful punch.
- Water: Essential for activating yeast. Room temperature water (around 70°F) helps jumpstart the fermentation process.
- Active dry yeast: This little powerhouse makes your bread rise. It’s the key to that airy texture we all love.
- Bread flour: Higher in protein than all-purpose flour, it gives your loaf structure and chew. For a lighter version, consider mixing in some all-purpose flour.
- Kosher or fine sea salt: Not just for flavor! Salt controls yeast activity and strengthens gluten, enhancing texture.
- Freshly ground black pepper: A hint of spice that complements the dill and Gouda, adding depth without overpowering.
- Fresh dill: This aromatic herb brings a burst of freshness. If you can’t find fresh dill, dried dill can be a good alternative, but use less.
- Gouda cheese: The real star! It adds creaminess and a rich, nutty flavor. Feel free to substitute with any cheese you adore, like sharp cheddar or pepper jack, for a twist.
Exact measurements and a printable version are waiting for you at the bottom of this article.
How to Make No-Knead Dill Gouda Artisan Bread
Step 1: Prepare the Yeast Mixture
To kick off your baking adventure, start by combining the active dry yeast with room temperature water. Let it sit for about 10-15 minutes. This short wait allows the yeast to activate and wake up, creating those tiny bubbles of goodness that will help your bread rise. You’ll know it’s ready when you see froth forming on the surface. It’s like magic in a bowl!
Step 2: Combine Dry Ingredients
Now it’s time to mix the dry ingredients! In a large bowl, whisk together your bread flour, kosher salt, freshly ground black pepper, and chopped dill. This step ensures everything is evenly distributed, and the flavors will bloom as they mix. Let the mixture rest for 10 minutes. This little pause helps the flour absorb moisture, enhancing flavor and texture in your No-Knead Dill Gouda Artisan Bread.
Step 3: Mix Dough
With your dry mixture ready, it’s time to combine the wet and dry ingredients. Pour your yeast mixture into the bowl with the flour. Use a rubber spatula to stir until everything comes together. The dough should be sticky and shaggy, with flour still visible around the bowl’s edges. Don’t worry about perfection here! This rustic texture is exactly what we want for that artisan feel.
Step 4: First Rise
Now, let the magic happen! Cover your bowl with a clean kitchen towel or plastic wrap and place it in a warm spot. Let it rise for about 8-10 hours until it doubles in size. This slow rise is crucial. It develops flavor, making your No-Knead Dill Gouda Artisan Bread taste heavenly. Use a sunny window or a cozy corner of your kitchen; the warmth helps the dough grow.
Step 5: Shape the Dough
Once your dough has doubled, sprinkle some flour on a clean surface and gently turn the dough out. Using floured hands, fold the dough into itself—this helps maintain its airy texture. Next, shape it into a neat rectangle and sprinkle those wonderful Gouda cheese cubes on top. Roll the dough up like a log, tucking in the ends. It’s like giving your bread a nice, cozy blanket before it goes to sleep!
Step 6: Refrigerate Overnight
To wrap up this stage, place the shaped dough into a floured bowl, dust it with flour, and cover it. Let it chill overnight in the refrigerator. This step isn’t just about waiting; it works wonders for flavor and texture. Chilling helps deepen the taste and gives your bread a beautiful crust. It’s worth the wait, I promise!
Step 7: Bake the Bread
Preheat your oven to 450°F (232°C) with your Dutch oven inside. This ensures the pot is hot for a golden crust. Carefully transfer your dough onto a piece of parchment paper, seam side down. Score the top with a sharp knife—this allows steam to escape. Lift the parchment with the dough into the hot pot and cover. Bake for 30 minutes, then remove the lid and bake for another 15-20 minutes. Enjoy the glorious aroma as it fills your kitchen!
Tips for Success
- Use room temperature water to ensure your yeast activates properly.
- Let your dough rise in a warm spot to double its size effectively.
- When shaping, handle the dough gently to preserve that airy texture.
- For a thicker crust, bake covered for the first half and uncovered for the second.
- If using different flours, adjust hydration levels as needed for best results.
Equipment Needed
- Large mixing bowl: For combining ingredients. A sturdy salad bowl works too.
- Rubber spatula: Ideal for mixing. A wooden spoon can substitute.
- Floured surface: For shaping dough. Use your countertop or a cutting board.
- Dutch oven: Essential for baking. Any heavy pot with a lid can work.
- Parchment paper: To ease transfer. Aluminum foil can be used if necessary.
Variations of No-Knead Dill Gouda Artisan Bread
- Herb Infusion: Swap out dill for other fresh herbs like rosemary or thyme for a different flavor profile.
- Cheese Twist: Experiment with cheeses such as feta or smoked gouda for a unique taste experience.
- Whole Wheat Flour: Use a blend of bread flour and whole wheat flour for a healthier option with a nutty flavor.
- Spicy Kick: Add crushed red pepper flakes or diced jalapeños for a zesty touch!
- Seed Topping: Before baking, sprinkle sesame or poppy seeds on top for added texture and flavor.
- Sweet Variants: Incorporate dried fruits like cranberries or apricots and substitute cheese for a sweet-savory twist.
Serving Suggestions for No-Knead Dill Gouda Artisan Bread
- Pair with Soups: This bread complements creamy tomato or hearty vegetable soups beautifully.
- Cheese Board Star: Slice it thinly to serve on a cheese board, alongside olives and nuts.
- Brunch Delight: Serve as a side with scrambled eggs or a fresh veggie omelet.
- Wine Match: Enjoy with a glass of Sauvignon Blanc for a delightful evening!
- Toast It: Drizzle with olive oil and toast slices for a delicious appetizer.
FAQs about No-Knead Dill Gouda Artisan Bread
I often get questions about the No-Knead Dill Gouda Artisan Bread, so I’m here to clear up any confusion! Here are some commonly asked questions and helpful answers to guide you through your baking journey.
Can I make this bread without Gouda cheese?
Absolutely! Feel free to swap Gouda for any cheese you love. Cheddar, mozzarella, or feta can work beautifully. Just adjust based on your taste preference.
Is it necessary to let the dough rise overnight?
While it’s highly recommended for best flavor and texture, you can let it rise for a shorter time if you’re in a pinch. Just ensure it at least doubles in size!
How do I store leftover bread?
Store your No-Knead Dill Gouda Artisan Bread in a paper bag or wrapped in a clean cloth to keep that crusty exterior. Avoid plastic, as it can make the bread soggy.
Can I freeze the dough?
You can! After shaping the dough, freeze it before the second rise. Just thaw it in the fridge the night before baking, and follow the remaining steps as usual!
What can I serve with this artisan bread?
This bread shines when served with soups, fresh salads, or a charcuterie board. Pair it with spreads like hummus or a delightful herb-infused olive oil.
Final Thoughts
There’s a certain joy in baking the No-Knead Dill Gouda Artisan Bread that transcends just making a loaf. It’s about creating something delightful for your loved ones, filling your home with comforting aromas, and evoking smiles at the dinner table. The simplicity of this recipe allows anyone, even the busiest among us, to enjoy homemade goodness without the fuss.
With each slice, you’ll taste the love and effort while relishing that gooey Gouda and fragrant dill. I hope it finds a cherished spot in your home and heart, just as it has in mine.
Print
No-Knead Dill Gouda Artisan Bread
- Total Time: 8-10 hours (including rising time)
- Yield: 1 loaf 1x
- Diet: Vegetarian
Description
Discover the art of baking with this No-Knead Dill Gouda Artisan Bread that requires minimal effort yet delivers an irresistible flavor.
Ingredients
- 1½ cups water, room temperature (at or near 70°F/21°C)
- 1 teaspoon active dry yeast
- 3½ cups bread flour, plus more for dusting
- 1 teaspoon kosher or fine sea salt
- ½ teaspoon freshly ground black pepper
- 2 tablespoons fresh dill, finely chopped
- 1 cup cubed Gouda cheese
Instructions
- Add the yeast to the water and let it sit for 10-15 minutes. In a large bowl, whisk together flour, salt, pepper and fresh dill until evenly distributed. Let sit for 10 minutes.
- Add yeast mixture to the bowl and stir together using a rubber spatula just until combined. The dough should look a little sticky and shaggy and there should still be a little flour around the edges of the bowl.
- Cover and let rise somewhere warm until it has doubled in size, about 8-10 hours.
- Once the dough has doubled in volume, use your hands to pull the dough out onto a floured surface. With floured hands, gently fold the dough into itself several times just until it holds together. Stretch and smooth out dough into a rectangular shape and press Gouda cubes into the dough.
- Roll up dough into a log shape, adding bits of flour as needed to prevent sticking, and fold the ends underneath. Sprinkle with a little more flour and shape into a flour-covered ball.
- Place the dough into a flour dusted bowl, dust with flour, cover and refrigerate overnight.
- Preheat oven to 450ºF (232ºC) with your Dutch oven inside.
- Uncover the dough and turn it out onto a lightly floured surface seam side down. Shape it into a loaf and place it on a sheet of parchment paper. Score the top with a razor blade or sharp knife.
- Remove the Dutch oven from the oven and transfer the dough, still on parchment, into it. Cover and bake for 30 minutes, then remove the cover and bake for 15-20 minutes more.
- Once the top is browned and sounds hollow when tapped, remove the bread and transfer it to a wire cooling rack to let cool for up to an hour before slicing.
Notes
- Ensure the dough is in a warm place to rise effectively.
- If using alternative flours, refer to specific guidelines for best results.
- Prep Time: 10 minutes (plus rising time)
- Cook Time: 45-50 minutes
- Category: Bread
- Method: Baking
- Cuisine: American
Nutrition
- Serving Size: 1 slice
- Calories: 180
- Sugar: 0g
- Sodium: 210mg
- Fat: 6g
- Saturated Fat: 3g
- Unsaturated Fat: 2g
- Trans Fat: 0g
- Carbohydrates: 25g
- Fiber: 1g
- Protein: 7g
- Cholesterol: 15mg


