

Introduction to Molten Lava Cake Chocolate
Ah, the magical world of desserts! Nothing beats a Molten Lava Cake Chocolate, especially when you need something sweet to impress loved ones, or simply to treat yourself after a long day. It’s a heavenly balance between a rich chocolate cake and a gooey, flowing center that will have everyone swooning. This recipe is my go-to for those moments when I need a quick solution that looks like I spent all day in the kitchen. So, grab your apron and join me on this delicious journey. Trust me; you won’t regret it!
Why You’ll Love This Molten Lava Cake Chocolate
You’ll fall head over heels for this Molten Lava Cake Chocolate for so many reasons! First, it’s incredibly easy to whip up, even on the busiest of nights. In just a few simple steps, you’ll have a show-stopping dessert that’ll wow your family and friends. Plus, the taste? It’s a rich, chocolate lover’s dream come true. Trust me, it’s the kind of dessert that brings smiles and warms hearts!
Ingredients for Molten Lava Cake Chocolate
Gathering the right ingredients is key to making a fantastic Molten Lava Cake Chocolate. Each component plays its part in creating that blissful dessert experience. Here’s what you’ll need:
- Unsalted Butter: This is your base for flavor and richness. It helps achieve that soft, tender crumb and is also used to grease the ramekins.
- Baking Chocolate: Rich baking chocolate ensures a deep chocolate flavor. Choose high-quality chocolate for the best results, as it melts into that luscious molten center.
- Large Eggs and Egg Yolks: These are essential for structure and moisture. The combination of whole eggs and yolks adds richness to your cake.
- Granulated Sugar: This sweetener not only balances the bittersweet chocolate but also helps create that fluffy texture we love in cakes.
- Vanilla Extract: A splash of pure vanilla elevates the flavor, marrying beautifully with the chocolate.
- Salt: Just a pinch enhances all the flavors, bringing out the richness of the chocolate.
- All-Purpose Flour: This provides structure while allowing the center to remain gooey. Don’t worry; it’s just a small amount!
- Cocoa Powder: Adding cocoa powder intensifies the chocolate flavor, giving you that decadent experience.
- Powdered Sugar: For garnishing, this lovely dusting adds a touch of sweetness and makes your dessert look extra fancy.
- Vanilla Ice Cream: While it’s optional, a scoop atop your cake is a creamy indulgence that perfectly complements the molten center.
- Chocolate Sauce: A drizzle of chocolate sauce brings extra rich flavor and looks gorgeous on the plate!
For exact quantities of these delightful ingredients, just scroll to the end of the article, where you’ll find everything you need for printing. Happy baking!
How to Make Molten Lava Cake Chocolate
Step 1: Preheat the Oven and Prepare Ramekins
First things first, let’s get that oven preheated to 230°C. This high temperature is crucial for achieving the perfect molten center. While that’s heating up, generously grease six ramekins with softened butter to prevent sticking. Don’t skip this step! Proper greasing ensures your delightful cake releases easily and doesn’t tear apart. Lightly dust the ramekins with cocoa powder for an extra layer of flavor and a beautiful finish. Trust me; this step lays the groundwork for a cake that’s both decadent and delightful!
Step 2: Melt the Chocolate and Butter
Now, let’s melt the butter and baking chocolate together. Place them in a microwave-safe bowl and heat them in 30-second intervals. It’s essential to stir thoroughly after each interval to avoid any burning. This melting process creates a silky mixture that’s key to our gooey center. As it transforms into a glossy blend, you can actually smell the magic unfolding. This step ensures that our Molten Lava Cake Chocolate has that luxurious, velvety texture we crave!
Step 3: Whisk the Eggs and Sugar
In a large mixing bowl, whisk the eggs, egg yolks, and granulated sugar until the mixture becomes pale and fluffy. This process takes about 2-3 minutes, and it’s quite vital! Whisking incorporates air, creating a light batter that results in a tender cake. Just picture that fluttering texture that will envelop the molten chocolate center. Don’t rush this step; it defines the delightful experience of your cake!
Step 4: Combine Mixtures
Next, pour the melted chocolate mixture into the fluffy egg and sugar blend. Add the vanilla extract and salt, and mix gently until everything is combined. It’s important to be gentle during this mixing process, as overmixing can affect the texture of your cake. You want to maintain that airiness we achieved earlier while ensuring a homogenous batter. This careful blending leads to the winning combination of flavors that will make everyone swoon!
Step 5: Prepare Batter for Ramekins
Now, it’s time to fill those prepared ramekins! Spoon the batter evenly into each, filling them about three-quarters full. This filling technique is essential because it allows room for the batter to rise and form that beautiful gooey center. If you fill them too full, the molten magic won’t happen. Remember, consistency is key, so don’t rush this step—your chocolate-loving heart will thank you later!
Step 6: Bake to Perfection
Slide your filled ramekins into the preheated oven and set your timer for 10-12 minutes. Keeping a close eye is crucial here! You want the edges to be set but the centers to remain soft and jiggly. Those telltale signs of readiness are so exciting; you’ll be on the edge of your seat, and for good reason! Avoid overbaking at all costs, as this will lead to solid centers instead of that delightful lava we desire!
Step 7: Serve and Enjoy
The moment of truth is here! Allow the cakes to cool in the ramekins for just one minute. Then, place a small plate over each one, flip, and invert. With a little gentle tap, your Molten Lava Cake Chocolate should release beautifully. Now for the finishing touches: top each cake with a scoop of vanilla ice cream, drizzle with chocolate sauce, and dust with powdered sugar. These final steps not only elevate the presentation but add to the overall delightful experience. Get ready for everyone to dig in and devour your creation!
Tips for Success
- Don’t overbake! Checking your cakes a minute or two before the time is up can save the gooey center.
- Use high-quality chocolate for a richer molten experience. It makes a world of difference!
- Prepare the batter ahead of time and refrigerate it. Just add extra baking time for a special occasion!
- Sprinkle a little sea salt on top before serving—it enhances the chocolate flavor beautifully!
- Resting the cakes for a minute in the ramekins helps them set just right.
Equipment Needed
- Ramekins: Six 120 ml ramekins are ideal, but if you don’t have them, small oven-safe bowls work too!
- Mixing Bowls: A couple of medium to large bowls for mixing the batter will suffice.
- Microwave-safe Bowl: This is perfect for melting the chocolate and butter; a heat-resistant bowl will do.
- Whisk: A good old whisk is essential, although an electric mixer can save time.
- Spatula: Use a silicone spatula to gently fold in your batter and scrape the bowls clean!
Variations
- Nutty Delight: Add chopped nuts like almonds or hazelnuts to the batter for a crunchy texture contrast.
- Mocha Magic: Substitute a bit of brewed espresso for some of the butter to enhance the chocolate flavor with a caffeine kick.
- Gluten-Free Option: Replace all-purpose flour with almond flour or a gluten-free baking mix for a gluten-free treat.
- Fruit Fusion: Incorporate fruit purees, like raspberry or orange, into the batter for a refreshing twist.
- Vegan Version: Use aquafaba (chickpea brine) instead of eggs and a vegan butter substitute to make a delightful vegan molten cake.
Serving Suggestions
- Garnish: Serve with fresh berries like raspberries or strawberries for a pop of color and flavor.
- Complementary Drinks: Pair with a cup of espresso or a rich red wine to enhance the chocolate experience.
- Presentation: Dust the plates with extra cocoa powder or chocolate shavings for an elegant touch.
- Nut Sprinkles: Top with crushed nuts for added texture and crunch.
- Whipped Topping: A dollop of whipped cream can add extra creaminess to each bite.
FAQs about Molten Lava Cake Chocolate
Can I make Molten Lava Cake Chocolate in advance?
Absolutely! You can prepare the batter ahead of time and store it in the refrigerator. Just remember to add a couple of extra minutes to the baking time when you’re ready to bake. This is a great way to save time on a busy day!
How can I tell if my cake is done baking?
The edges of your cake should be set while the center still jiggles slightly. The perfect textbook sign is that the edges look cooked, but the middle is soft, ensuring that molten surprise awaits!
Is it possible to customize the fillings of Molten Lava Cake Chocolate?
Certainly! You can experiment with different fillings, such as caramel or fruit preserves. Just place a teaspoon of your chosen filling in the center of the batter before baking for a delightful twist!
Can I use different types of chocolate?
Yes, you can use milk chocolate or white chocolate for a different flavor profile. Just remember that the sweetness may vary, so adjust the sugar accordingly to maintain balance in your dessert!
What’s the best way to serve Molten Lava Cake Chocolate?
For a restaurant-worthy presentation, top your molten cake with a scoop of vanilla ice cream, a drizzle of chocolate sauce, and a dusting of powdered sugar. Fresh berries also make for a lovely addition, bringing both taste and color!
Final Thoughts
Indulging in a warm slice of Molten Lava Cake Chocolate is like wrapping yourself in a cozy blanket on a chilly night. Each bite delivers an explosion of flavor that’s both comforting and delightful. Whether you’re celebrating a special occasion or treating yourself after a long week, this dessert is sure to impress. The joy of watching it flow beautifully onto the plate, paired with a scoop of vanilla ice cream, is simply unmatched. With just a little bit of effort, you can create a moment of bliss that will leave your loved ones grinning from ear to ear!
Print
Molten Lava Cake Chocolate
- Total Time: 27 minutes
- Yield: 6 servings 1x
- Diet: Vegetarian
Description
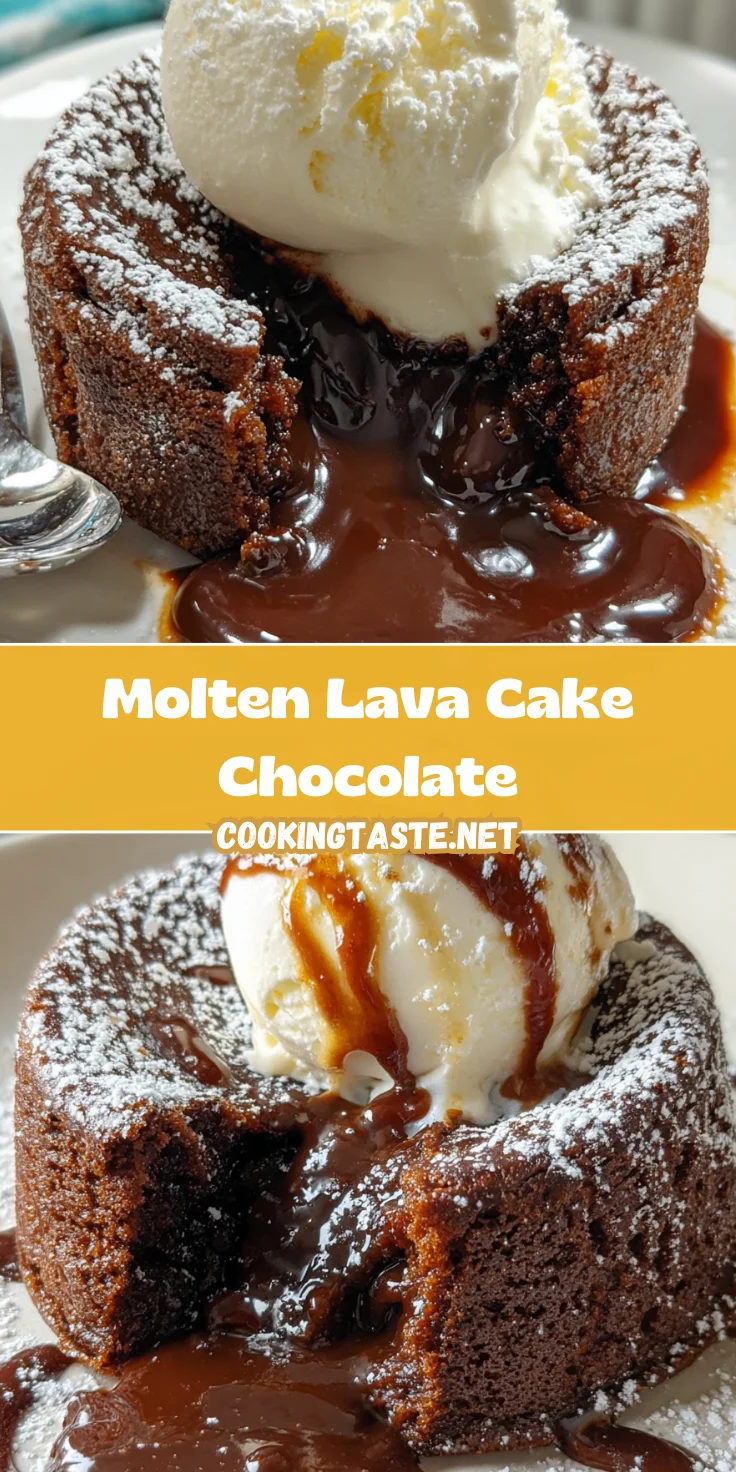
Molten Lava Cake Chocolate is an indulgently rich dessert with a gooey chocolate center that flows when cut open, perfect for any special occasion or a sweet treat.
Ingredients
- 227 grams unsalted butter, plus extra softened butter for greasing
- 227 grams baking chocolate, chopped
- 4 large eggs
- 4 large egg yolks
- 300 grams granulated sugar
- 1 teaspoon vanilla extract
- 0.25 teaspoon salt
- 65 grams all-purpose flour
- 16 grams cocoa powder, plus extra for dusting
- Powdered sugar, as needed for garnish
- Vanilla ice cream, as needed for serving
- Chocolate sauce, as needed for serving
Instructions
- Preheat oven to 230°C. Generously grease six 120 ml ramekins with softened butter and lightly dust with cocoa powder. Set aside.
- Combine butter and chopped baking chocolate in a microwave-safe bowl. Melt in 30-second intervals, stirring thoroughly after each, until smooth and glossy.
- In a large mixing bowl, whisk together eggs, egg yolks, and granulated sugar until pale and fluffy, approximately 2-3 minutes.
- Pour the melted chocolate mixture into the whisked eggs and sugar. Add vanilla extract and salt, mixing gently until homogenous.
- Sift in flour and cocoa powder. Fold gently into the wet mixture just to combine, being careful not to overmix.
- Spoon batter evenly among prepared ramekins, filling each about three-quarters full. Arrange ramekins on a baking sheet.
- Bake in the preheated oven for 10-12 minutes, until the edges are set but the centers remain soft.
- Allow to cool in ramekins for 1 minute. Place a small plate over each ramekin and invert to release. Let cakes rest briefly before lifting off ramekins.
- Top each cake with a scoop of vanilla ice cream, a drizzle of chocolate sauce, and a dusting of powdered sugar if desired. Serve immediately.
Notes
- Ensure not to overbake to maintain the molten center.
- These cakes can be prepared ahead of time and refrigerated before baking; just add a couple of extra minutes to the baking time.
- Prep Time: 15 minutes
- Cook Time: 12 minutes
- Category: Dessert
- Method: Baking
- Cuisine: French
Nutrition
- Serving Size: 1 cake
- Calories: 480
- Sugar: 45g
- Sodium: 180mg
- Fat: 26g
- Saturated Fat: 15g
- Unsaturated Fat: 8g
- Trans Fat: 0g
- Carbohydrates: 60g
- Fiber: 3g
- Protein: 6g
- Cholesterol: 210mg


