

Introduction to Italian Easter Cookies
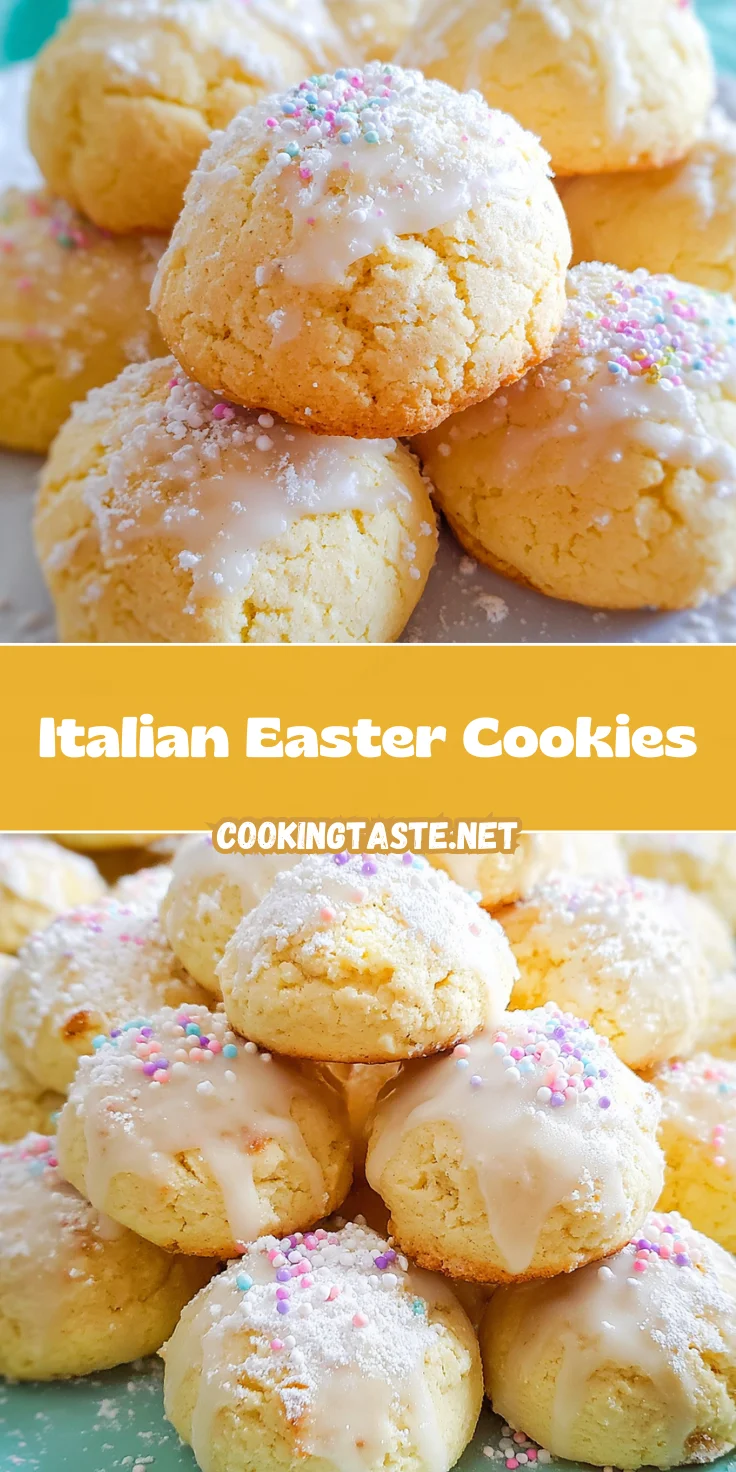
This year, as Easter approaches, I find myself reminiscing about the delightful scent of Italian Easter cookies wafting through my home. These cookies, soft and adorned with colorful glaze, are a true symbol of joy and celebration. Whether you’re a busy mom or a professional juggling a packed schedule, this recipe is perfect for you. It allows for a quick and easy way to bring a touch of tradition into your celebrations. So, roll up your sleeves and let’s embark on this sweet culinary adventure together!
Why You’ll Love This Italian Easter Cookies
You will absolutely adore the simplicity of making these Italian Easter cookies. They come together quickly, making them perfect for busy schedules. The flavor? Oh, it’s a heavenly blend of vanilla and almond that dances on your taste buds. Plus, the colorful glaze not only enhances the look but also adds a delightful sweetness. These cookies are not just about taste; they are a celebration of family and tradition, all wrapped up in a bite!
Ingredients for Italian Easter Cookies
To whip up these delightful Italian Easter cookies, you’ll need a handful of simple ingredients that come together beautifully. Let’s take a closer look at what you’ll need:
- All-purpose flour: This is the base for our cookies, providing structure and that soft texture we crave.
- Baking powder: A must-have leavening agent that helps the cookies rise, ensuring they stay fluffy and soft.
- Salt: Just a pinch to enhance the flavors. It balances the sweetness of the cookies perfectly.
- Granulated sugar: This adds sweetness and helps create a lovely texture, making them irresistible.
- Unsalted butter: Softened butter is crucial for creaming, which brings air into the mix for that light, tender bite.
- Vanilla extract: A classic flavor that complements the almond and brings a warm, aromatic note.
- Almond extract: This gives our cookies that signature Italian flavor. If you’re not a fan, you can use extra vanilla instead.
- Eggs: Room temperature eggs help bind the ingredients together, making for a smoother batter.
- Powdered sugar: This is essential for our sweet glaze, providing that smooth finish and eye-catching color.
- Milk or cream: Used in the glaze, it adds the right consistency for dipping and decorating.
- Liquid food coloring: This allows you to bring your creativity to life, making each cookie as vibrant as your holiday spirit.
- sprinkles: A fun addition for decorating that adds crunch and a pop of color!
Want to know the exact measurements? Fear not! They’re all available at the bottom of the article for easy printing.
How to Make Italian Easter Cookies
Now that we have our ingredients prepped and ready to go, let’s dive into the fun part—the baking! Follow these straightforward steps to create your own batch of delicious Italian Easter cookies.
Step 1: Preheat and Prepare
The first step is to preheat your oven to 350°F. This ensures that the cookies bake evenly and come out soft and delightful. While that’s heating up, line two large baking sheets with parchment paper or silicone baking mats. This simple action prevents sticking and makes cleanup a breeze. Trust me; you’ll thank yourself later when those colorful cookies glide right off!
Step 2: Combine Dry Ingredients
In a medium bowl, whisk together the all-purpose flour, baking powder, and salt. This process is essential, as it evenly distributes the baking powder and salt throughout the flour. Remember to do this well, but don’t stress about perfection! The goal is to make sure everything is incorporated, and you’ll see how it helps in creating light, fluffy cookies.
Step 3: Cream Butter and Sugars
Now, let’s cream the butter and sugars. In a large bowl or the bowl of a stand mixer, combine the softened butter, granulated sugar, vanilla extract, and almond extract. Beat them together on medium-high speed until the mixture becomes light and fluffy. This step is crucial; air bubbles in the mixture help give your cookies that fluffy texture we all love. It’s like giving your cookies a big hug before they even hit the oven!
Step 4: Add Eggs Gradually
Next, it’s time to add the eggs. Add one egg at a time, mixing on medium-low speed until each egg is fully incorporated before adding the next. This gradual process helps to keep your cookie batter smooth and prevents it from becoming soupy. As you mix, take a moment to enjoy that rich aroma filling your kitchen—it’s simply divine!
Step 5: Mix Wet and Dry Ingredients
Slowly add the flour mixture to your wet ingredients. Stir gently until just combined. Make sure not to over-mix this batter; a few floury streaks are okay. Over-mixing can lead to tougher cookies, and we want these soft and tender, bursting with flavor! Plus, don’t forget that this step is where the magic of the Italian Easter cookies really begins!
Step 6: Shape Cookie Dough
Now, it’s time to shape our cookies! Use a medium cookie scoop—about 1 ½ tablespoons of dough each—and use your hands to roll them into balls. Place these dough balls about an inch apart on your prepared baking sheets. Spacing is key here; it allows enough room for the cookies to spread and maintain their beautiful shapes as they bake. Perfectly round cookies emerging from the oven? Yes, please!
Step 7: Bake the Cookies
It’s showtime! Bake the cookies in your preheated oven for 12 to 15 minutes. Keep an eye on them—once a toothpick inserted into the center comes out clean, they’re good to go! Let them sit on the baking sheets for about 5 minutes before transferring to a cooling rack. This time on the baking sheet allows them to set perfectly, making them easier to move without falling apart.
Step 8: Cool and Glaze
Once your cookies have cooled completely, it’s time for the fun part—glazing! In a small bowl, whisk together the powdered sugar, milk, and almond extract until smooth. Divide this glaze into different bowls and tint with food coloring as you like. For all-out fun, consider double-dipping your cookies in the glaze for a deeper color. Then, let them sit on a plate while they set. The moment you see those colorful sprinkles on top, you’ll know these Italian Easter cookies are ready to bring joy to your table!
Tips for Success
- Ensure your butter is softened for easy creaming!
- Use room temperature eggs for better mixing and texture.
- Don’t over-mix your dough; gentle folding keeps the cookies soft.
- Double dip the cookies for a more vibrant glaze color!
- Allow cookies to cool completely before glazing for the best results.
Equipment Needed
- Mixing bowls: Good quality bowls work for mixing ingredients; glass or stainless steel are great options.
- Stand mixer or hand mixer: Use either for creaming butter and sugar, but a whisk can do in a pinch!
- Scoops or spoons: A cookie scoop ensures uniform cookies, but you can use two spoons instead.
- Baking sheets: Basic sheets work, but a silicone mat or parchment paper makes cleanup easier!
- Cooling rack: If you don’t have one, a plate will suffice for letting cookies cool.
Variations
- Gluten-free option: Substitute all-purpose flour with a gluten-free flour blend for a gluten-free version of these Italian Easter cookies.
- Citrus twist: Add lemon or orange zest to the dough for a refreshing citrus flavor that pairs beautifully with the almond.
- Nutty delight: Fold in chopped nuts like almonds or pistachios for an extra crunch and rich flavor.
- Dried fruits: Add raisins or chopped dried apricots for a chewy texture and a hint of natural sweetness.
- Vegan alternative: Use coconut oil instead of butter and replace eggs with flaxseed or apple sauce for a vegan-friendly version.
Serving Suggestions
- Pair your Italian Easter cookies with a cup of freshly brewed coffee or tea for a delightful afternoon treat.
- Present them on a colorful platter to celebrate the vibrant spirit of Easter.
- Consider serving with fruit salad for a refreshing contrast.
- For a festive touch, place them in whimsical bags as delightful gifts for family and friends.
- Add a dusting of powdered sugar on top for an elegant finish!
FAQs about Italian Easter Cookies
Curious about Italian Easter cookies? I’m here to answer some of the most frequently asked questions that may pop into your mind as you embark on this baking journey. Let’s get those questions addressed!
Can I make these Italian Easter cookies ahead of time?
Absolutely! You can bake the cookies a day or two in advance. Just be sure to store them in an airtight container to keep them fresh. The glaze can also be made ahead; just give it a quick whisk before using.
How do I store leftover cookies?
To keep your Italian Easter cookies fresh, store them in an airtight container at room temperature. If you want to preserve their softness, you can also place a slice of bread inside the container. This whimsical hack works wonders!
Can I customize the glaze colors?
Yes, indeed! The beauty of making Italian Easter cookies is that you can unleash your inner artist. Use any liquid food coloring to create vibrant shades to match your festive mood. Get creative with patterns, and let the kids join in the fun!
What if I don’t have almond extract?
If almond extract isn’t available, no worries! You can simply replace it with an equal amount of vanilla extract for a slightly different, but still delicious, flavor. Your Italian Easter cookies will still bring joy to the table!
Are these cookies suitable for a gluten-free diet?
Yes! You can easily turn these Italian Easter cookies gluten-free by substituting all-purpose flour with a good gluten-free flour blend. Just be sure to check the blend for the right ratio, and you’re all set!
Final Thoughts
As we wrap up this delightful baking adventure, I can’t help but feel excited about the joy that Italian Easter cookies will bring to your celebrations. These colorful treats not only offer a burst of flavor but also create a beautiful moment of togetherness for family and friends. Picture your loved ones gathered around, laughter filling the air as they savor these sweet bites. This recipe isn’t just about baking; it’s about connection and tradition, crafted right in your kitchen. So, grab your apron and spread the love—one Italian Easter cookie at a time!
Print
Italian Easter Cookies
- Total Time: 35 minutes
- Yield: 24 cookies 1x
- Diet: Vegetarian
Description
Delicious Italian Easter cookies that are soft and topped with a colorful glaze, perfect for celebrating the holiday.
Ingredients
- 3 cups all-purpose flour
- 2 teaspoons baking powder
- ¼ teaspoon salt
- ¾ cup granulated sugar
- 8 tablespoons unsalted butter, softened
- 1 teaspoon vanilla extract
- 2 teaspoons almond extract
- 3 eggs, room temperature
- 1 cup powdered sugar (for glaze)
- 3 tablespoons milk or cream (for glaze)
- 1 teaspoon almond extract (for glaze)
- liquid food coloring (for decorating)
- sprinkles (for decorating)
Instructions
- Preheat the oven to 350F°. Line two large baking sheets with parchment paper or silicone baking mats and set aside.
- In a medium bowl, whisk together the all-purpose flour, salt, and baking powder.
- In a large bowl or the bowl of a stand mixer, combine the softened butter, granulated sugar, and both the vanilla and almond extracts and beat on medium-high speed until the mixture is light and fluffy.
- Add one egg at a time, mixing on medium-low speed until the egg is incorporated before adding the next egg.
- Slowly add the flour mixture to the wet ingredients, mixing just until combined. Be careful not to over mix.
- Use a medium cookie scoop (about 1 ½ tablespoons of cookie dough) and use your hands to shape into balls. Place the balls about an inch apart on the prepared baking sheets.
- Bake for 12 to 15 minutes, or until an inserted toothpick comes out clean. Let the cookies rest on the baking sheets for about 5 minutes before transferring to a cooling rack. Let cookies cool completely before glazing.
- To make the glaze, whisk together the powdered sugar, milk, and almond extract in a small bowl until smooth and no lumps remain.
- Divide the glaze equally into 3 bowls (or however many colors you want) and tint with food coloring.
- Carefully dip the cooled cookies in the glaze and decorate with sprinkles. Allow them to set on a plate before serving. (Consider double dipping the cookies for a deeper glaze color.)
Notes
- Make sure the eggs are at room temperature for better mixing.
- Double dipping the cookies can enhance the glaze color.
- Allow the cookies to cool completely before glazing for better adhesion of the glaze.
- Prep Time: 20 minutes
- Cook Time: 15 minutes
- Category: Dessert
- Method: Baking
- Cuisine: Italian
Nutrition
- Serving Size: 1 cookie
- Calories: 150
- Sugar: 8g
- Sodium: 30mg
- Fat: 6g
- Saturated Fat: 4g
- Unsaturated Fat: 1g
- Trans Fat: 0g
- Carbohydrates: 22g
- Fiber: 0g
- Protein: 2g
- Cholesterol: 30mg


