

Introduction to Harvest Marble Chocolate Chip Cookies
As the leaves start to turn and the air grows crisp, what better way to embrace the season than with a batch of Harvest Marble Chocolate Chip Cookies? These vibrant cookies not only taste amazing but also add a splash of color to your dessert table.
I know how busy life can get, especially when juggling family, work, and everything in between. This recipe is a quick solution for satisfying those sweet cravings or a lovely treat to impress your loved ones. Trust me, these marbled delights will make your kitchen feel like a cozy fall haven!
Why You’ll Love This Harvest Marble Chocolate Chip Cookies
These Harvest Marble Chocolate Chip Cookies are a delightful blend of flavors and colors that effortlessly capture the spirit of fall. Not only are they quick to prepare, but they also bring a smile to everyone’s face with their eye-catching marbled design. The rich chocolate chips melt in your mouth, creating a treat that’s perfect for families or gatherings. Plus, the recipe is adaptable, making it so easy to fit into your busy schedule!
Ingredients for Harvest Marble Chocolate Chip Cookies
Let’s gather our ingredients for these delightful Harvest Marble Chocolate Chip Cookies. Each one plays a crucial role in creating that delicious combination of flavors and vibrant colors.
- Butter: Softened salted sweet cream butter is key for a rich, creamy base.
- Granulated Sugar: This adds sweetness and helps achieve that lovely chewy texture.
- Brown Sugar: The molasses in brown sugar deepens the flavor, giving it a slight caramel richness.
- Eggs: A couple of large eggs help bind everything together while adding moisture.
- Vanilla Extract: Don’t skip this! It provides warmth and enhances the cookie’s overall flavor.
- Baking Soda: This leavening agent helps the cookies rise and become soft.
- Salt: Just a pinch amplifies the sweetness and balances the flavors beautifully.
- All-purpose Flour: The foundation of our cookie dough, giving it structure.
- Chocolate Chips: Use your favorite variety, as they add delicious bursts of chocolatey goodness.
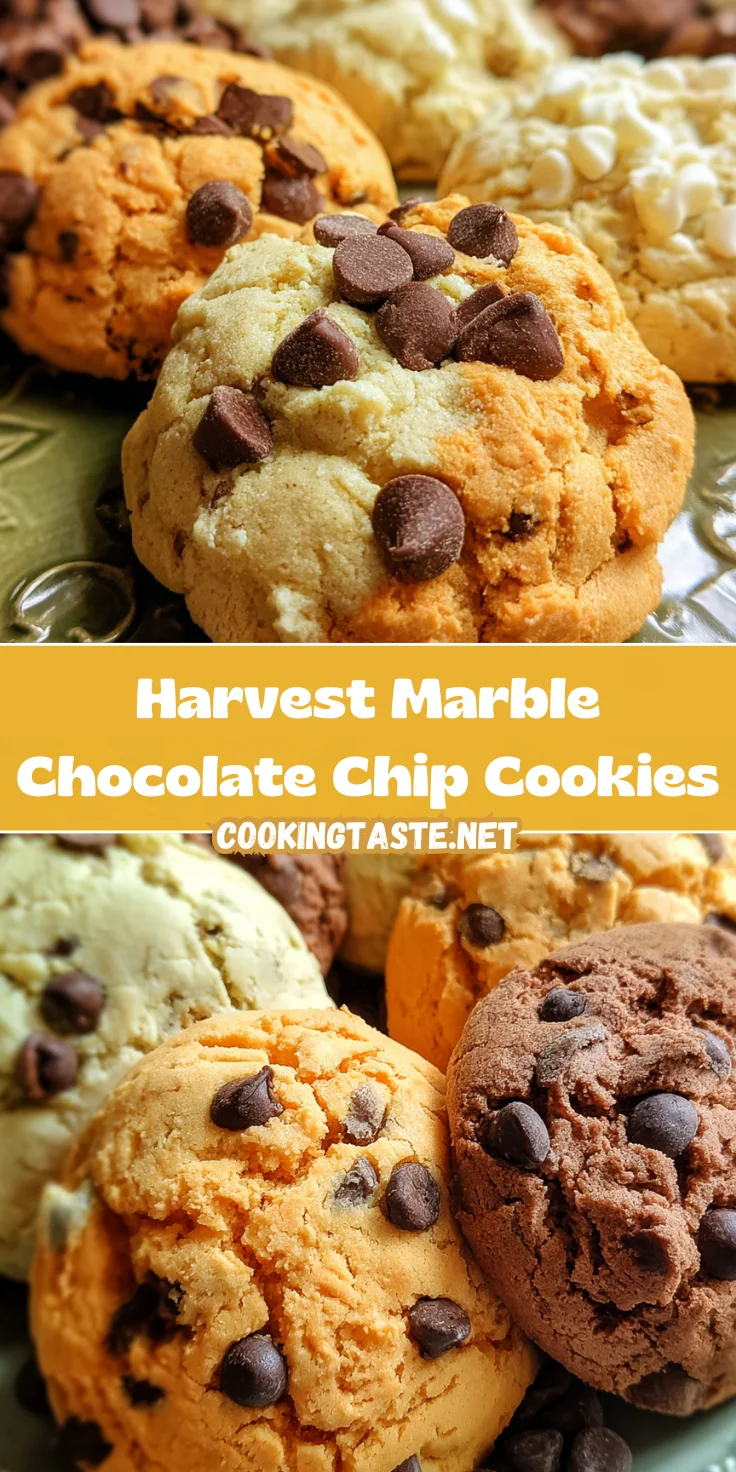
- Food Coloring: Orange and brown options bring the autumn flair to these cookies. Feel free to adjust based on your desired vibrancy!
You’ll find the exact quantities of each ingredient at the bottom of this article for easy printing. Now, let’s get ready to create some magic in the kitchen!
How to Make Harvest Marble Chocolate Chip Cookies
Now that we have everything in place, let me walk you through the delightful process of making Harvest Marble Chocolate Chip Cookies. This step-by-step guide will help you whip up these treats in no time!
Step 1: Cream the Butter and Sugars
Start by placing your softened butter, granulated sugar, and brown sugar into your stand mixer. Beat them together on medium speed until the mixture turns light and fluffy. This step is crucial as it creates a lovely airy texture. Feel free to take a moment to enjoy that sweet, buttery aroma as it fills your kitchen!
Step 2: Combine Eggs and Vanilla
Next, it’s time to add the eggs. Crack them in one at a time, mixing thoroughly after each addition. This ensures an even distribution throughout the batter. Then pour in the vanilla extract. Trust me, the warm scent that envelopes you is worth it! Blend everything until it’s smooth and well merged.
Step 3: Mix Dry Ingredients
Now for the dry ingredients! Sprinkle in the baking soda and salt first, mixing them into the batter. Then, gradually add in the all-purpose flour, about a cup at a time. This method helps prevent a flour explosion in your kitchen! Keep mixing until a cohesive dough forms. It’s that simple!
Step 4: Divide and Color the Dough
Divide the dough into three equal portions. In one bowl, add orange food coloring and mix until you reach your desired hue. In the second bowl, do the same with brown food coloring. Leave the third bowl untouched for a classic color contrast. This is where the magic of marbling begins!
Step 5: Fold in Chocolate Chips
Now it’s time to add those glorious chocolate chips! Fold them into each colored dough portion. Carefully incorporate the chocolate until evenly distributed, ensuring every cookie bite is bursting with chocolatey goodness. Your cookie dough is now a colorful blend of flavors just waiting to be shaped!
Step 6: Shape the Cookies
For shaping, grab equal amounts of each colored dough—orange, brown, and uncolored. Combine them gently to create approximately 55 g balls. Be creative here; shaping them into marbled patterns adds a personal touch. Once shaped, arrange the dough balls on a lined baking tray and flatten them slightly for even baking.
Step 7: Bake and Cool
Preheat your oven to 190°C (375°F) and let it warm up while you finish shaping. Once you’re ready, pop the tray in the oven and bake for 8–10 minutes. You want to see golden brown edges, while the centers remain soft. After baking, let the cookies cool on the tray for a few minutes before transferring them to a wire rack. The aroma will be irresistible!
Tips for Success
- Use room temperature butter for easier mixing and better texture.
- Don’t overmix after adding the flour to keep the cookies tender.
- Experiment with the food coloring to create your own unique shades!
- Chill the dough for 30 minutes if it’s too soft to shape easily.
- For a fun twist, try adding nuts or dried fruits to the mix.
Equipment Needed
- Stand Mixer: A hand mixer works too if you don’t have a stand mixer.
- Baking Tray: Use parchment paper or a silicone mat for easy cleanup.
- Mixing Bowls: Ensure you have several for dividing the dough.
- Spoon or Cookie Scoop: Helps in shaping uniform cookie balls.
Variations on Harvest Marble Chocolate Chip Cookies
- For a gluten-free option, substitute all-purpose flour with a 1:1 gluten-free baking blend.
- Add spices like cinnamon or nutmeg for a cozy fall flavor twist.
- Incorporate crushed nuts, such as walnuts or pecans, for added crunch and flavor.
- Swap out regular chocolate chips for dark or white chocolate for a different sweetness.
- Use mini chocolate chips for a fun texture and more chocolatey bites.
- Replace the food coloring with natural alternatives like beet or turmeric for a healthier option.
Serving Suggestions for Harvest Marble Chocolate Chip Cookies
- Pair the cookies with a tall glass of cold milk for a classic treat.
- Serve them warm alongside a scoop of vanilla ice cream for an indulgent dessert.
- Present on a rustic wooden platter for a cozy autumn vibe.
- Garnish with a sprinkle of sea salt for an unexpected twist.
FAQs about Harvest Marble Chocolate Chip Cookies
Can I freeze the Harvest Marble Chocolate Chip Cookies?
Absolutely! Once the cookies are cool, place them in an airtight container or freezer bag. They can last up to three months in the freezer. Just thaw them at room temperature before enjoying.
What can I substitute for brown sugar?
If you’re out of brown sugar, a blend of granulated sugar and a bit of molasses can work in a pinch. Just mix one cup of granulated sugar with one tablespoon of molasses to get a similar taste and moisture level.
How can I make these cookies less sweet?
To dial down the sweetness, you can reduce the amount of granulated sugar slightly. Just be careful not to affect the texture too much. Baking is a bit of a balancing act!
What’s the best way to store these cookies?
Keep your Harvest Marble Chocolate Chip Cookies in an airtight container at room temperature. They’ll stay delicious for about a week, though they usually vanish much sooner!
Can I use different types of chocolate chips?
Definitely! Feel free to mix dark, milk, or even white chocolate chips into your cookie dough. You can even fold in peanut butter chips for an extra kick!
Final Thoughts on Harvest Marble Chocolate Chip Cookies
As you gather with loved ones over a plate of Harvest Marble Chocolate Chip Cookies, you’ll feel the warmth of togetherness that these treats inspire. Each colorful bite is like a hug from your kitchen, reminding us of the joys of sharing and creating something special.
Whether you’re baking for a festive gathering or simply treating yourself after a long day, these cookies are sure to bring smiles all around. So roll up your sleeves and embrace the fun of baking; these delights will not only satisfy sweet cravings but also turn moments into cherished memories.
Print
Harvest Marble Chocolate Chip Cookies
- Total Time: 30 minutes
- Yield: Approximately 24 cookies 1x
- Diet: Vegetarian
Description
Delicious and visually appealing Harvest Marble Chocolate Chip Cookies featuring a blend of vibrant colors and rich chocolate flavors.
Ingredients
- 227 g butter, softened (salted, sweet cream)
- 200 g granulated sugar
- 110 g brown sugar
- 2 large eggs
- 2 teaspoons vanilla extract
- 1 teaspoon baking soda
- 0.5 teaspoon salt
- 345 g all-purpose flour
- 340 g chocolate chips
- Orange food coloring
- Brown food coloring
Instructions
- Combine softened butter, granulated sugar, and brown sugar in a stand mixer and beat until light and creamy.
- Add eggs one at a time and vanilla extract, mixing until the mixture becomes fluffy and well blended.
- Add baking soda and salt, then mix thoroughly. Gradually add flour in several additions, mixing until a uniform dough forms.
- Divide the dough evenly into three bowls. Mix orange food coloring into the first portion and brown food coloring into the second, leaving the third portion uncolored.
- Fold chocolate chips into each colored dough portion until evenly distributed.
- Take equal amounts of orange, brown, and uncolored dough and form approximately 55 g balls, gently shaping to create a marbled effect. Arrange on a lined baking tray and flatten slightly.
- Bake in a preheated oven at 190°C for 8–10 minutes, or until the edges are golden brown. Allow to cool on the tray for several minutes before transferring to a wire rack.
Notes
- Ensure the butter is softened for better mixing.
- Adjust the amount of food coloring based on the desired vibrancy.
- Cookies can be stored in an airtight container for up to a week.
- Prep Time: 20 minutes
- Cook Time: 10 minutes
- Category: Dessert
- Method: Baking
- Cuisine: American
Nutrition
- Serving Size: 1 cookie
- Calories: 150
- Sugar: 12 g
- Sodium: 120 mg
- Fat: 7 g
- Saturated Fat: 4 g
- Unsaturated Fat: 2 g
- Trans Fat: 0 g
- Carbohydrates: 20 g
- Fiber: 1 g
- Protein: 2 g
- Cholesterol: 20 mg


