

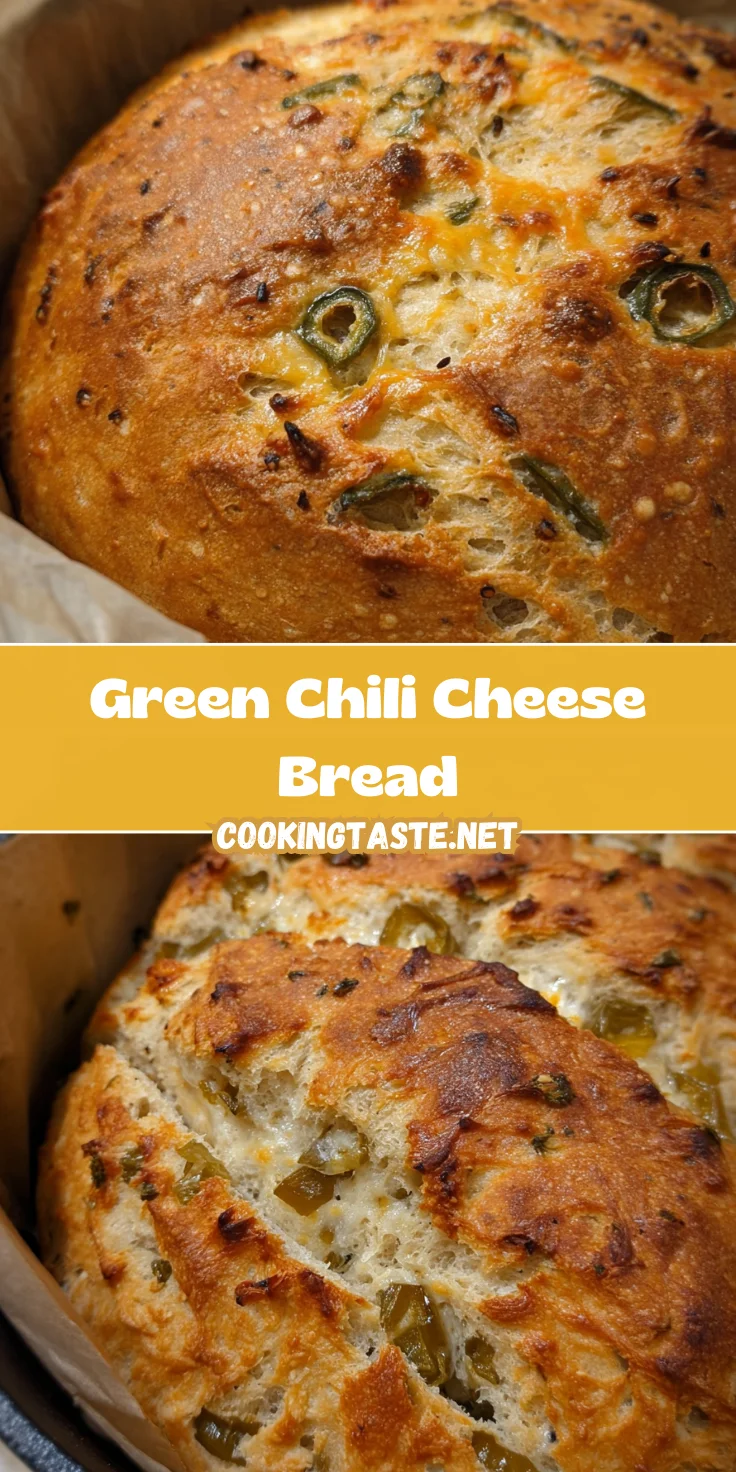
Introduction to Green Chili Cheese Bread
As a busy mom, I often find myself juggling a million things, yet I still crave comfort food that feels like a hug. That’s where Green Chili Cheese Bread swoops in to save the day. This delightful bread combines the gooey goodness of melted cheese with the zesty kick of green chilis, making it an irresistible treat for both friends and family. Perfect for brunch, a cozy dinner, or simply to enjoy with a warm bowl of soup, this bread is not just easy to make; it’s also a star that’ll impress everyone who takes a bite!
Why You’ll Love This Green Chili Cheese Bread
If you’re looking for a simple yet delicious recipe, this one’s for you! Green Chili Cheese Bread is incredibly easy to whip up, with minimal fuss and maximum flavor. The savory combination of cheese and chilis packs a punch that’s both comforting and exciting. Plus, it’s perfect for meal prep—make a loaf today and enjoy it all week, whether toasted for breakfast or served alongside a hearty salad!
Ingredients for Green Chili Cheese Bread
Gathering the right ingredients is the first step in creating your mouthwatering Green Chili Cheese Bread. Here’s what you’ll need:
- Whole wheat flour: This adds a nutty flavor and brings in some whole grain goodness.
- All-purpose flour: A classic choice that provides structure and texture to your bread.
- Salt: Essential for flavor enhancement; it really makes the other ingredients shine!
- Cumin: This spice gives a warm, earthy aroma that complements the chilis beautifully.
- Active dry yeast: This little powerhouse helps the bread rise, adding to its fluffy texture.
- Ground black pepper: A dash of this spice brings a subtle kick to the flavor profile.
- Room temperature water: This helps the yeast activate and promotes even mixing.
- Monterry cheese or cheddar: The star ingredient! Choose your favorite for a melty, cheesy heart.
- Green chilis: These add that signature zing! Adjust the spiciness to your preference by selecting mild or hot varieties.
Now, you might be wondering, “Can I substitute anything?” Absolutely! If you prefer a gluten-free option, mixing a gluten-free flour blend can work too. Just remember to check the ratios on the package for the best results.
The exact quantities for these ingredients are available at the bottom of the article for easy printing. Let’s move on to bringing all these flavors together!
How to Make Green Chili Cheese Bread
Step 1: Prepare Your Ingredients
Before diving into the delicious world of Green Chili Cheese Bread, it’s helpful to gather and measure all your ingredients. Grab your measuring cups, spoons, and a mixing bowl. Set everything out on your counter for easy access. If you can, pre-measure the flour and spices so they are ready to go when you need them. This little bit of prep saves you time and keeps the process flowing smoothly, making your baking experience much more enjoyable!
Step 2: Mix Dry Ingredients
In a medium-sized bowl, combine your dry ingredients: whole wheat flour, all-purpose flour, salt, cumin, and black pepper. Use a whisk or a fork to mix them well—this ensures even distribution of flavors. Make sure there are no lumps; you want a consistent blend for your bread. This step is crucial, as it sets the stage for the flavors to mix beautifully along with your green chilis and cheese later on!
Step 3: Combine Wet Ingredients
Next, it’s time to bring everything together. In your bowl of dry ingredients, pour in the room temperature water and add the juice from the green chilis. This juice is a secret flavor boost, so don’t skip it! Use a spoon or spatula to mix everything together for about a minute until it forms a sticky dough. This mixture is the start of your delightful cheese bread that will soon rise to perfection.
Step 4: Let the Dough Rise
After mixing, cover your bowl tightly with plastic wrap and let it sit at room temperature for 10 to 18 hours. I know, patience is key! This resting period allows the dough to develop flavor and texture, making your bread light and airy. During this time, you can relax or prepare a side dish for later. Just don’t peek! The dough needs its tranquility to rise beautifully.
Step 5: Preheat and Prepare for Baking
When your dough is done resting, it’s time to bring the heat! Preheat your oven to 475°F and place your Dutch oven inside. By heating both the oven and the Dutch oven, you’re setting the stage for a stunning, crispy crust on your Green Chili Cheese Bread. Wait at least 30-45 minutes for the Dutch oven to get really hot. A hot pot is the secret to that gorgeous golden crust!
Step 6: Shape and Place Dough
Remove the dough from the bowl and gently shape it into a ball on a floured surface. Be gentle! You don’t want to deflate all those lovely bubbles. Once shaped, place the dough on a piece of parchment paper. This makes transferring it easier later on. Fold the corners of the parchment over the dough for neatness. Your tasty creation is almost ready for the oven!
Step 7: Bake Your Bread
Now for the exciting part! Carefully transfer the dough and parchment paper into the hot Dutch oven. Pop the lid on, and bake for 30 minutes. This helps to trap steam, creating that soft interior. After 30 minutes, remove the lid to give your bread a lovely golden crust. Bake for an additional 10-15 minutes, keeping an eye on it to avoid over-browning. The smell will be heavenly by now!
Step 8: Cool Before Slicing
Once your bread is perfectly baked, remove it from the Dutch oven using the parchment paper. Place the loaf on a cooling rack and let it cool for at least 30 minutes before slicing. I know it’s tempting to dive in right away, but cooling ensures the texture sets properly. If you have leftovers, store them in a bread bag or an airtight container. Enjoy your warm, cheesy masterpiece!
Tips for Success
- Measure ingredients accurately for the best results.
- Use room temperature water to activate the yeast properly.
- Let the dough rest longer for a more flavorful bread.
- Don’t skip preheating the Dutch oven for a perfect crust.
- Experiment with various cheeses for different flavor profiles.
Equipment Needed for Green Chili Cheese Bread
- Mixing bowls: Use sturdy glass or stainless steel bowls for durability.
- Whisk or fork: Essential for mixing dry ingredients; a fork works too!
- Dutch oven: A cast iron pot creates the best crust; any heavy pot with a lid will do.
- Parchment paper: Use it for easy transfers; aluminum foil can be a substitute.
- Cooling rack: Helps to cool your bread evenly; a simple plate can suffice.
Variations of Green Chili Cheese Bread
- Herb-Infused Bread: Add fresh chopped herbs like cilantro or parsley to the dough for a burst of freshness and flavor.
- Spicy Jalapeño Twist: Swap out green chilis for jalapeños to kick up the heat factor in your bread.
- Cheese Mix: Combine different cheeses, like mozzarella or pepper jack, for a melty, flavorful surprise.
- Gluten-Free Option: Use a gluten-free flour blend to make a version that everyone can enjoy!
- Roasted Garlic Variation: Mix in roasted garlic for a deep, savory flavor that pairs beautifully with the cheese.
Serving Suggestions for Green Chili Cheese Bread
- Pair with a creamy tomato soup for a comforting, satisfying meal.
- Serve alongside a zesty salad, like a cilantro-lime slaw.
- Enjoy with your favorite dips, such as guacamole or salsa.
- Slice and toast for a delicious breakfast with eggs.
- Present warm, wrapped in a kitchen towel for an inviting touch!
FAQs about Green Chili Cheese Bread
Can I freeze Green Chili Cheese Bread? Absolutely! This cheese bread freezes beautifully. Just slice it after cooling, wrap each piece tightly in plastic wrap, and store it in a freezer bag. When you’re ready to enjoy, simply toast or warm the slices in the oven!
How spicy is this bread? The heat level of your Green Chili Cheese Bread depends on the type of green chilis you use. Opt for mild ones for a gentle zing or go for hot varieties if you like a spicy kick. It’s all about your personal taste!
Can I use a different type of flour? Yes, you can! While the recipe calls for whole wheat and all-purpose flour, you can try bread flour for a chewier texture or use a gluten-free blend for those with dietary restrictions. Just adjust the liquid according to the flour you choose.
How long can I store leftovers? If stored properly, your Green Chili Cheese Bread can last for about 3-5 days at room temperature in an airtight container. For longer freshness, keep it in the refrigerator.
What can I serve with this bread? This delightful bread pairs wonderfully with soups, stews, or even a fresh garden salad. You can also serve it alongside spreads like guacamole or hummus for an exciting appetizer!
Final Thoughts on Green Chili Cheese Bread
There’s something undeniably joyful about sharing a fresh loaf of Green Chili Cheese Bread with loved ones. The aroma wafting through the kitchen creates an atmosphere of warmth and comfort. As you slice into the soft, cheesy goodness, a smile spreads across your face, knowing you just created a blend of flavors that delights. Whether enjoyed with soup, salads, or on its own, this bread is sure to spark joy at any mealtime. So don your apron and embrace the culinary adventure, because baking this bread is not just cooking—it’s a heartfelt experience!
Print
Green Chili Cheese Bread
- Total Time: 10-18 hours including resting
- Yield: 1 loaf 1x
- Diet: Vegetarian
Description
Green Chili Cheese Bread is an irresistible treat that combines the flavors of cheese and green chilis in a delightful bread.
Ingredients
- 2 cups whole wheat flour
- 2 cups all-purpose flour
- 2 teaspoons salt
- 2 teaspoons cumin
- ¾ teaspoon active dry yeast
- 1 teaspoon ground black pepper
- 2 cups room temperature water
- 1 ½ cups Monterrey cheese or cheddar
- 1 (4 ounce) can green chilis
Instructions
- Read instructions all the way through before starting.
- Add the dry ingredients to a medium-sized bowl and mix.
- Add the wet ingredients, including the juice from the green chilis, and mix for about a minute.
- Cover with saran wrap and let it rest at room temperature for 10-18 hours.
- Preheat the oven to 475°F and heat the dutch oven for 30-45 minutes.
- Flour your surface generously, pull out the bread dough, and gently shape it into a ball.
- Place the shaped dough on a piece of parchment paper.
- Transfer the dough using the parchment paper to the hot dutch oven, cover with the lid, and bake for 30 minutes.
- Remove the lid and bake for an additional 10-15 minutes until golden brown.
- Carefully lift the parchment out to get the loaf from the dutch oven and place it on a cooling rack.
- Allow to cool for at least 30 minutes before slicing.
Notes
- The green chilis can be chosen based on your preference for mild or hot.
- It’s important to let the bread cool before slicing to ensure the inside sets properly.
- Prep Time: 10 minutes
- Cook Time: 45 minutes
- Category: Bread
- Method: Baking
- Cuisine: American
Nutrition
- Serving Size: 1 slice
- Calories: 220
- Sugar: 1g
- Sodium: 400mg
- Fat: 8g
- Saturated Fat: 3g
- Unsaturated Fat: 5g
- Trans Fat: 0g
- Carbohydrates: 30g
- Fiber: 3g
- Protein: 8g
- Cholesterol: 15mg


