

Introduction to Easy No-Oven Turkish Bread
Are you ever caught in a whirlwind of dinner prep, dreaming of a side that will steal the show? Look no further! This Easy No-Oven Turkish Bread comes to your rescue with minimal fuss and maximum flavor. Imagine fluffy, warm flatbread made right on your stovetop, ready in no time! Perfect for those busy days, this recipe is not just about filling plates; it’s about enhancing every meal and creating smiles. Whether you’re wrapping it around savory dishes or soaking up sauces, this bread is sure to impress your loved ones without breaking a sweat.
Why You’ll Love This Easy No-Oven Turkish Bread
This Easy No-Oven Turkish Bread is a game-changer for anyone juggling a busy schedule. It’s quick to whip up, needing just about an hour from start to finish. The soft, fluffy texture invites you to enjoy each bite, while the stovetop method means you can skip the heating battle of an oven. Plus, the delightful aroma wafting through your kitchen will have your family racing to the table, eager to taste your delicious creation!
Ingredients for Easy No-Oven Turkish Bread
Gather your ingredients and get ready to dive into the world of Turkish bread making! You’ll need some basic staples that you likely already have in your kitchen. Here’s what you’ll need:
- Bread flour or all-purpose flour: This is the backbone of your bread. It provides the structure needed for a soft, fluffy texture.
- Warm milk: A crucial component that adds richness and a touch of sweetness. It helps activate the yeast more effectively.
- Warm water: Similar to milk, this helps create the perfect environment for the yeast to thrive.
- Instant dry yeast: Your magic ingredient! It’s responsible for making the dough rise and creating that light texture.
- Sugar: Just a bit of sweetness helps fuel the yeast and enhances the overall flavor of the bread.
- Salt: Essential for bringing out flavor and strengthening the dough’s structure.
- Melted unsalted butter (or olive oil): Optional for brushing on the finished bread. It adds flavor and a shiny finish.
- Chopped parsley: Another optional touch! Sprinkle it on for a fresh burst of color and flavor.
You can find all the exact quantities at the bottom of the article, making it easy for you to print out this Easy No-Oven Turkish Bread recipe. So, let’s make some delicious memories together!
How to Make Easy No-Oven Turkish Bread
Step 1: Prepare the Dough
Let’s begin by mixing our key ingredients! In a bowl, pour warm milk and warm water, adding sugar and yeast. Give it a good stir to combine everything well. This warm liquid is crucial for activating the yeast, making it come alive and bubbly. Just picture those little yeast particles dancing in the liquid—they’re working hard to create magic within our dough!
Step 2: Mix and Knead
Next, it’s time to bring in the flour and salt. Sprinkle these ingredients into the yeast mixture and stir until you form a rough dough. Now, here comes the fun part—kneading! Turn your dough out onto a floured surface, and get those hands working! Knead until the dough is smooth and elastic. Aim for a non-sticky texture; that’s what you want for perfect, fluffy Easy No-Oven Turkish Bread.
Step 3: Let the Dough Rise
Once your dough feels great, it’s time for a little rest. Cover it with a clean kitchen towel or plastic wrap, and place it in a warm, draft-free spot. Let it rise until it doubles in size, which usually takes about an hour. This step is like a mini-vacation for your dough, allowing it to gather strength and flavor!
Step 4: Shape the Bread
After your dough has risen nicely, it’s time to shape it into bread. Divide the dough into six equal pieces and gently shape each into a round ball. Keeping it simple, roll each piece out with a rolling pin to about 5 mm thick and roughly 18 cm wide. The goal here is to make the bread even so it cooks perfectly on the stove!
Step 5: Cook on the Stovetop
Now let’s head to the stovetop! Preheat your pan over medium heat. Once it’s hot, place a rolled-out round into the pan. Watch for bubbling; when you see lots of little bubbles, it’s time to flip that bread! Cook until both sides are golden, puffing up like a happy balloon. Using a thick pan ensures even cooking, preventing any doughy spots.
Step 6: Final Touches
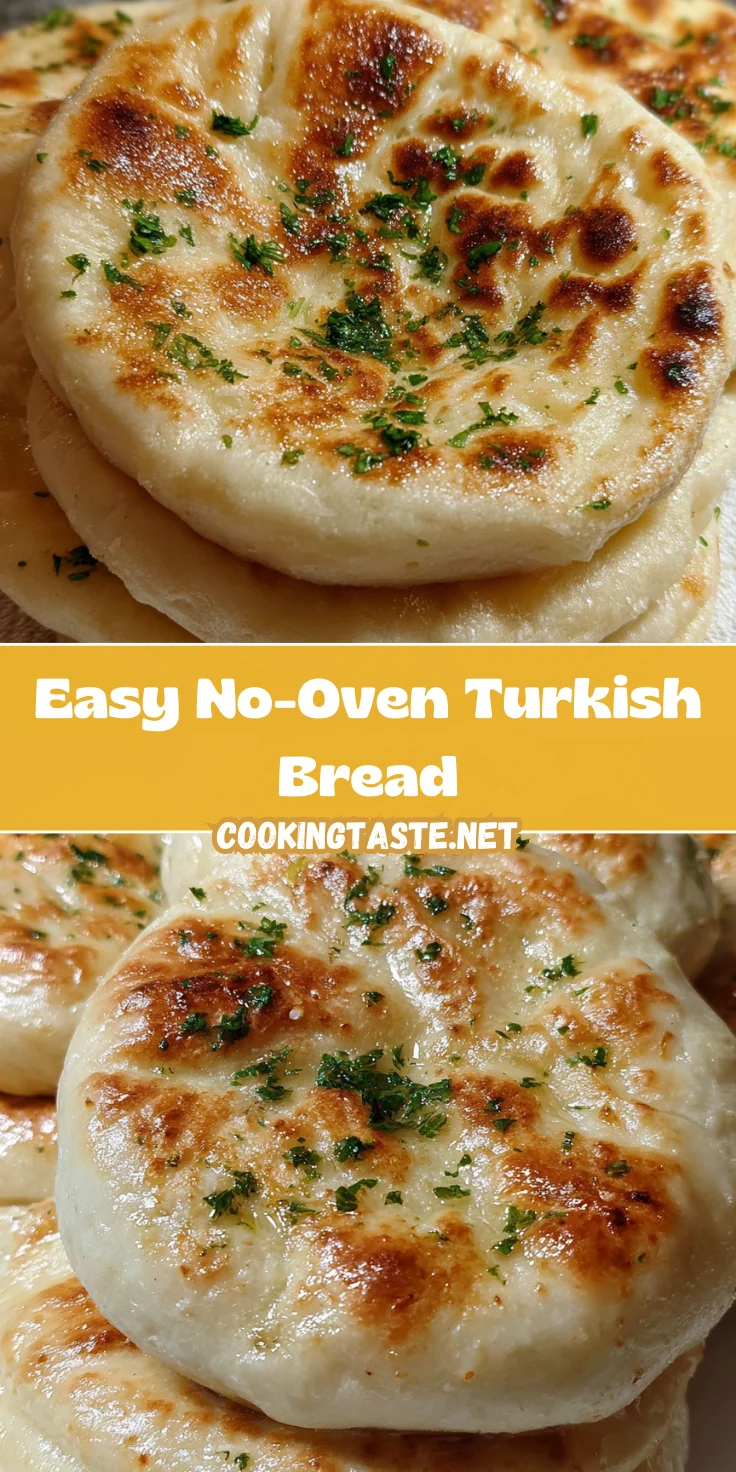
When your bread is beautifully cooked, it’s time for the final flourish. Brush it with melted butter or a drizzle of olive oil for extra flavor and a shiny touch. You can sprinkle it with chopped parsley or any herbs you love for an added zing! Serve it warm, and watch how everyone at the table brings their plates closer, ready to indulge in your soft and fluffy creation.
Tips for Success
- Make sure your liquids are warm but not hot; too hot can kill the yeast.
- Knead the dough on a floured surface to avoid stickiness.
- For a softer bread, cover it with a cloth during cooking.
- Experiment with toppings like sesame seeds or za’atar for added flavor.
- Store any leftovers in an airtight container to keep them fresh.
Equipment Needed
- Mixing bowl: A large bowl for combining ingredients, or use a pot if that’s all you have.
- Rolling pin: For rolling out dough; a wine bottle works just as well!
- Thick pan: A cast-iron skillet is ideal, but any sturdy frying pan will do.
- Kitchen towel: To cover the dough; a plastic wrap is also a good alternative.
Variations of Easy No-Oven Turkish Bread
- Herb-Infused: Add dried herbs like oregano or thyme to the dough for an aromatic twist.
- Garlic-Butter: Mix minced garlic into melted butter for brushing. This adds a savory layer of flavor!
- Cheesy Delight: Sprinkle shredded cheese, like mozzarella or feta, on top just before serving for a cheesy indulgence.
- Spicy Kick: Incorporate crushed red pepper flakes into the dough or sprinkle on top for those who love a bit of heat.
- Whole Wheat Option: Substitute half of the bread flour with whole wheat flour for a healthier version with added fiber.
- Vegan Version: Replace milk with almond or coconut milk and omit butter, using olive oil for brushing instead.
Serving Suggestions for Easy No-Oven Turkish Bread
- Pair it with a refreshing cucumber and tomato salad for a light meal.
- Serve alongside hummus or tzatziki for dipping; they complement the bread beautifully.
- Enjoy with grilled meats or roasted vegetables for a hearty feast.
- Consider a glass of yogurt drink, like Ayran, to cool your palate.
- Present the bread on a colorful platter garnished with herbs for an inviting look.
FAQs about Easy No-Oven Turkish Bread
Can I make this Easy No-Oven Turkish Bread in advance?
Absolutely! You can prepare the dough ahead of time and store it in the fridge. Just remember to let it come to room temperature before shaping and cooking. This is perfect for busy evenings!
What if I don’t have instant dry yeast?
If you’re out of instant dry yeast, you can use active dry yeast instead. Just make sure to activate it in warm water with a bit of sugar before adding it to the mixture. Your Easy No-Oven Turkish Bread will still turn out delicious!
How can I store leftovers?
To keep your bread fresh, store any leftover pieces in an airtight container at room temperature. If you want, you can also freeze them. Just warm them up in a pan or microwave when you’re ready to enjoy again.
Can I use whole wheat flour?
Yes, you can substitute some of the bread flour with whole wheat flour for a healthier take. Just keep in mind it might create a denser texture, but still delicious in every way!
What’s the best way to serve this bread?
This Easy No-Oven Turkish Bread pairs wonderfully with a variety of dishes! Serve it with some dip, alongside grilled meats, or even wrap it around your favorite fillings. It’s a versatile choice for any meal!
Final Thoughts
There’s something truly heartwarming about making Easy No-Oven Turkish Bread. It’s not just about nourishing your body; it’s about bringing joy to your table. This soft and fluffy flatbread effortlessly compliments a range of meals, making every dining experience a little more special. I adore how simple it is to prepare, yet it feels like a culinary adventure. Imagine the smiles around the table as everyone enjoys warm, freshly made bread! This recipe isn’t just a dish; it’s an invitation to create beautiful moments, one bite at a time. So, roll up your sleeves and enjoy the magic!
Print
Easy No-Oven Turkish Bread
- Total Time: 1 hour 35 minutes
- Yield: 6 pieces 1x
- Diet: Vegetarian
Description
This Easy No-Oven Turkish Bread is a soft and fluffy flatbread that can be made quickly on the stovetop, perfect for enhancing any meal.
Ingredients
- 500 g Bread flour or all-purpose flour (4 cups)
- 160 ml Warm milk (2/3 cup)
- 160 ml Warm water (2/3 cup)
- 10 g Instant dry yeast (1.5 tbsp)
- 10 g Sugar (1 tbsp)
- 8 g Salt (0.8 tbsp)
- 20 g Melted unsalted butter (or olive oil) – optional for topping
- Chopped parsley – optional for topping
Instructions
- Pour warm milk, warm water, sugar and yeast into a container. Mix them well.
- Add flour and salt and mix well. Knead the dough by hand until it’s no longer sticky and the surface is smooth.
- Cover the dough and let it proof until it has doubled in size (about 1 hour).
- Divide the dough into 6 pieces and shape them into rounds. Cover them with a plastic bag.
- Press them out with a roller to a round shape of about 18 cm and 5 mm thick.
- Turn on the stove and heat the pan over medium heat.
- Bake on both sides. When lots of bubbles have formed, turn the bread over to the other side.
- When the bread pops like a balloon, turn the heat down to low.
- Cover the bread with a cloth to prevent it from drying out while baking.
- It’s better to use a thick pan than a thin one, as the bread won’t rise in a thin pan.
- Brush the bread with a little butter or olive oil and enjoy.
Notes
- This bread can be topped with various toppings like herbs or spices.
- Store any leftovers in an airtight container to keep them fresh.
- Prep Time: 15 minutes
- Cook Time: 20 minutes
- Category: Bread
- Method: Stovetop
- Cuisine: Turkish
Nutrition
- Serving Size: 1 piece
- Calories: 150
- Sugar: 1g
- Sodium: 200mg
- Fat: 3g
- Saturated Fat: 1g
- Unsaturated Fat: 2g
- Trans Fat: 0g
- Carbohydrates: 29g
- Fiber: 1g
- Protein: 4g
- Cholesterol: 0mg


