

Introduction to Classic Pickled Eggs
Hey there, fellow food lovers! If you’re like me and you often find yourself racing against the clock, you’re in for a treat with this Classic Pickled Eggs recipe. These tangy delights are not just a delicious snack; they’re also a fantastic addition to salads or a quick meal solution. With only a handful of ingredients and minimal prep, you can impress your family and guests alike. Think of these pickled eggs as your secret weapon for busy days, effortlessly lifting your meals to a whole new level of flavor!
Why You’ll Love This Classic Pickled Eggs
What’s not to love about Classic Pickled Eggs? They’re super easy to whip up, making them a perfect choice for busy moms like us. In just a few minutes of cooking, you have a tangy, protein-packed snack ready to enjoy. The best part? The flavors only get better with time, offering a quick taste of home cooking in every bite. Plus, you can customize the spices to suit your family’s preferences!
Ingredients for Classic Pickled Eggs
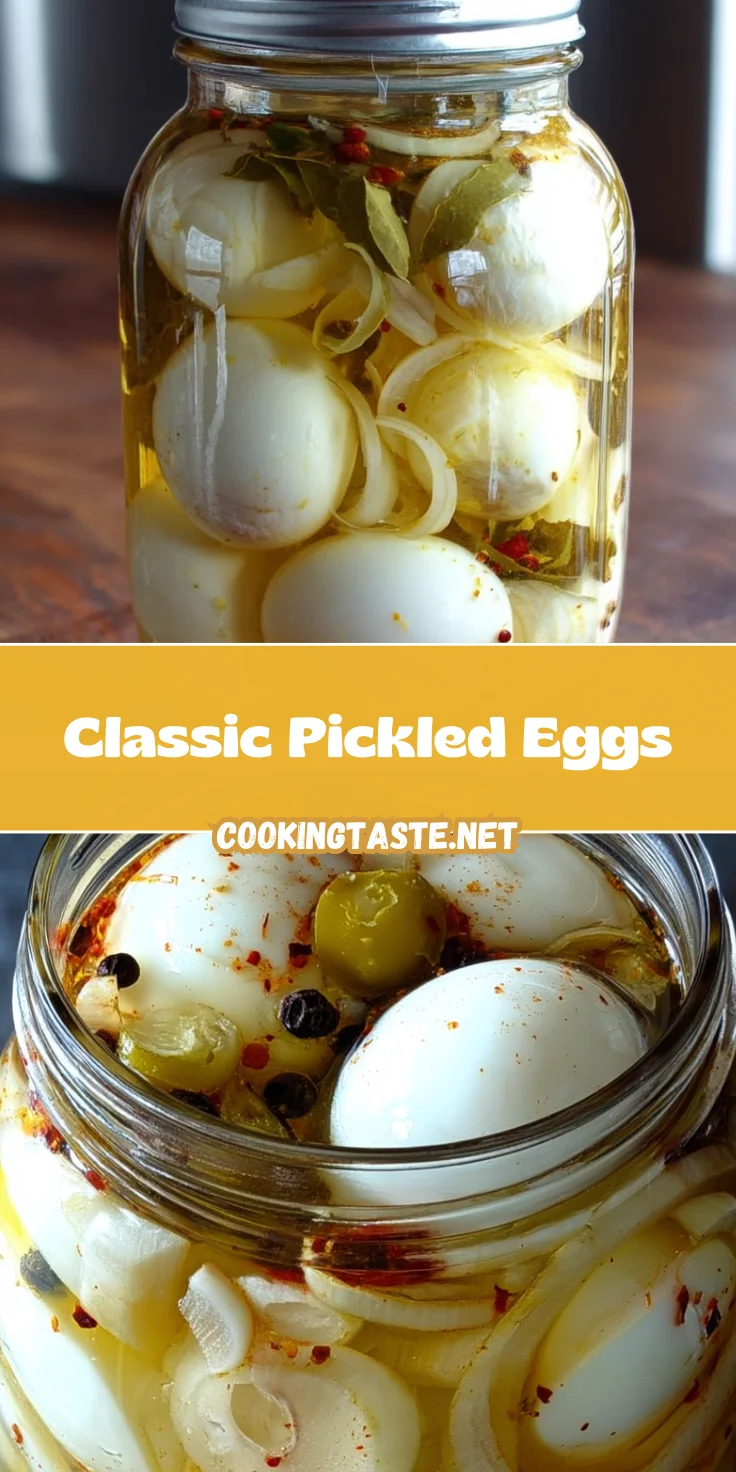
To create your Classic Pickled Eggs, gather the following ingredients:
- Eggs: Fresh eggs are key! They provide the foundation of our pickled treat. Feel free to use organic for better flavor.
- White vinegar: This is what gives our eggs that iconic tang. Opt for vinegar with 5-7% acetic acid for best results.
- Water: You’ll need this to dilute your vinegar. The right balance is crucial for the perfect pickling solution.
- Salt: Just a half teaspoon will help enhance the flavors. It’s essential for the brining process!
- Pickling spice: A blend including mustard seed, bay leaves, peppercorns, and coriander seeds will add depth to the flavor profile. You can easily find this in the spice aisle.
- Onion: Optional, but thinly sliced yellow onion rounds bring a lovely sweetness and additional flavor, if desired.
You can find specific quantities and measurements for these ingredients at the bottom of the article for easy printing. Remember, using high-quality ingredients makes all the difference in flavor and satisfaction!
How to Make Classic Pickled Eggs
Preparing the Eggs
First things first, let’s cook those eggs! I love using my Instant Pot for this task because it makes cooking eggs so hassle-free. Begin by placing the rack in the bottom of your Instant Pot insert. Add a cup of water, then gently lay in your eggs. You can cook 8 to 12 eggs at once—whatever fits! Seal the lid, close the valve, and set the timer for just 5 minutes on high pressure.
After the timer goes off, give it a rest for 3 more minutes to let the pressure naturally release. Once that’s done, carefully move the valve to release any remaining pressure. Don’t forget to have a bowl of cold water ready! Quickly transfer the eggs into the bowl—it really helps stop the cooking process and makes peeling easier later on. Now you’re all set for the fun part!
Packing the Jar
With your hard-boiled eggs cooled and ready, it’s time to pack the jar! Make sure you’ve chosen a clean quart-sized jar—it keeps the pickling process sanitary. If you’d like, you can add thinly sliced onions at the bottom of the jar for that touch of sweetness. Then, gently place your eggs on top. How about a little layering? This keeps them from rolling around too much.
As I layer, I like to make sure the eggs are snug but not squished. If you’re feeling adventurous, throw in a few slices of jalapeños for some heat! Cleanliness is key here, as well; it helps keep your pickled eggs fresh longer. Now that your jar is layered, we can move on to adding that flavor-packed brine!
Mixing the Brine
The brine is where the magic happens! In a separate bowl, mix your white vinegar with some water; typically, you’ll fill about one-quarter of your jar with water and the rest with vinegar. This simple mixture ensures your eggs take on that classic tang. Add in your pickling spice and salt, stirring well to combine.
This step is crucial! You want the spices to be evenly distributed, so every bite packs a flavor punch. Trust me, that hint of mustard seed and bay leaves will elevate your Classic Pickled Eggs to gourmet status. Once mixed, it’s time to pour this delectable brine over your carefully packed eggs!
Pickling Process
Now, the patience game begins! Seal your jar tightly with the lid and give it a couple of gentle turns to combine the contents. This helps the vinegar and spices mingle beautifully with the eggs. Pop the jar in the fridge for about 4 to 5 days. Yes, you read that right—days! But don’t worry; this waiting game is worth it.
During this time, the brine penetrates the eggs, creating deliciously tangy bites. The longer you let them sit, the more flavorful they become. When ready, you’ll be rewarded with perfectly pickled eggs that are great as snacks or to elevate your salads. Trust me; the wait is so worth it!
Tips for Success
- Use fresh, organic eggs for the best flavor.
- Make sure your jar is clean and dry to prevent spoilage.
- Adjust the pickling spice to suit your taste – a little more or less can make a difference.
- Label your jars for easy identification in the fridge.
- Don’t rush the pickling process; patience truly enhances the flavor.
Equipment Needed for Classic Pickled Eggs
- Instant Pot: For quick and easy egg cooking. A traditional pot works too, but it takes longer.
- Quart-sized jar: Any clean, glass jar will work; just ensure it seals well.
- Mixing bowl: For combining the brine ingredients.
- Tongs or a slotted spoon: Helps safely transfer eggs.
Variations of Classic Pickled Eggs
- Spicy Pickled Eggs: Add sliced jalapeños or red pepper flakes for a kick of heat.
- Herb-Infused Eggs: Experiment with fresh herbs like dill or thyme in the brine for a fragrant twist.
- Beet Pickled Eggs: Add cooked, peeled beets to the jar for a beautiful color and earthy sweetness.
- Garlic Lover’s Delight: Toss in whole garlic cloves for a pungent punch that garlic fans will adore!
- Sweet Pickled Eggs: Incorporate a touch of sugar or honey into your brine for a sweet-savory flavor.
Serving Suggestions for Classic Pickled Eggs
- Snack time: Enjoy them straight from the jar for a quick energy boost!
- Salads: Chop them up to add tangy protein to leafy greens or pasta salads.
- Charcuterie boards: Include them alongside cured meats and cheeses for visual appeal.
- Pair with drinks: Serve with a cold beer or your favorite cocktail for a great bite.
FAQs about Classic Pickled Eggs
How long do Classic Pickled Eggs last in the fridge?
Once pickled, your Classic Pickled Eggs can last up to 3-4 months in the fridge. Just make sure they stay submerged in the brine, and they’ll be good to go!
Can I reuse the brine for another batch of eggs?
Absolutely! Reusing the brine can save you time and effort. Just make sure to strain it to remove any bits from the previous batch. But keep in mind that flavors will fade with each reuse!
What’s the best way to peel the eggs?
Peeling can be tricky, but if you soak the eggs in cold water after cooking, it helps loosen the shells. You can also gently tap them on the counter to crack the shell, then peel under running water for easier removal.
Can I adjust the spiciness of my pickled eggs?
Definitely! If you prefer less heat, skip or reduce the amount of pickling spice and jalapeños. Conversely, feel free to experiment and add more spice if you like that kick!
Are Classic Pickled Eggs gluten-free?
Yes, this recipe for Classic Pickled Eggs is naturally gluten-free, making it a great option for those with dietary restrictions. Just make sure your pickling spice mix is also gluten-free!
Final Thoughts
Making Classic Pickled Eggs is not just about the tangy taste; it’s a delightful journey that brings joy to our busy lives. The act of preparing these little gems provides a sense of accomplishment, as I eagerly await the moment I can enjoy them. Whether you’re snacking on them straight from the jar or adding them to a vibrant salad, each bite feels like a hug from home. I hope you find this recipe as rewarding as I do, sparking culinary creativity and a touch of nostalgia in your kitchen!
Print
Classic Pickled Eggs
- Total Time: 4-5 days (including pickling time)
- Yield: 8-12 servings 1x
- Diet: Gluten Free
Description
A simple and classic recipe for pickled eggs, perfect for a tangy snack or addition to salads.
Ingredients
- 8–12 eggs
- White vinegar (5-7% acetic acid)
- Water
- 1/2 tsp salt
- 1 tbsp pickling spice (includes mustard seed, bay leaves, peppercorns, coriander seeds, allspice, etc.)
- 1/3 to 1/2 yellow onion; thinly sliced in rounds (optional)
Instructions
- Position the rack in the bottom of the Instant Pot insert. Add 1 cup of water and place as many eggs as you like on the rack.
- Place the lid on, ensure the valve is closed and set the timer for 5 minutes on high pressure.
- Once the eggs have been cooking for 5 minutes, allow them to sit a further three minutes then release the pressure by moving the valve.
- Remove the eggs and place them in a bowl of cold water.
- Pack eggs and onions (if using) in clean quart size or larger jar depending on how many you are using.
- Add pickling spice and salt.
- Fill 1/4 jar with water, then top up with vinegar.
- Seal with the jar lid, then gently invert the jar a couple of times so the vinegar and water are mixed and the salt dissolves.
- Place in the fridge for 4-5 days to allow the brine to penetrate the eggs, then enjoy!
Notes
- For a spicier version, consider adding sliced jalapeños to the jar.
- Letting the eggs pickle for longer enhances their flavor.
- Use a clean jar to prevent spoilage.
- Prep Time: 10 minutes
- Cook Time: 5 minutes
- Category: Snack
- Method: Instant Pot, Refrigerator Pickling
- Cuisine: American
Nutrition
- Serving Size: 1 egg
- Calories: 70
- Sugar: 0g
- Sodium: 100mg
- Fat: 5g
- Saturated Fat: 1g
- Unsaturated Fat: 4g
- Trans Fat: 0g
- Carbohydrates: 0g
- Fiber: 0g
- Protein: 6g
- Cholesterol: 186mg


