

Introduction to Banana Pudding Cups
There’s something about the creamy layers of Banana Pudding Cups that warms my heart.
When I think of desserts that bring smiles, these little delights top my list. Whether it’s a busy weekday or a special gathering, this recipe is my go-to.
It’s easy, quick, and oh-so-delicious!
Plus, it’s a fun way to involve the kids with layering. Trust me, everyone will love it, and it might just become your family’s favorite dessert.
Let’s dive in and whip up these Banana Pudding Cups for a sweet moment of joy and satisfaction!
Why You’ll Love This Banana Pudding Cups
These Banana Pudding Cups are a lifesaver for busy moms like me.
In just a few steps, you have a delightful dessert that tastes like it took hours to prepare.
The creaminess paired with the freshness of bananas creates a flavor explosion in your mouth.
Plus, it keeps well in the fridge, which means you can prep it ahead of time.
What’s not to love about such a simple, delicious treat?
Ingredients in Banana Pudding Cups
Getting the right ingredients is key for making the best Banana Pudding Cups. Here’s what you’ll need to gather:
- Instant vanilla pudding mix – This provides the creamy base that gives our dessert that classic pudding taste.
- Cold whole milk – Using whole milk ensures a rich and smooth consistency in the pudding.
- Pure vanilla extract (optional) – A splash of vanilla elevates flavors, making the pudding even more delightful.
- Cream cheese – This ingredient adds a luxurious texture and a hint of tanginess to the dessert.
- Sweetened condensed milk – This sweet treat brings extra creaminess and a touch of sweetness that pairs perfectly with bananas.
- Whipped topping – Light and airy, the whipped topping creates a lovely finish and adds volume to our cups.
- Ripe bananas – These are the stars of our recipe! Choose bananas that are just ripe for the best flavor and texture.
- Vanilla wafers – The crunch from these cookies adds a delightful contrast to the creamy layers.
- Extra whipped cream or topping for garnish – A little dollop on top makes everything look and taste more indulgent.
- Crushed vanilla wafers for garnish – Sprinkle these on top for an attractive presentation and crispy bite.
- Banana slices for garnish – Perfect for decorating and showcasing the delicious fruit.
- Caramel drizzle (optional) – If you want to kick it up a notch, this sweet addition is heavenly.
For detailed measurements, you can find everything at the bottom of this article, ready for printing. Enjoy the process of gathering these ingredients, as the anticipation builds to creating a delightful treat for your loved ones!
How to Make Banana Pudding Cups
Step 1: Prepare the Pudding
Let’s start by preparing the pudding, which serves as our delightful base.
In a large mixing bowl, whisk together the instant vanilla pudding mix and cold whole milk.
You want to beat this mixture for around 2–3 minutes until it starts to thicken slightly.
If you’re feeling adventurous, add in a teaspoon of pure vanilla extract for that extra depth of flavor.
Once combined, cover the bowl and pop it into the refrigerator to chill for at least 5 minutes.
This step is crucial as it allows the pudding to set perfectly, ready for the layers of deliciousness to come!
Step 2: Make the Cream Cheese Mixture
Next up is the creamy layer that takes these Banana Pudding Cups to the next level.
In another large bowl, grab your softened cream cheese.
Using an electric mixer, beat it until it’s smooth and fluffy.
Now, add in the sweetened condensed milk and mix until well combined.
This is where the magic happens, as the cream cheese and milk blend into a luscious mixture.
Once that’s done, gently fold in half of the thawed whipped topping.
This keeps it light and airy.
Set this aside, and let the creamy goodness shine!
Step 3: Slice the Bananas
Now it’s time to prepare our key ingredient—the bananas!
Start by peeling those ripe bananas and slicing them into ¼-inch thick rounds.
If you want to keep them from browning, lightly toss them in some lemon juice; it really works wonders.
Trust me, nobody wants brown bananas ruining the beauty of our dessert.
Once sliced, set them aside. They’ll be a delightful layer in our Banana Pudding Cups!
Step 4: Layering the Ingredients
Now comes the fun part—layering!
Grab your clear plastic cups, mason jars, or trifle bowls.
Start by placing a layer of vanilla wafers at the bottom.
These cookies add a nice crunch and form the perfect base.
Then, add a layer of sliced bananas, followed by a generous scoop of the cream cheese mixture.
Don’t forget to follow that with a beautiful layer of pudding.
Repeat the layers—cookies, bananas, cream cheese, and pudding—until your cups are filled.
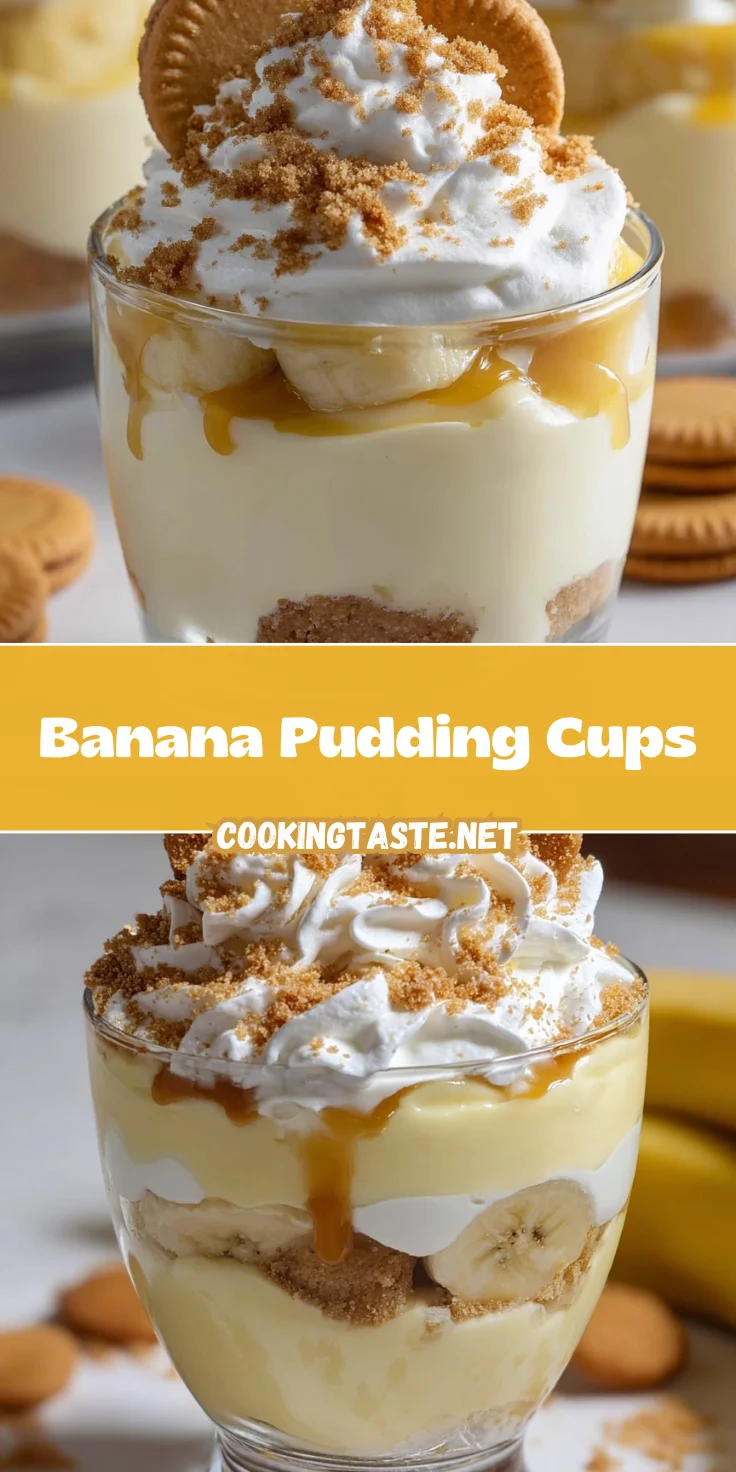
Finish it off with a cloud of whipped topping on the very top.
It’s like building a sweet tower of joy!
Step 5: Final Toppings and Chill
Before serving, let’s add those final touches.
Top your creations with extra whipped cream for that extra indulgence!
Sprinkle some crushed vanilla wafers on top for a lovely crunch.
Add a few banana slices for a pop of color, and if you’re feeling fancy, a drizzle of caramel is simply divine.
Now, cover your cups and refrigerate for at least 2–3 hours.
Chilling not only helps the flavors meld together but also makes it more refreshing.
Your Banana Pudding Cups will be ready to impress whoever is lucky enough to share them!
Tips for Success
- Use ripe bananas for the best flavor and sweetness.
- Prep the Banana Pudding Cups a day ahead and let them chill overnight for improved taste.
- To keep your bananas looking fresh, toss them in lemon juice right after slicing.
- Feel free to switch up vanilla wafers with your favorite cookies for a fun twist!
- Always use an electric mixer for the cream cheese to avoid lumps.
Equipment Needed
- Mixing bowls: A large bowl for mixing pudding and another for the cream cheese mixture. You can use any size that fits your workspace.
- Electric mixer: This helps achieve a smooth cream cheese blend. A whisk works too, but it requires more effort.
- Clear cups or jars: Perfect for layering; mason jars add a rustic touch.
Variations on Banana Pudding Cups
- Chocolate Lovers: Swap out half the vanilla pudding mix for chocolate pudding for a delicious twist.
- Nutty Delight: Add a layer of chopped nuts, like walnuts or pecans, for a crunchy texture.
- Healthier Option: Use low-fat cream cheese and sugar-free pudding mix for a lighter version.
- Berry Bliss: Incorporate fresh berries like strawberries or blueberries for a fruity burst of flavor.
- Dairy-Free: Substitute coconut cream and almond milk to create a tasty dairy-free alternative.
Serving Suggestions for Banana Pudding Cups
- Pair with Coffee: Serve with a cup of coffee for a delightful afternoon treat.
- Fruit Slices: Fresh strawberries or raspberries on the side complement the pudding beautifully.
- Presentation: Use clear cups to showcase the stunning layers for an eye-catching display.
- Chilled Beverages: Lemonade or iced tea balances the sweetness perfectly.
FAQs about Banana Pudding Cups
Here are some common questions you may have about making these delightful Banana Pudding Cups:
Can I use other fruits in Banana Pudding Cups? Absolutely! While bananas shine in this recipe, feel free to add strawberries or even blueberries for a fruity twist.
How long can I store Banana Pudding Cups? If stored in the refrigerator, they can last up to three days. However, they taste best when fresh!
Can I make Banana Pudding Cups ahead of time? Yes! Prepping these cups a day in advance enhances the flavors and allows for a quick grab-and-go dessert.
Is this recipe gluten-free? To make it gluten-free, simply use gluten-free cookies instead of vanilla wafers.
Final Thoughts
There’s something truly magical about these Banana Pudding Cups.
Each bite is a nostalgic trip back to sunny afternoons, sharing laughter and love with friends and family.
It’s a sweet reminder that great desserts don’t have to be complicated—sometimes, simple ingredients come together to create pure joy.
As you whip up these delightful treats, remember that the moments spent creating memories in the kitchen are just as important as the delicious result.
So, gather your ingredients, enjoy the process, and share your Banana Pudding Cups with the ones you love. They’ll be grateful, and you’ll feel fulfilled!
Print
Banana Pudding Cups
- Total Time: 2.5 hours
- Yield: 6-8 servings 1x
- Diet: Vegetarian
Description
Indulge in these delicious Banana Pudding Cups, featuring layers of creamy pudding, rich cheesecake, and fresh bananas.
Ingredients
- 1 (5.1 oz) box instant vanilla pudding mix
- 3 cups cold whole milk
- 1 teaspoon pure vanilla extract (optional)
- 1 (8 oz) package cream cheese, softened
- 1 (14 oz) can sweetened condensed milk
- 1 (12 oz) container whipped topping, thawed
- 4–5 ripe bananas
- 1 box vanilla wafers (about 11 oz)
- Extra whipped cream or topping for garnish
- Crushed vanilla wafers for garnish
- Banana slices for garnish
- Caramel drizzle (optional)
Instructions
- In a large mixing bowl, whisk together the instant pudding mix and cold milk for about 2–3 minutes until it thickens slightly. Stir in vanilla extract if using. Place in the refrigerator to chill for at least 5 minutes.
- In a separate large bowl, beat the softened cream cheese with an electric mixer until smooth. Add the sweetened condensed milk and mix until well combined. Gently fold in half of the whipped topping.
- Peel and slice the bananas into ¼-inch thick rounds. Optionally, toss them lightly in lemon juice to prevent browning.
- In clear plastic cups, mason jars, or trifle bowls, layer the ingredients. Start with vanilla wafers, followed by banana slices, the cream cheese mixture, and vanilla pudding. Repeat layers until the cup is filled, finishing with whipped topping.
- Top with extra whipped cream, crushed wafers, banana slices, or caramel drizzle. Refrigerate for at least 2–3 hours before serving.
Notes
- Use ripe bananas for the best flavor.
- Chill the dessert overnight for improved taste and texture.
- Experiment with different types of cookies if desired.
- Prep Time: 30 minutes
- Cook Time: 0 minutes
- Category: Dessert
- Method: No-Bake
- Cuisine: American
Nutrition
- Serving Size: 1 cup
- Calories: 320
- Sugar: 25g
- Sodium: 200mg
- Fat: 15g
- Saturated Fat: 7g
- Unsaturated Fat: 3g
- Trans Fat: 0g
- Carbohydrates: 43g
- Fiber: 1g
- Protein: 4g
- Cholesterol: 25mg


